
Build Round Dining Table
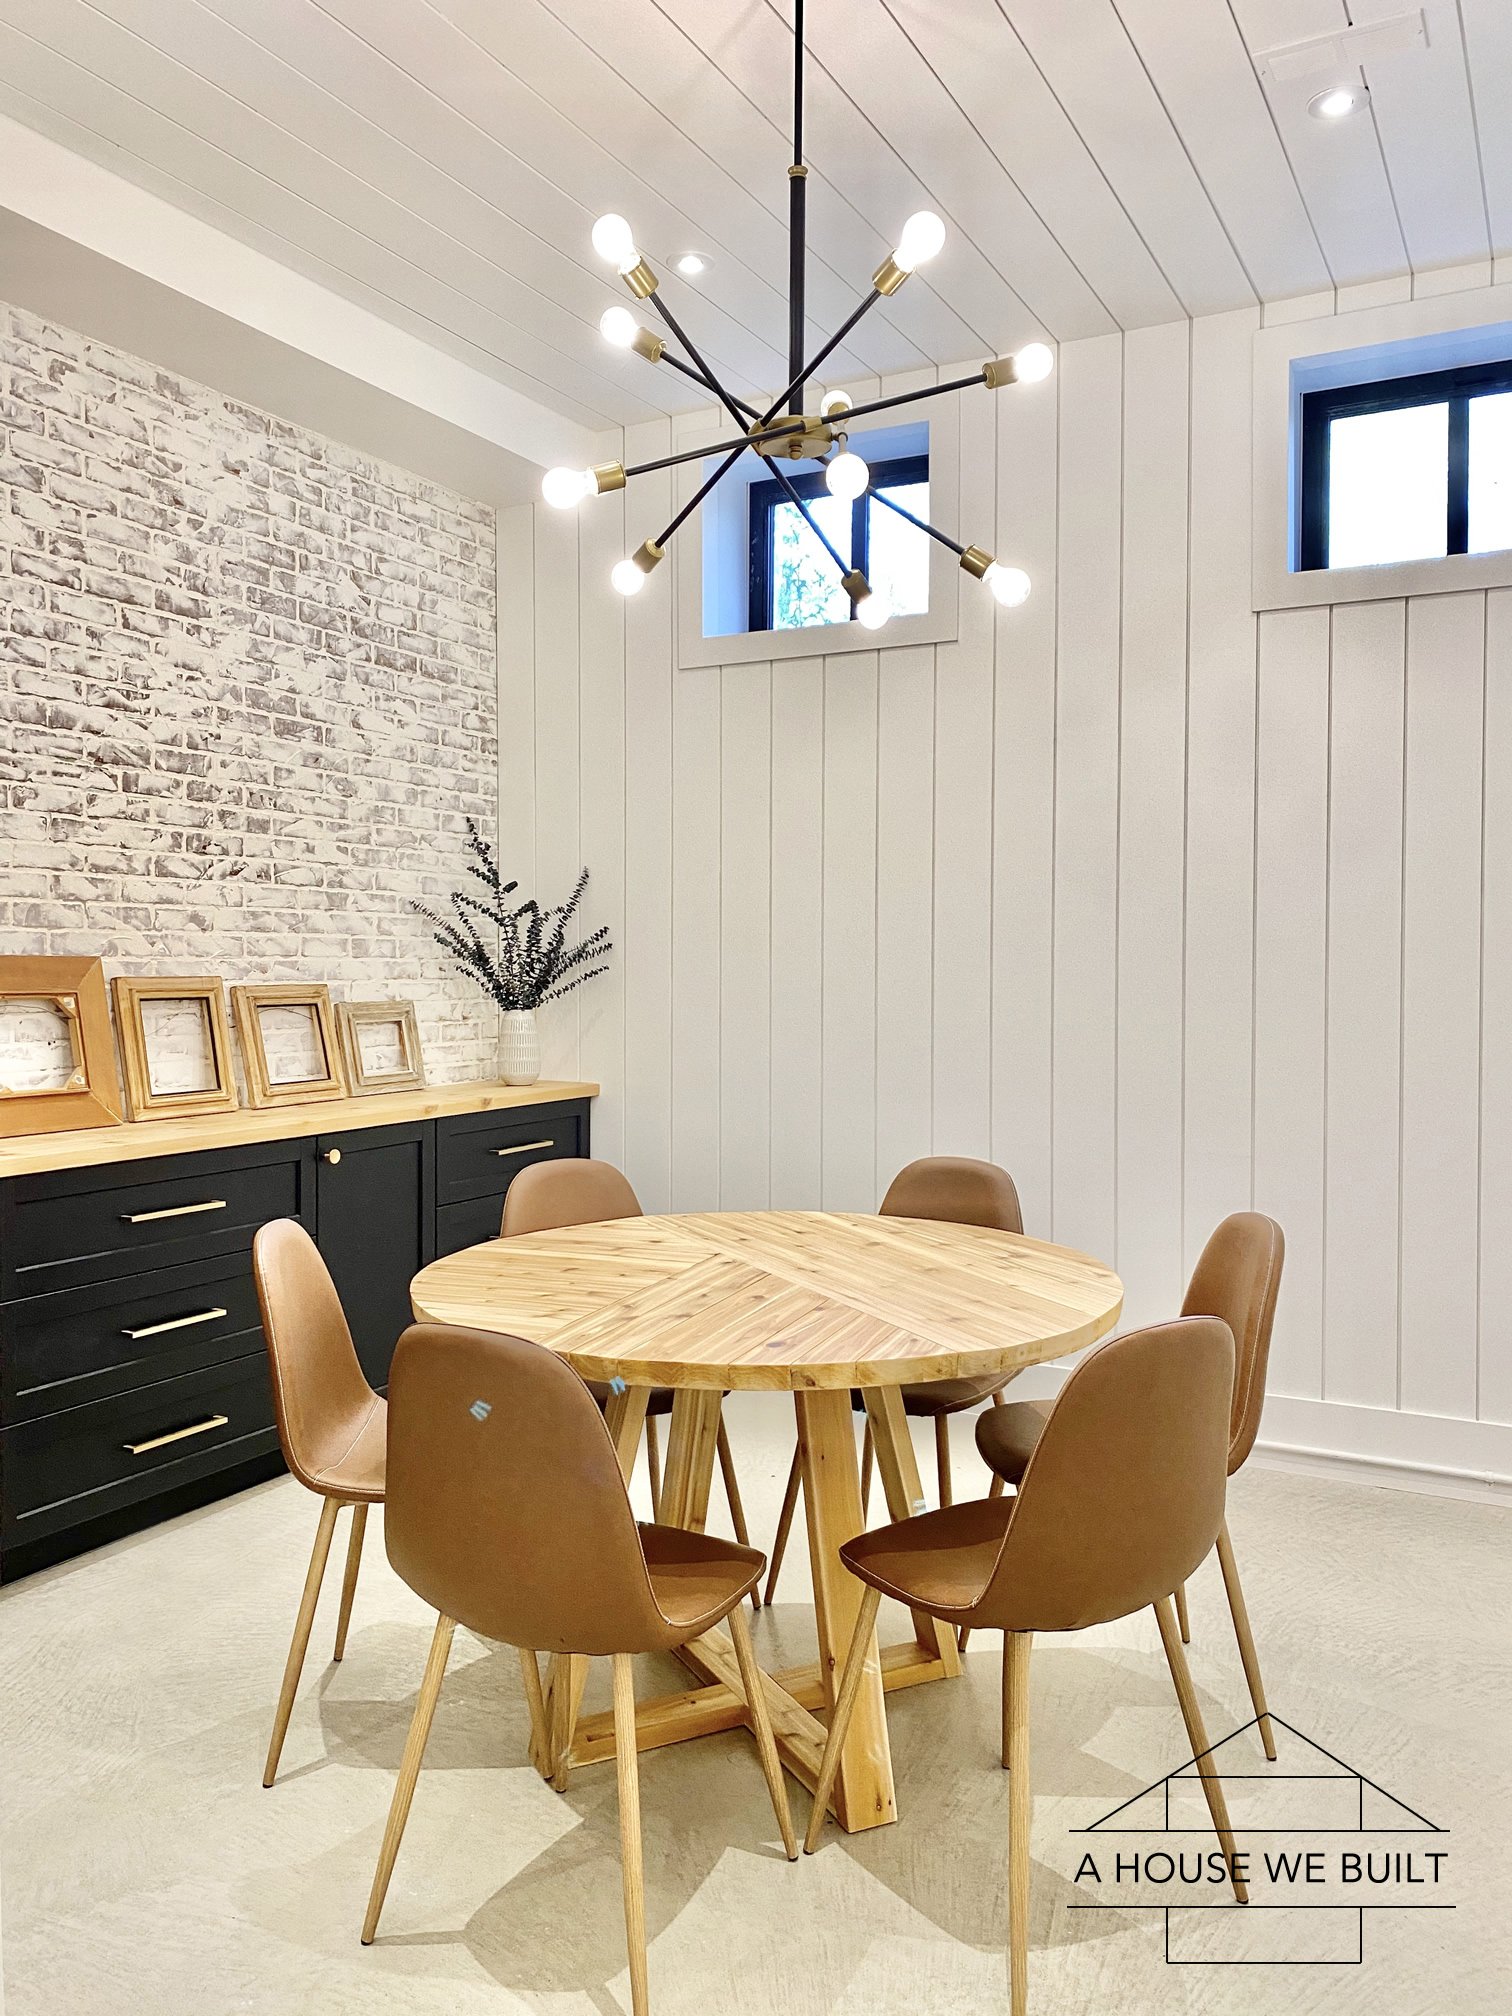

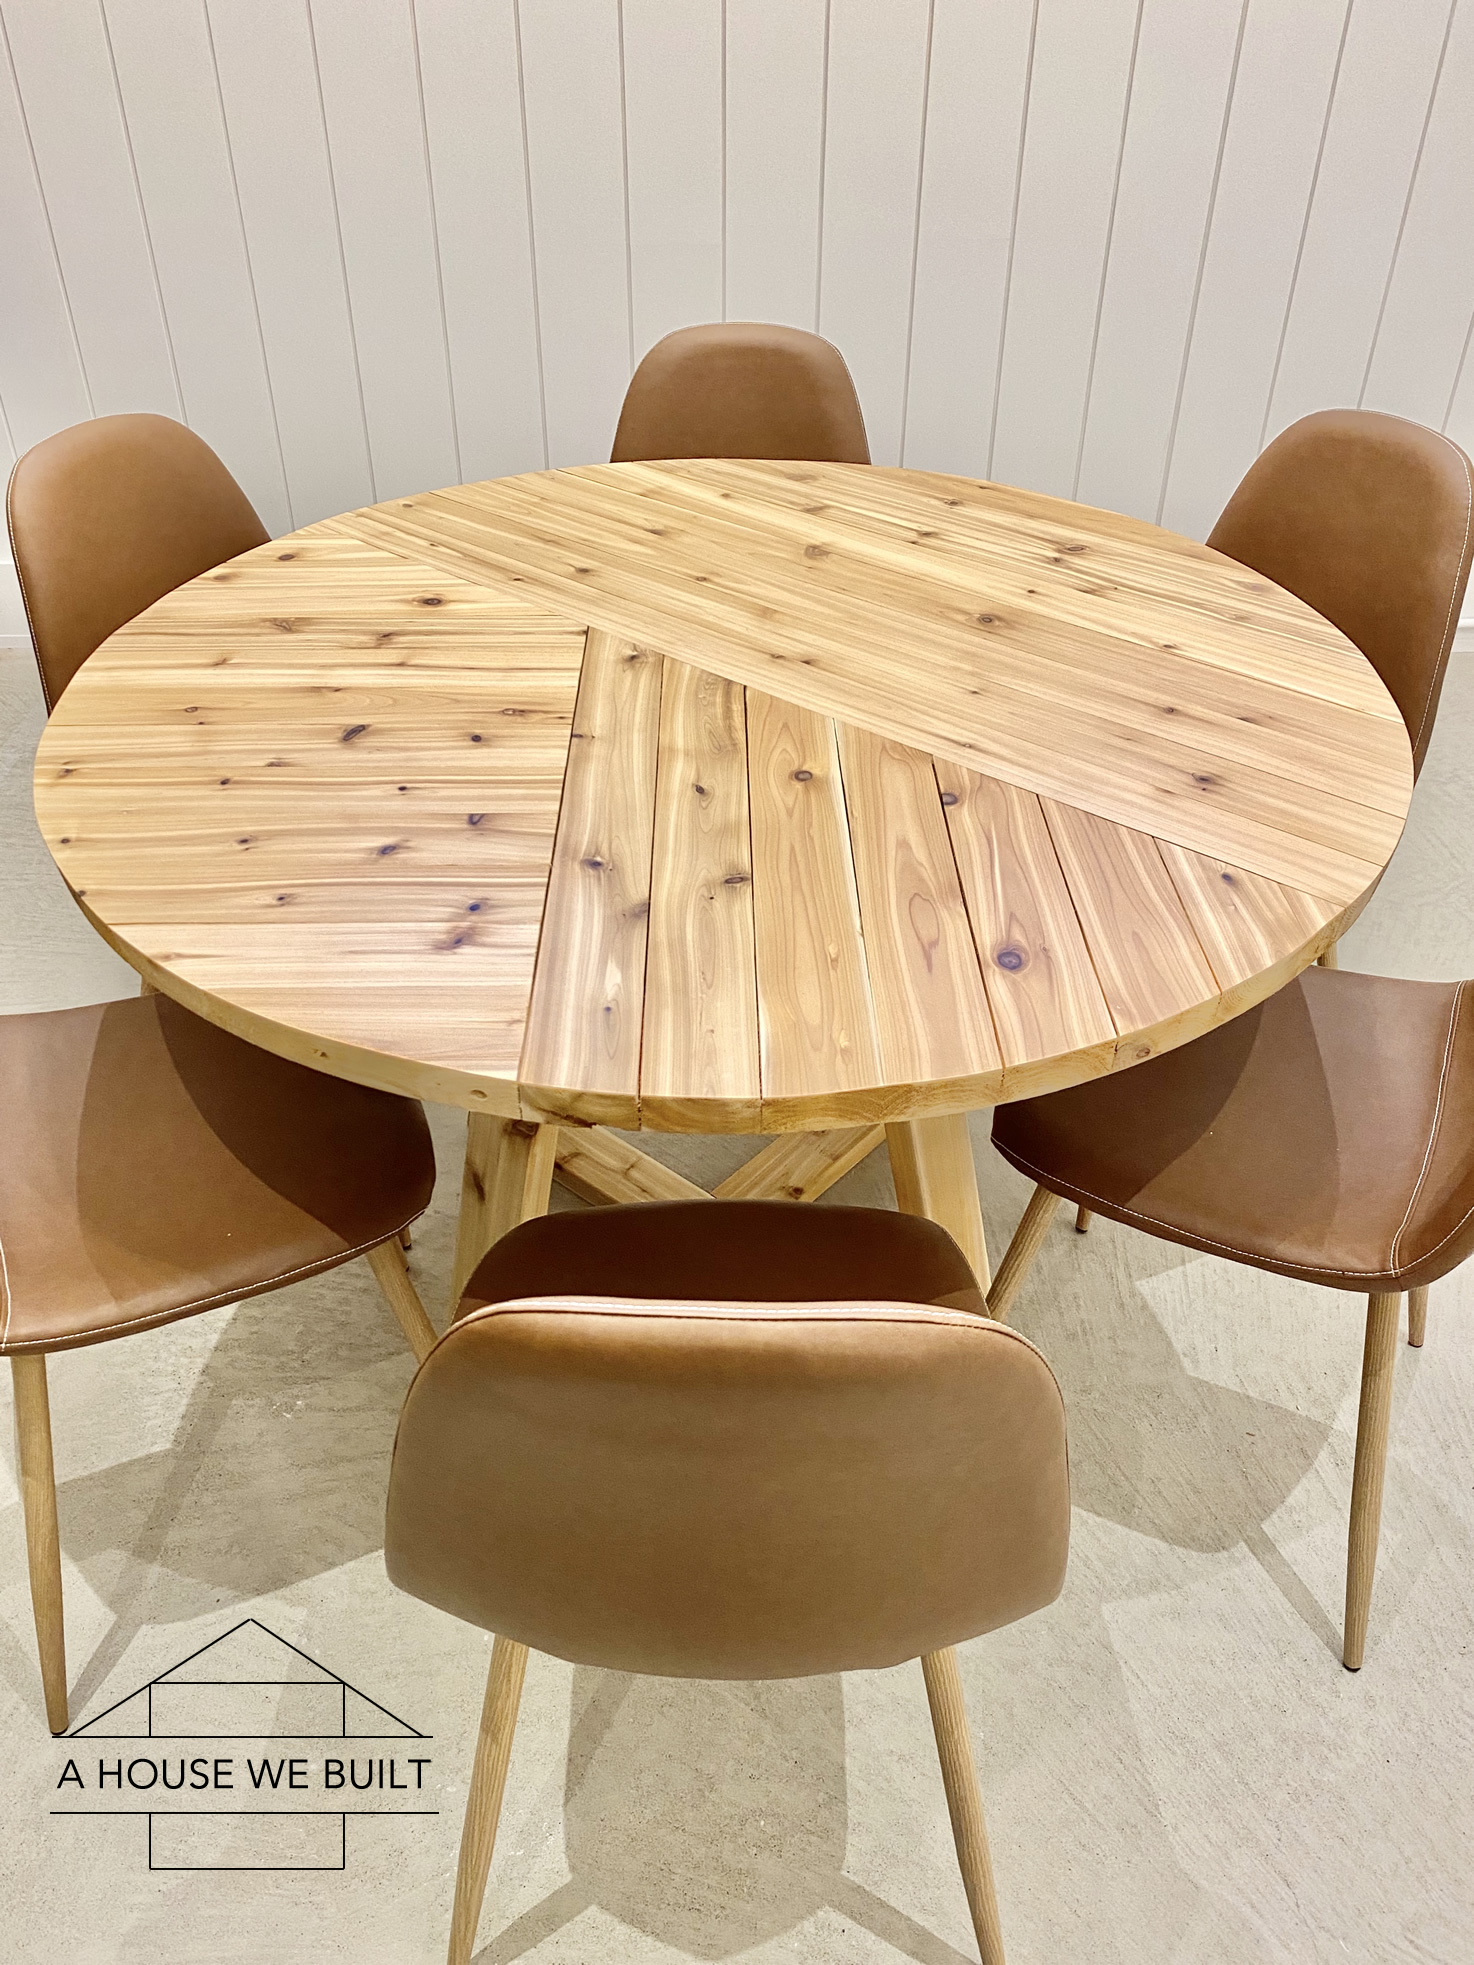
We built a modern rustic 48″ round table for our Basement Game Room out of a dozen 2x4x8s and I'm going to share how we did it here! It was a challenging piece to build but we love how it turned out!
The basic concept of how to build this table is simple but I'll be honest that we ran into a lot of issues while building it even though, by this point, we've had a fair bit of experience building things. If you've never built any furniture before, I would not recommend this as a first piece to start with. I'd consider it more of a moderate level of difficulty. It's neither super easy nor super hard, but my tutorial is going to assume that you generally know how to build stuff and use the tools mentioned if you build this table.
Here are some similar ready-to-order tables for reference:
- Similar base: McGee & Co | Pottery Barn | Wayfair | West Elm | Lulu & Georgia
- Alternative base: Crate & Barrel | Crate & Barrel | Crate & Barrel | West Elm
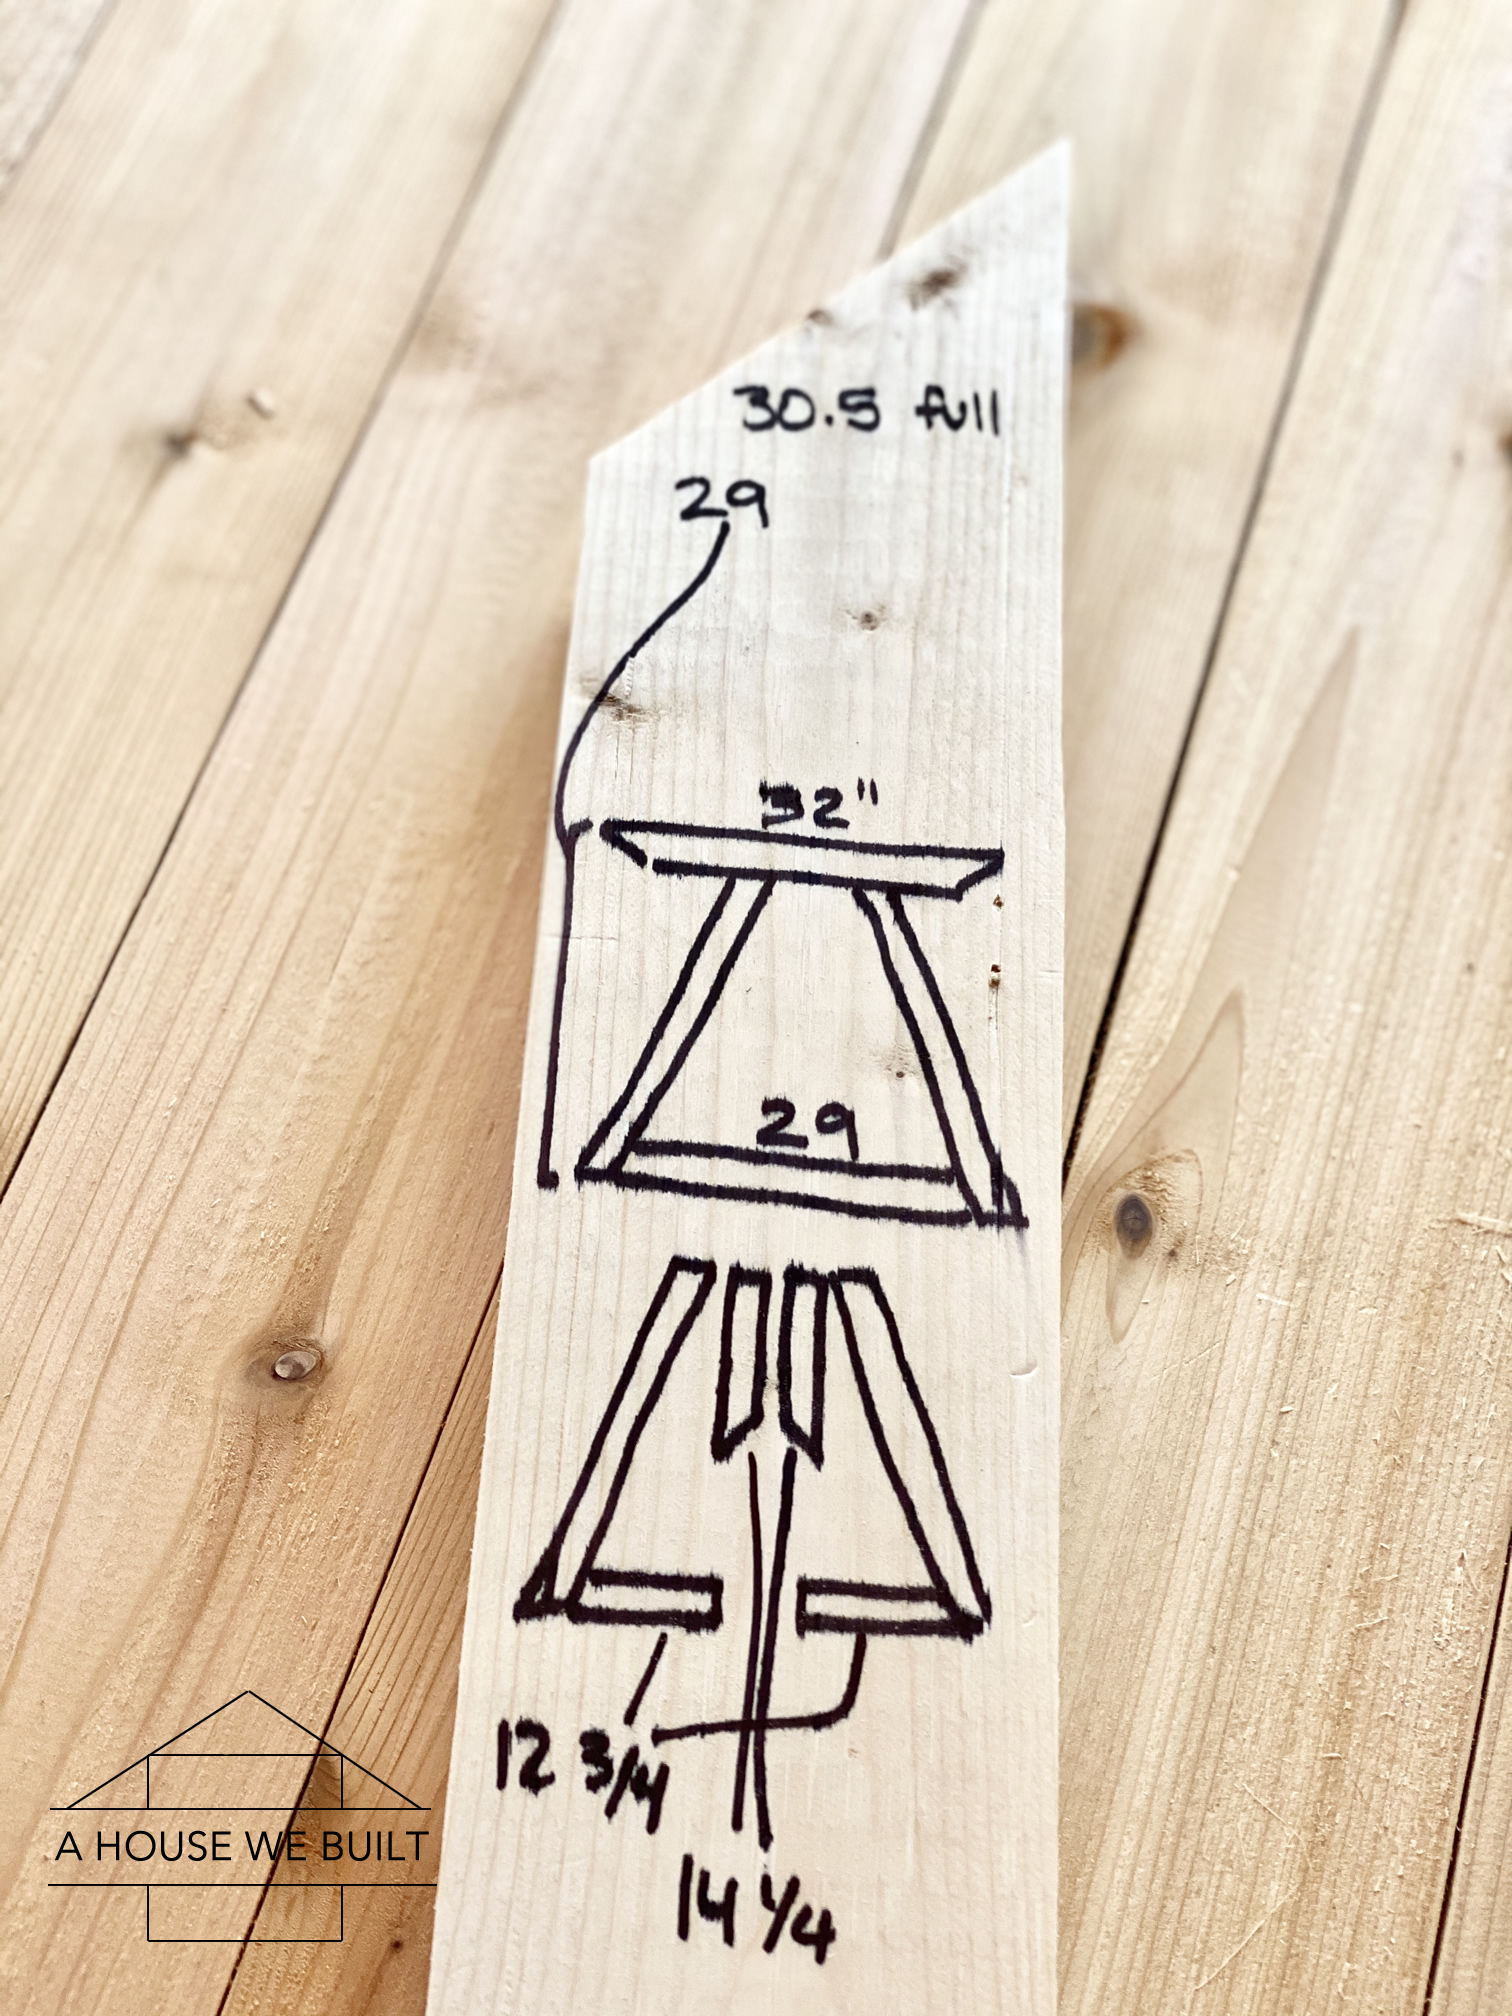
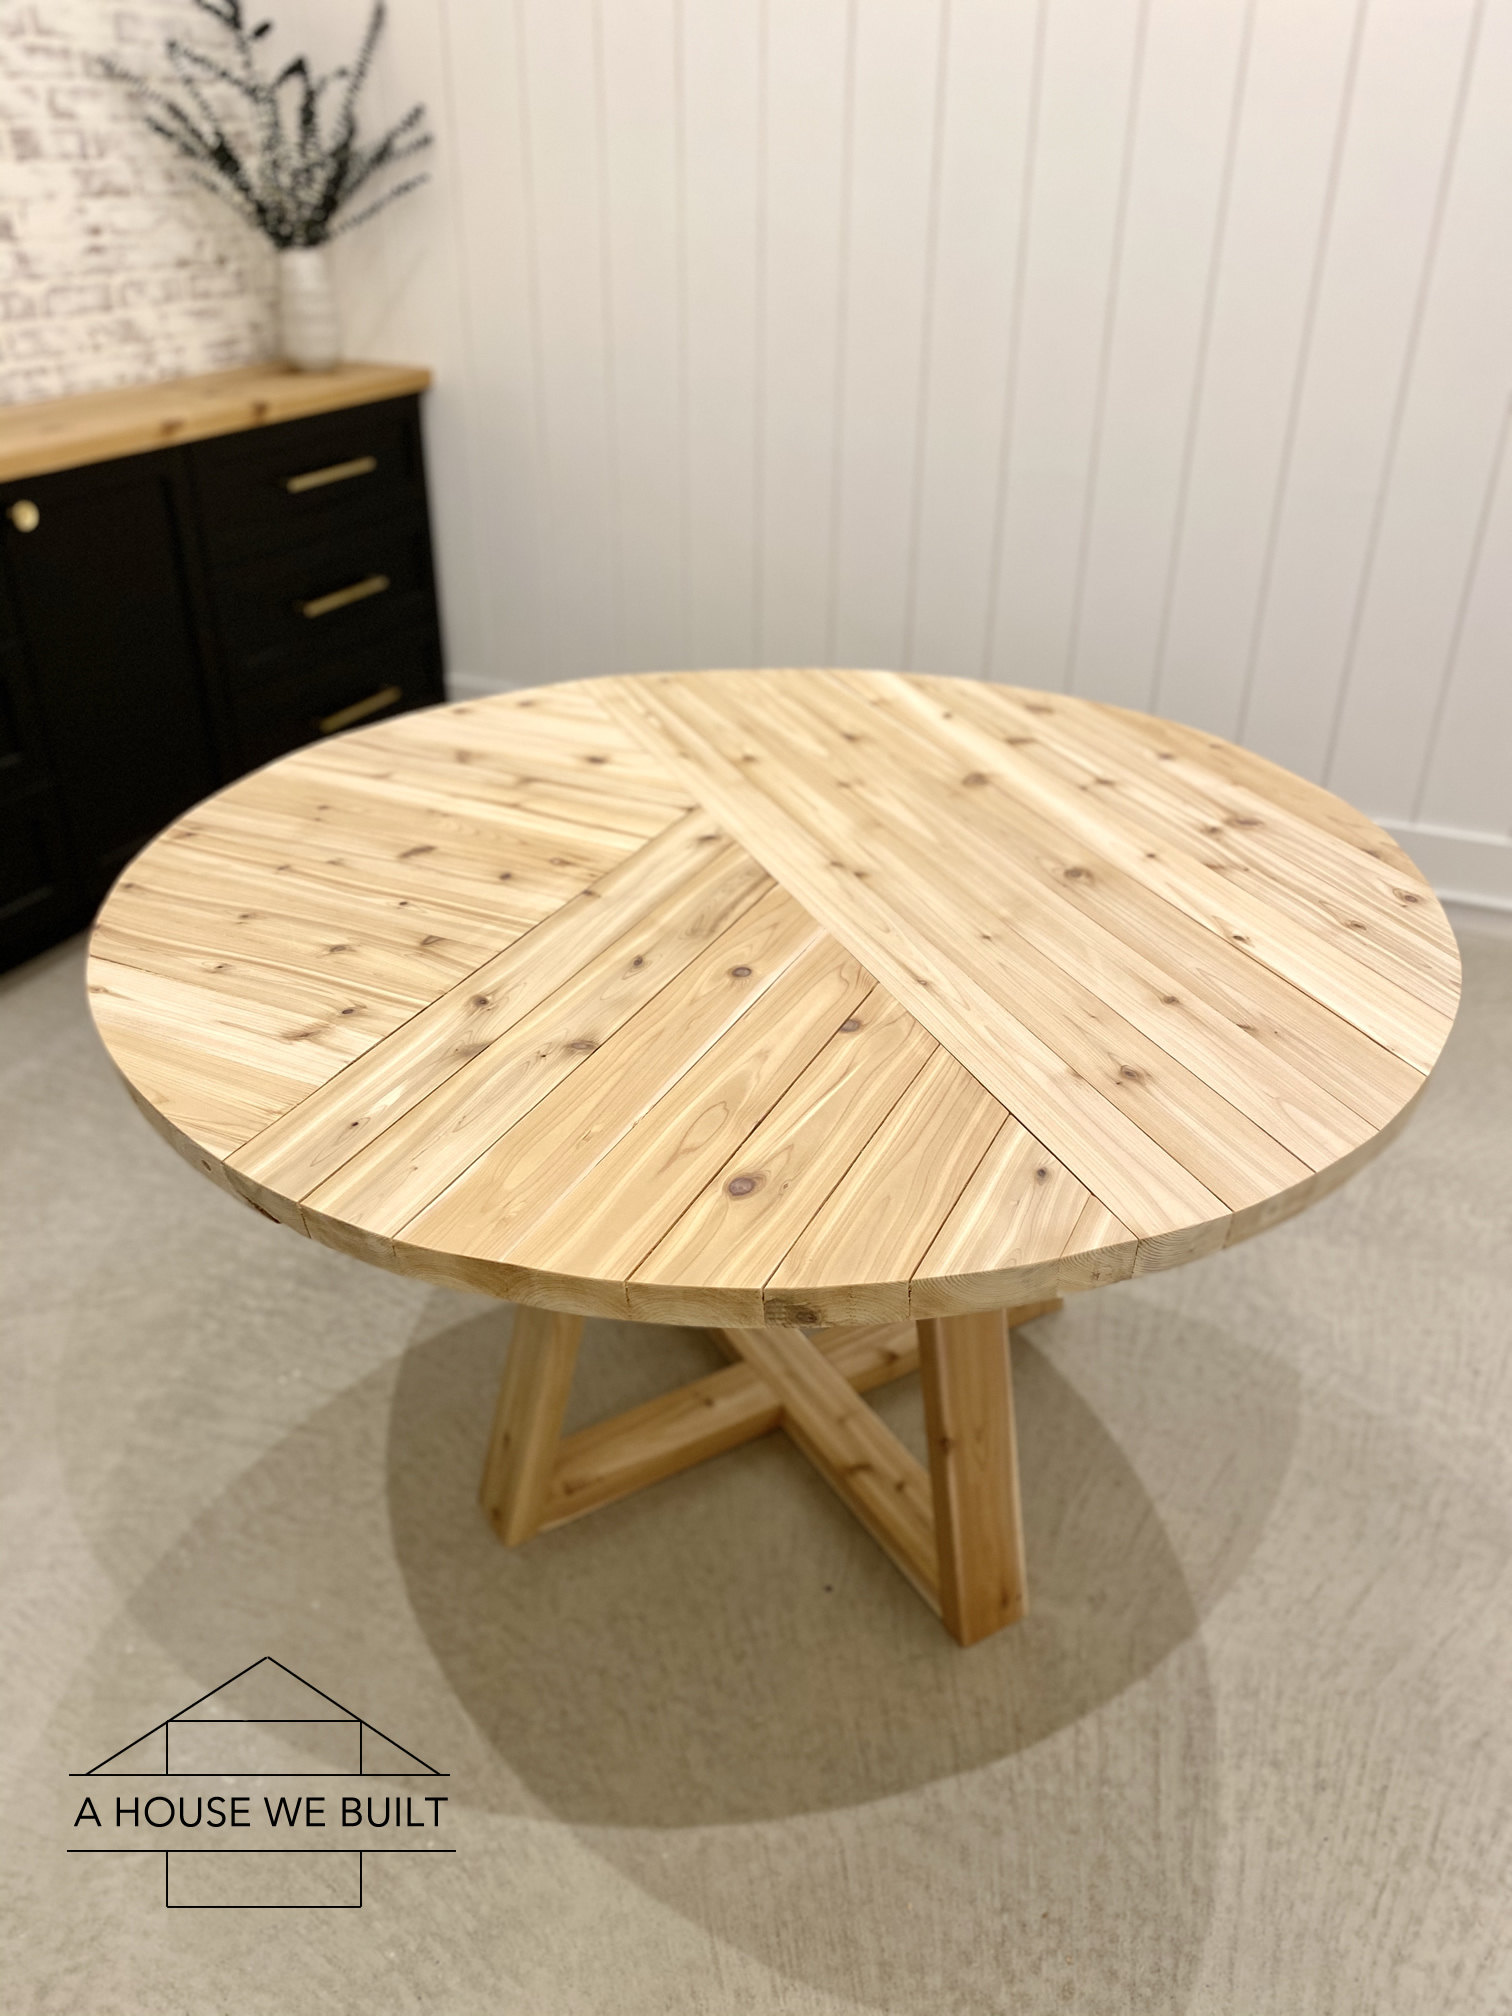
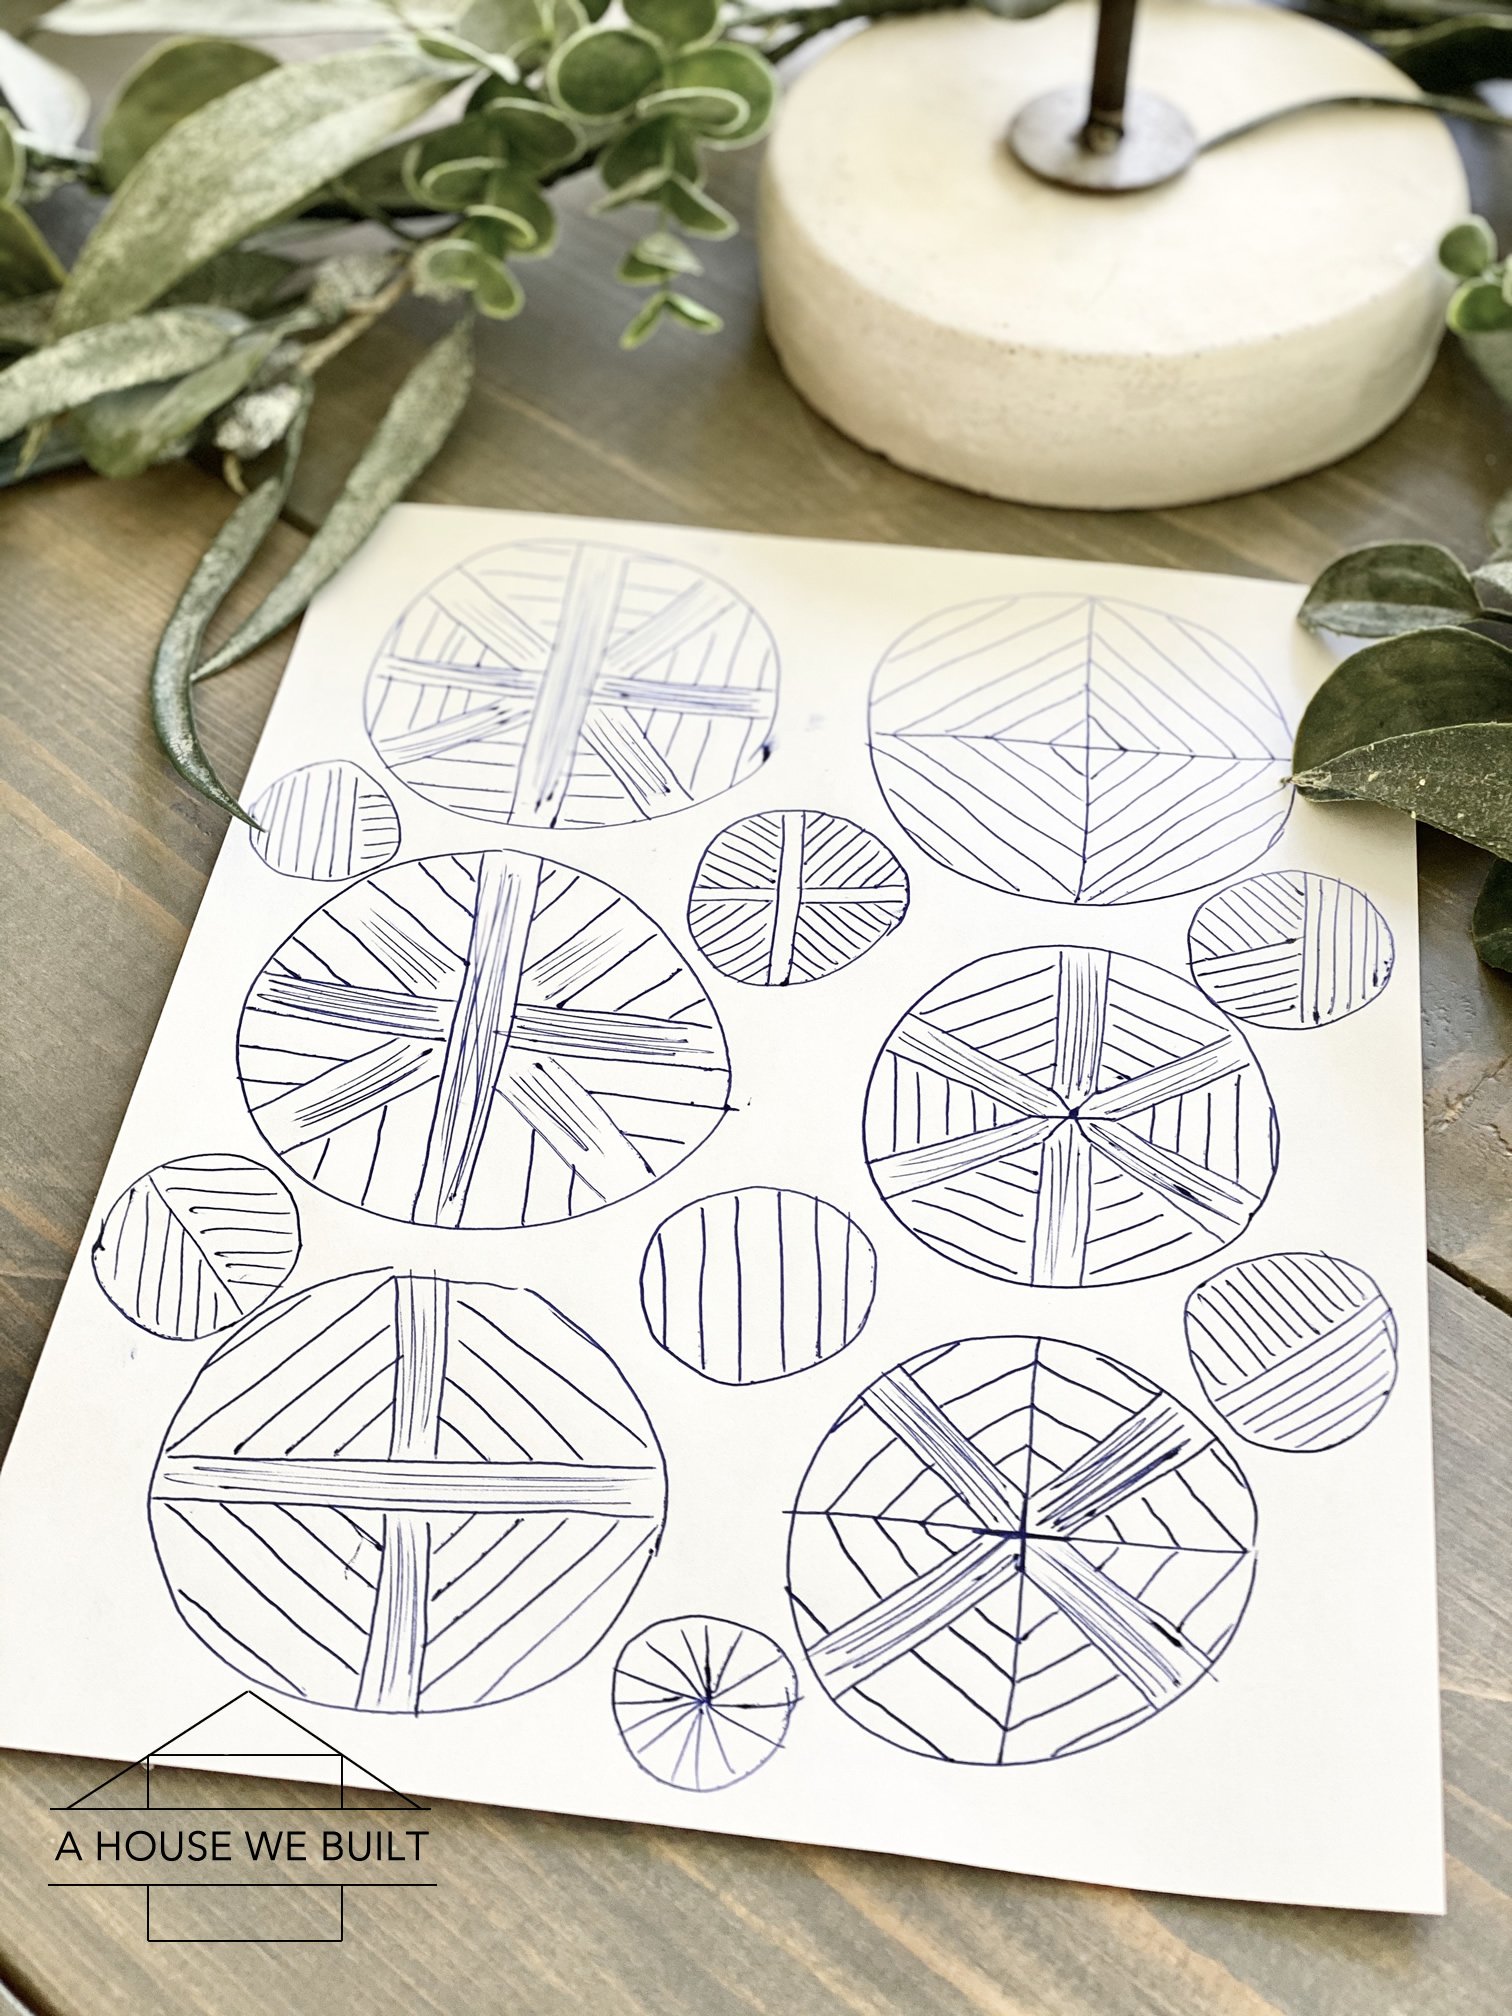 For our table design, we considered many different styles as shown in my concept sketches in the right pics. For the base, we originally planned to build a single-leg variation of our farmhouse dining table's X-based design, but instead we kept coming back to the simplicity of the more minimal base we chose over and decided to do a modern, geometric wood plank design for the table top. You may notice that our tabletop subtly ties in with our guest bedroom accent wall in a different part of our house. I've always really loved finding ways to to little tie-ins between rooms without blatantly matching – I just feel it makes the overall house design feel more cohesive.
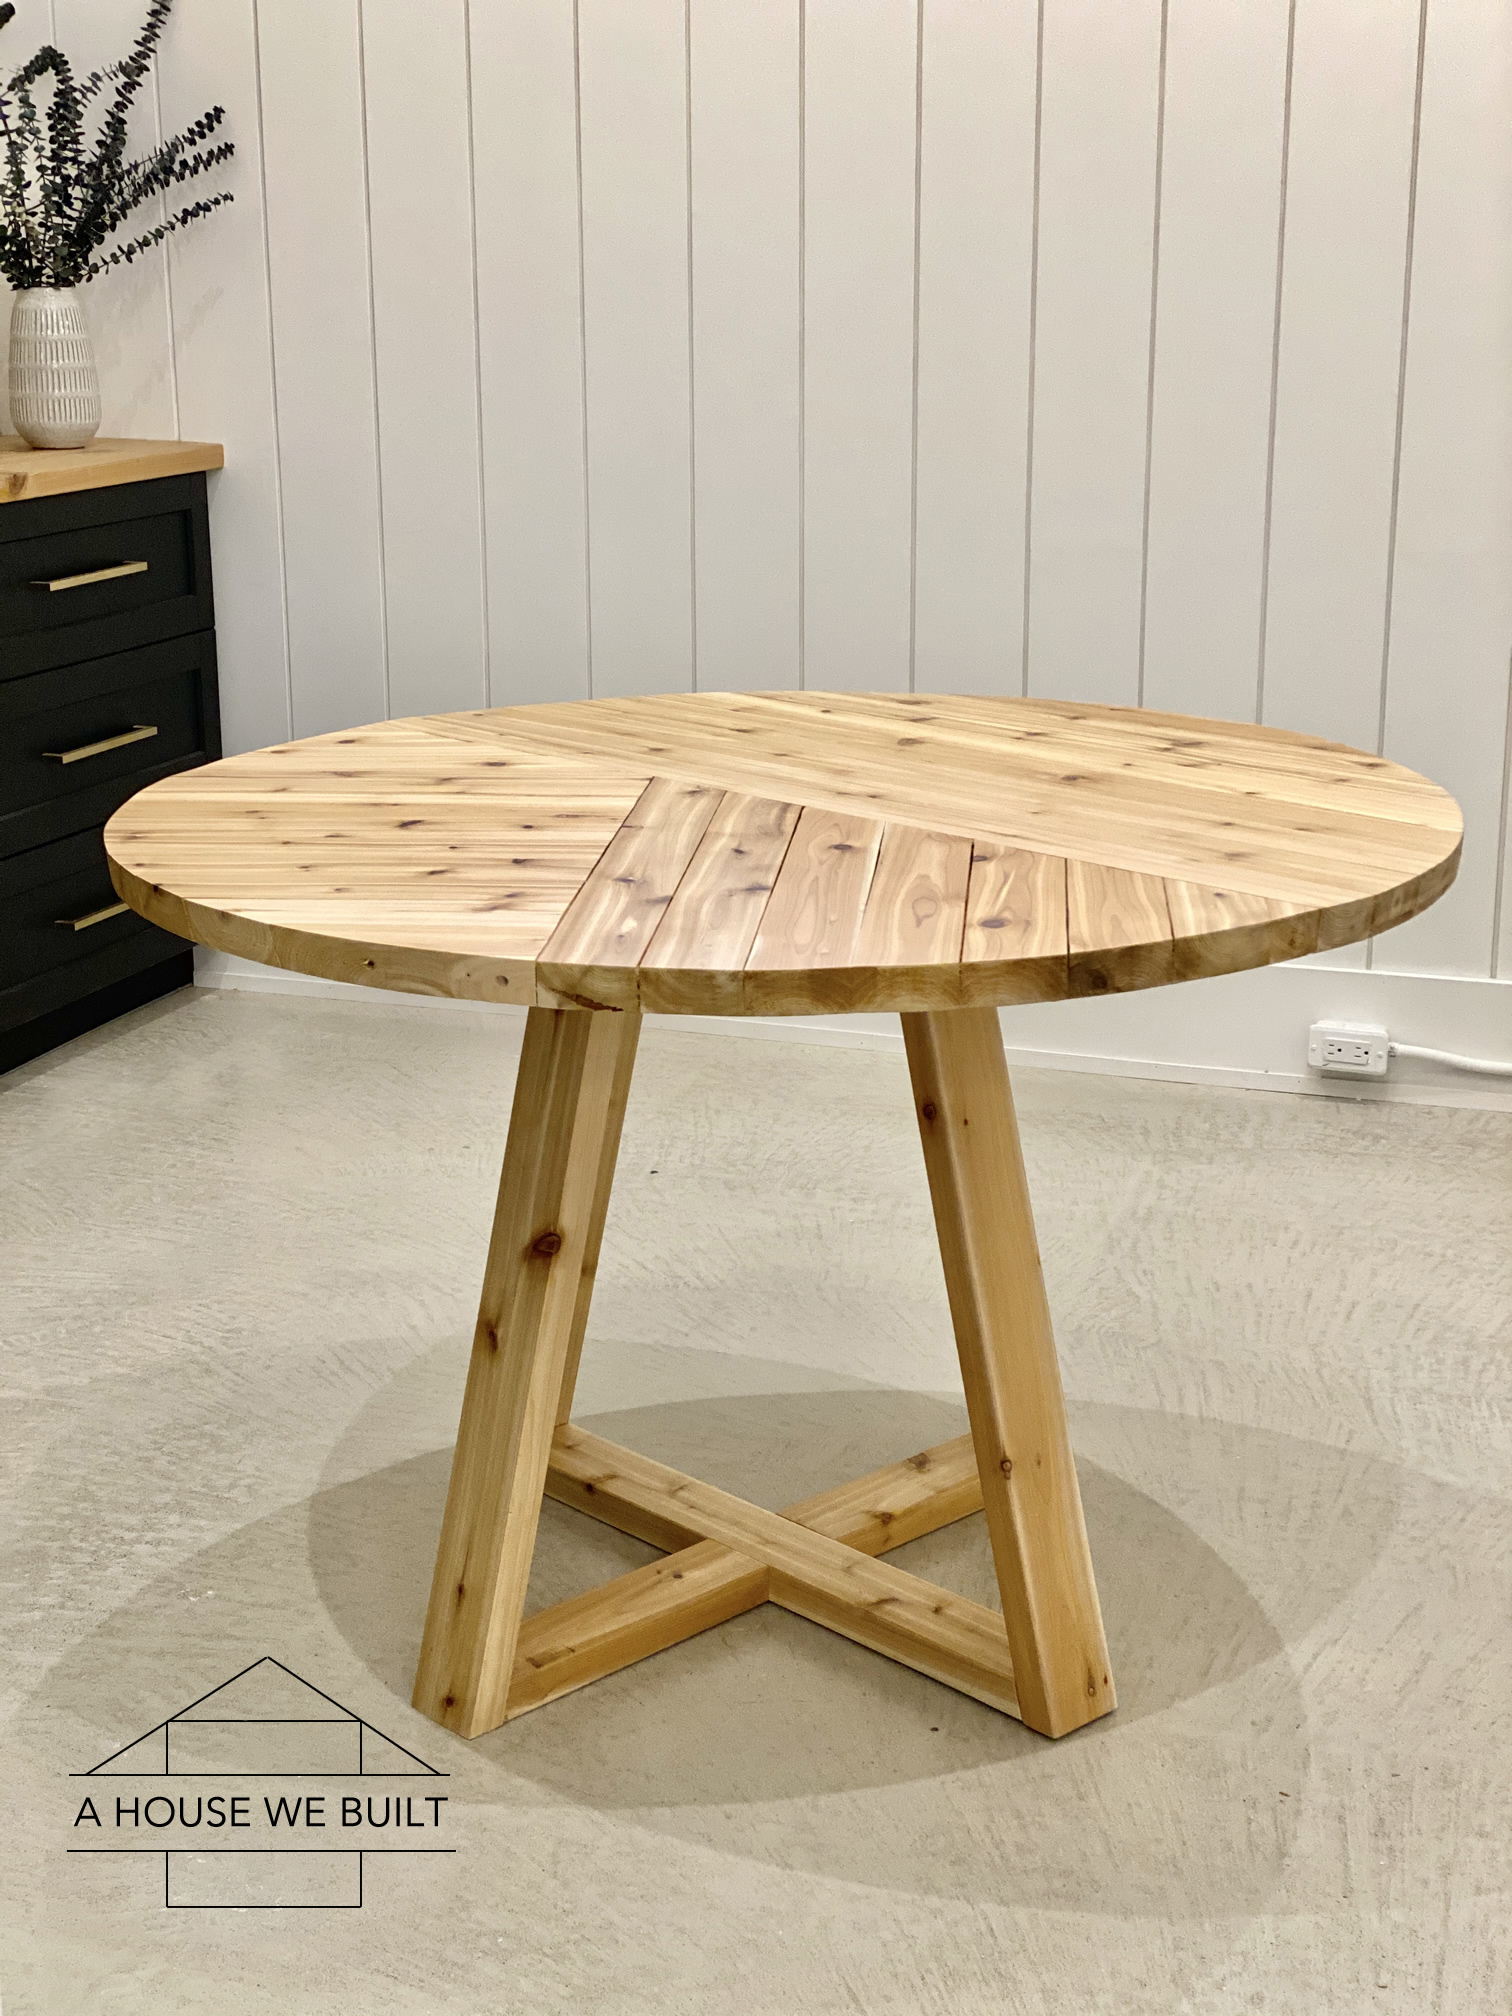
Our table is 48″ in diameter and 30.5″ high.
MATERIALS LIST:
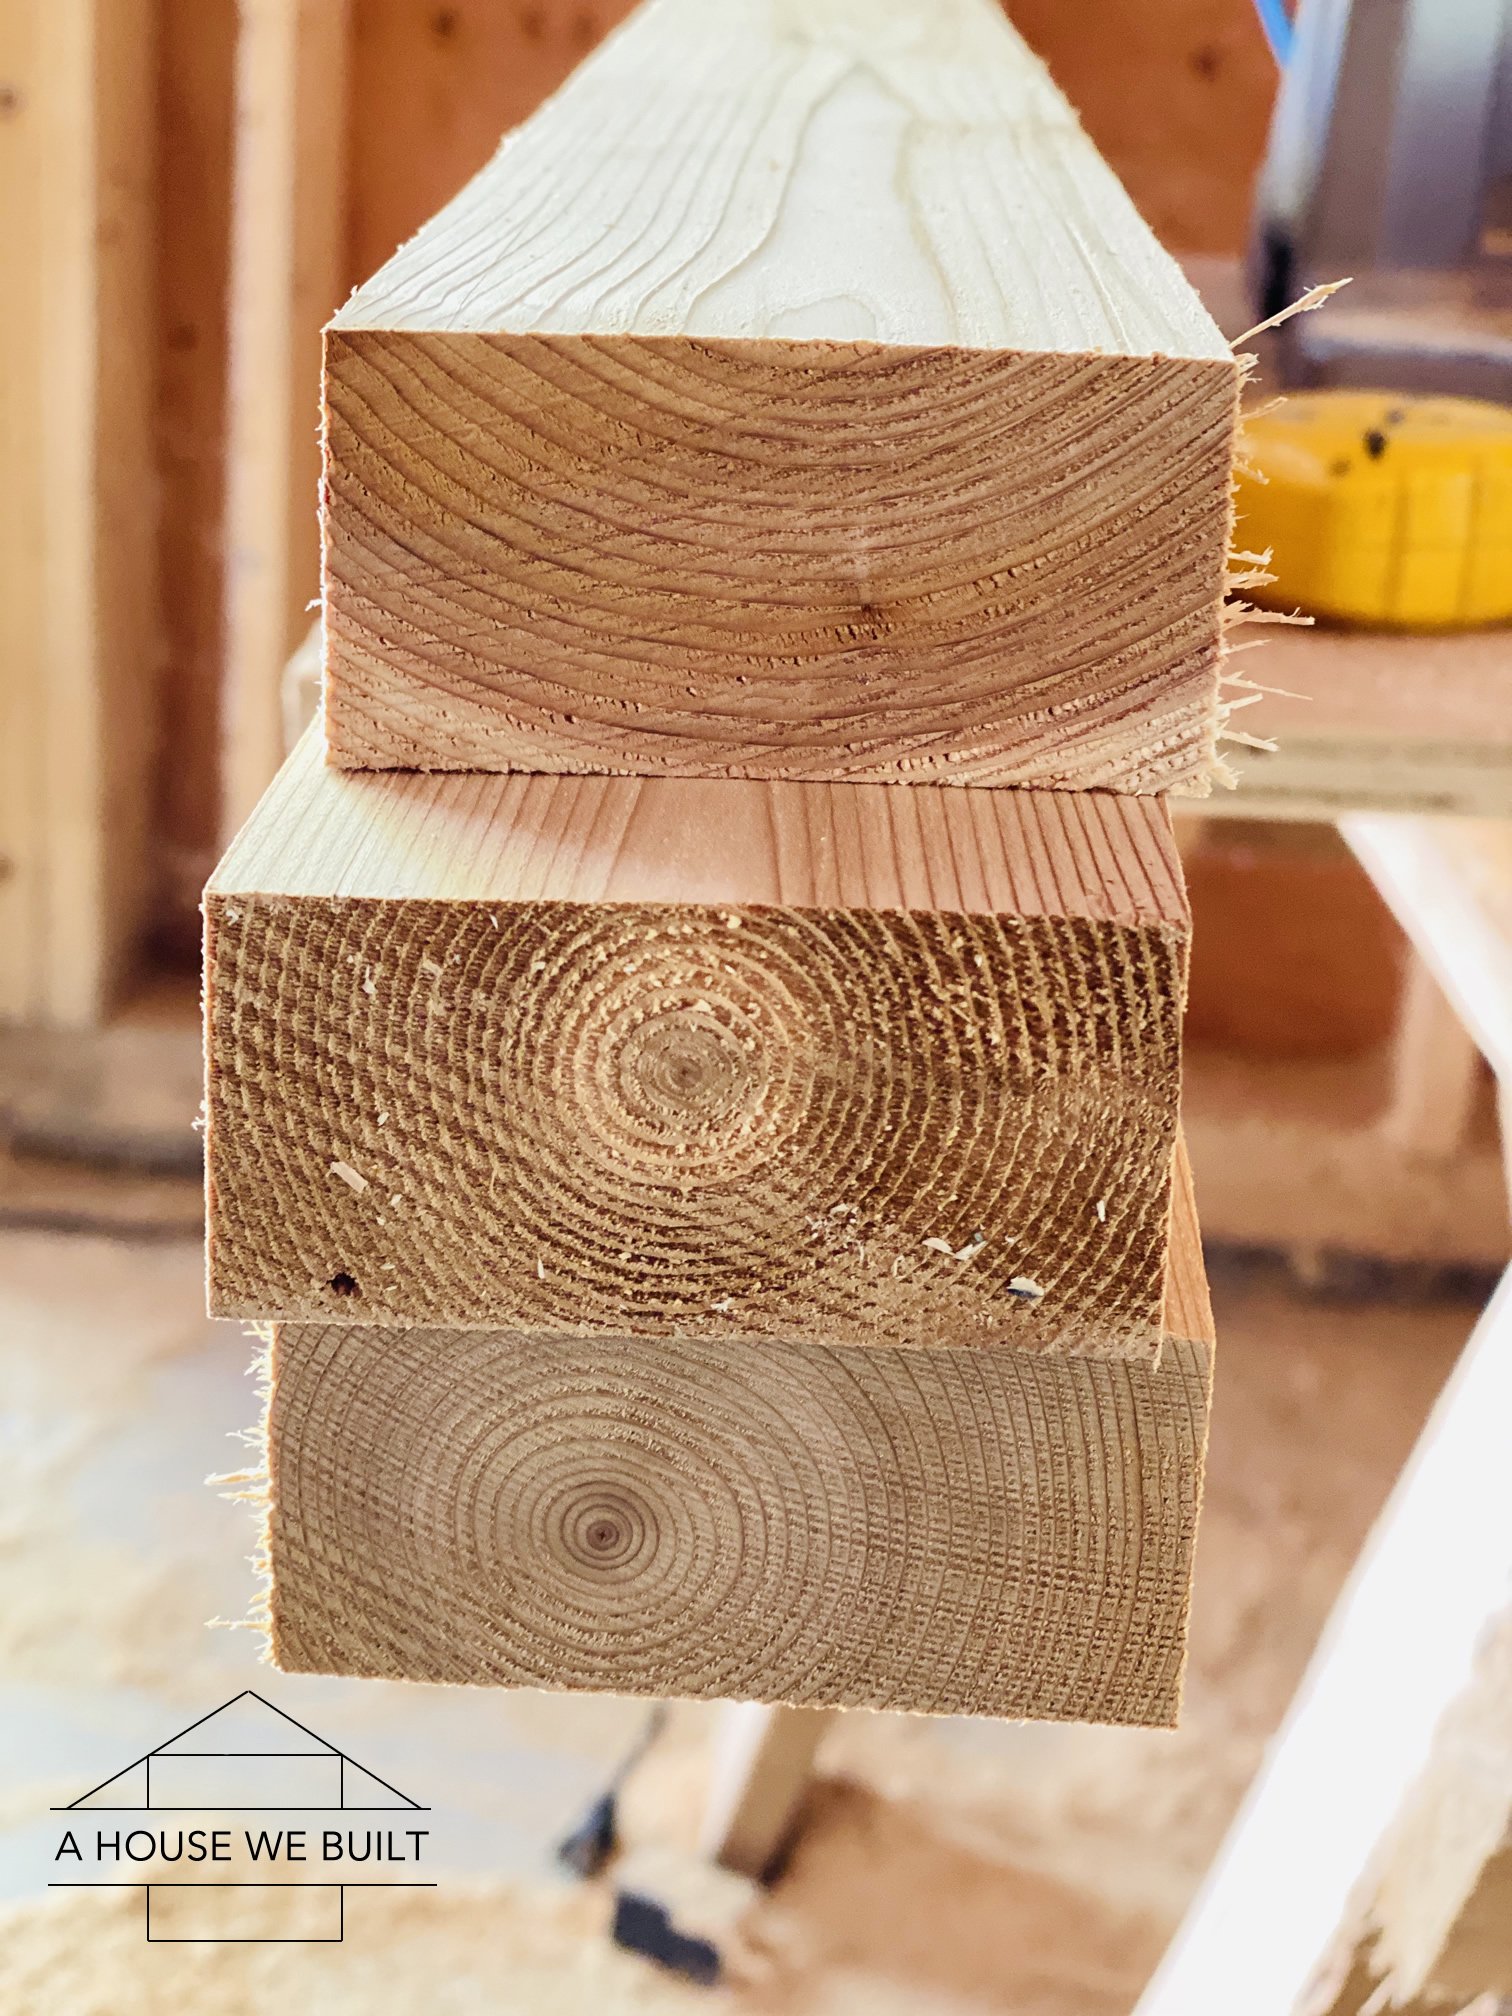
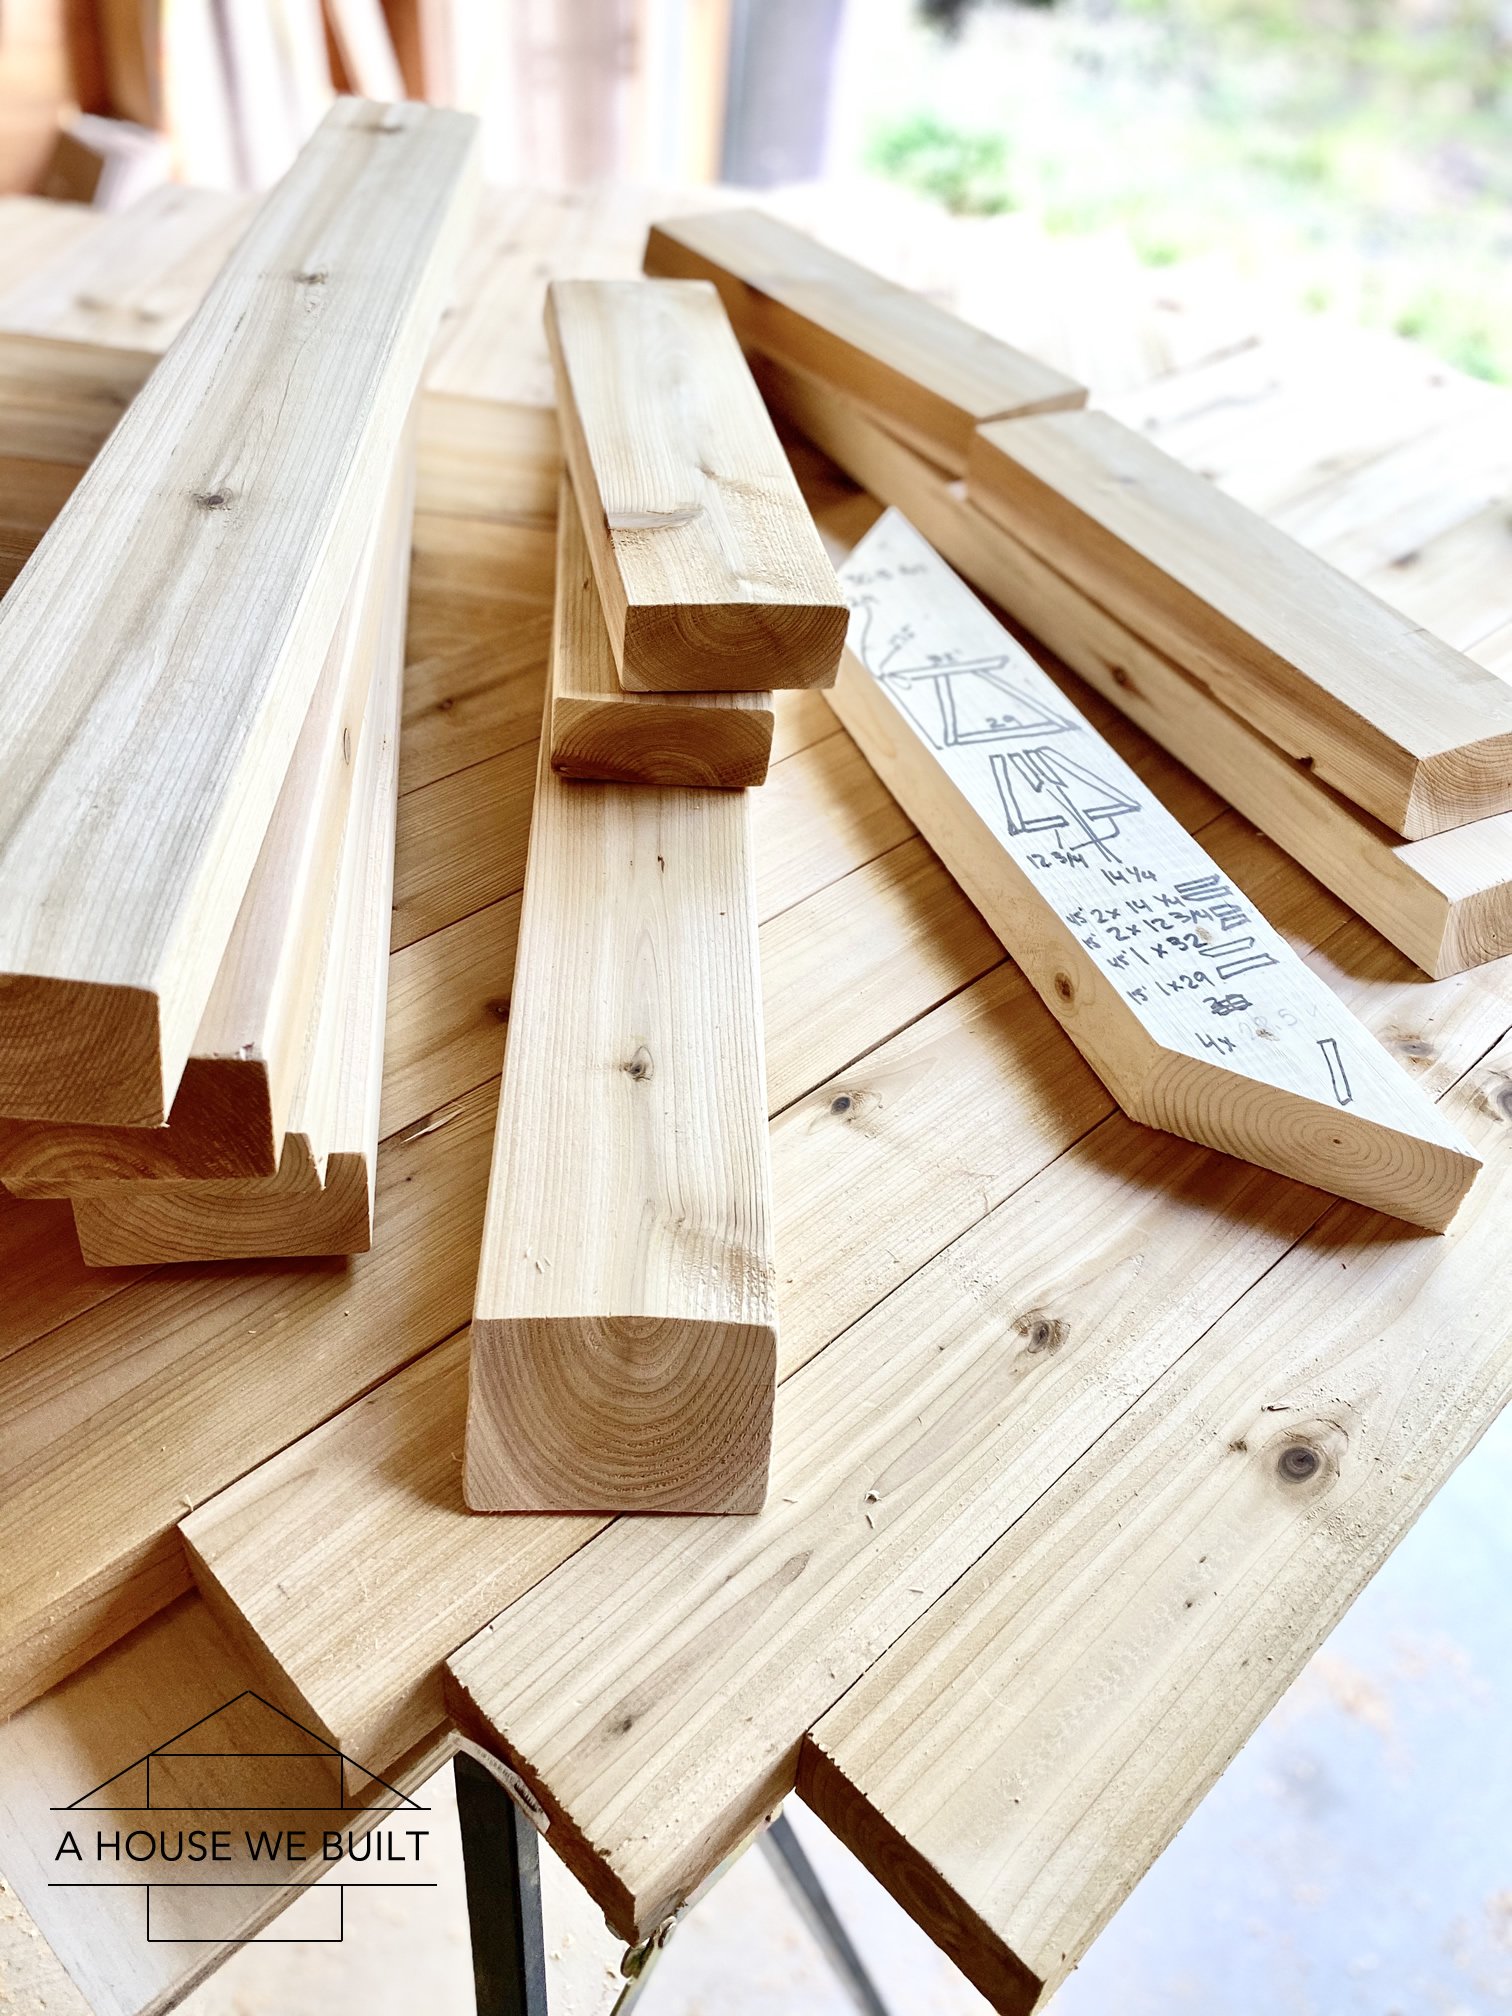
- 12 x 2x4x8 lumber (we used cedar) – I recommend getting a few extra just in case
- Wood screws (2 1/2″ and 3″ lengths)
- Wood glue: Home Depot | Amazon
- Matte top coat: Home Depot | Amazon
*Lumber buying tip: carefully select your boards. Check each one for straightness and, if you're using a wood with color variation, make sure the boards your select have the colors you want on your table.
TOOLS LIST:
- Miter saw: Home Depot | Amazon (to cut boards to size)
- Jig saw: Home Depot | Amazon (to cut the circle)
- Table saw: Home Depot | Amazon (to rip boards down – this is optional)
- Orbital sander: Home Depot | Amazon
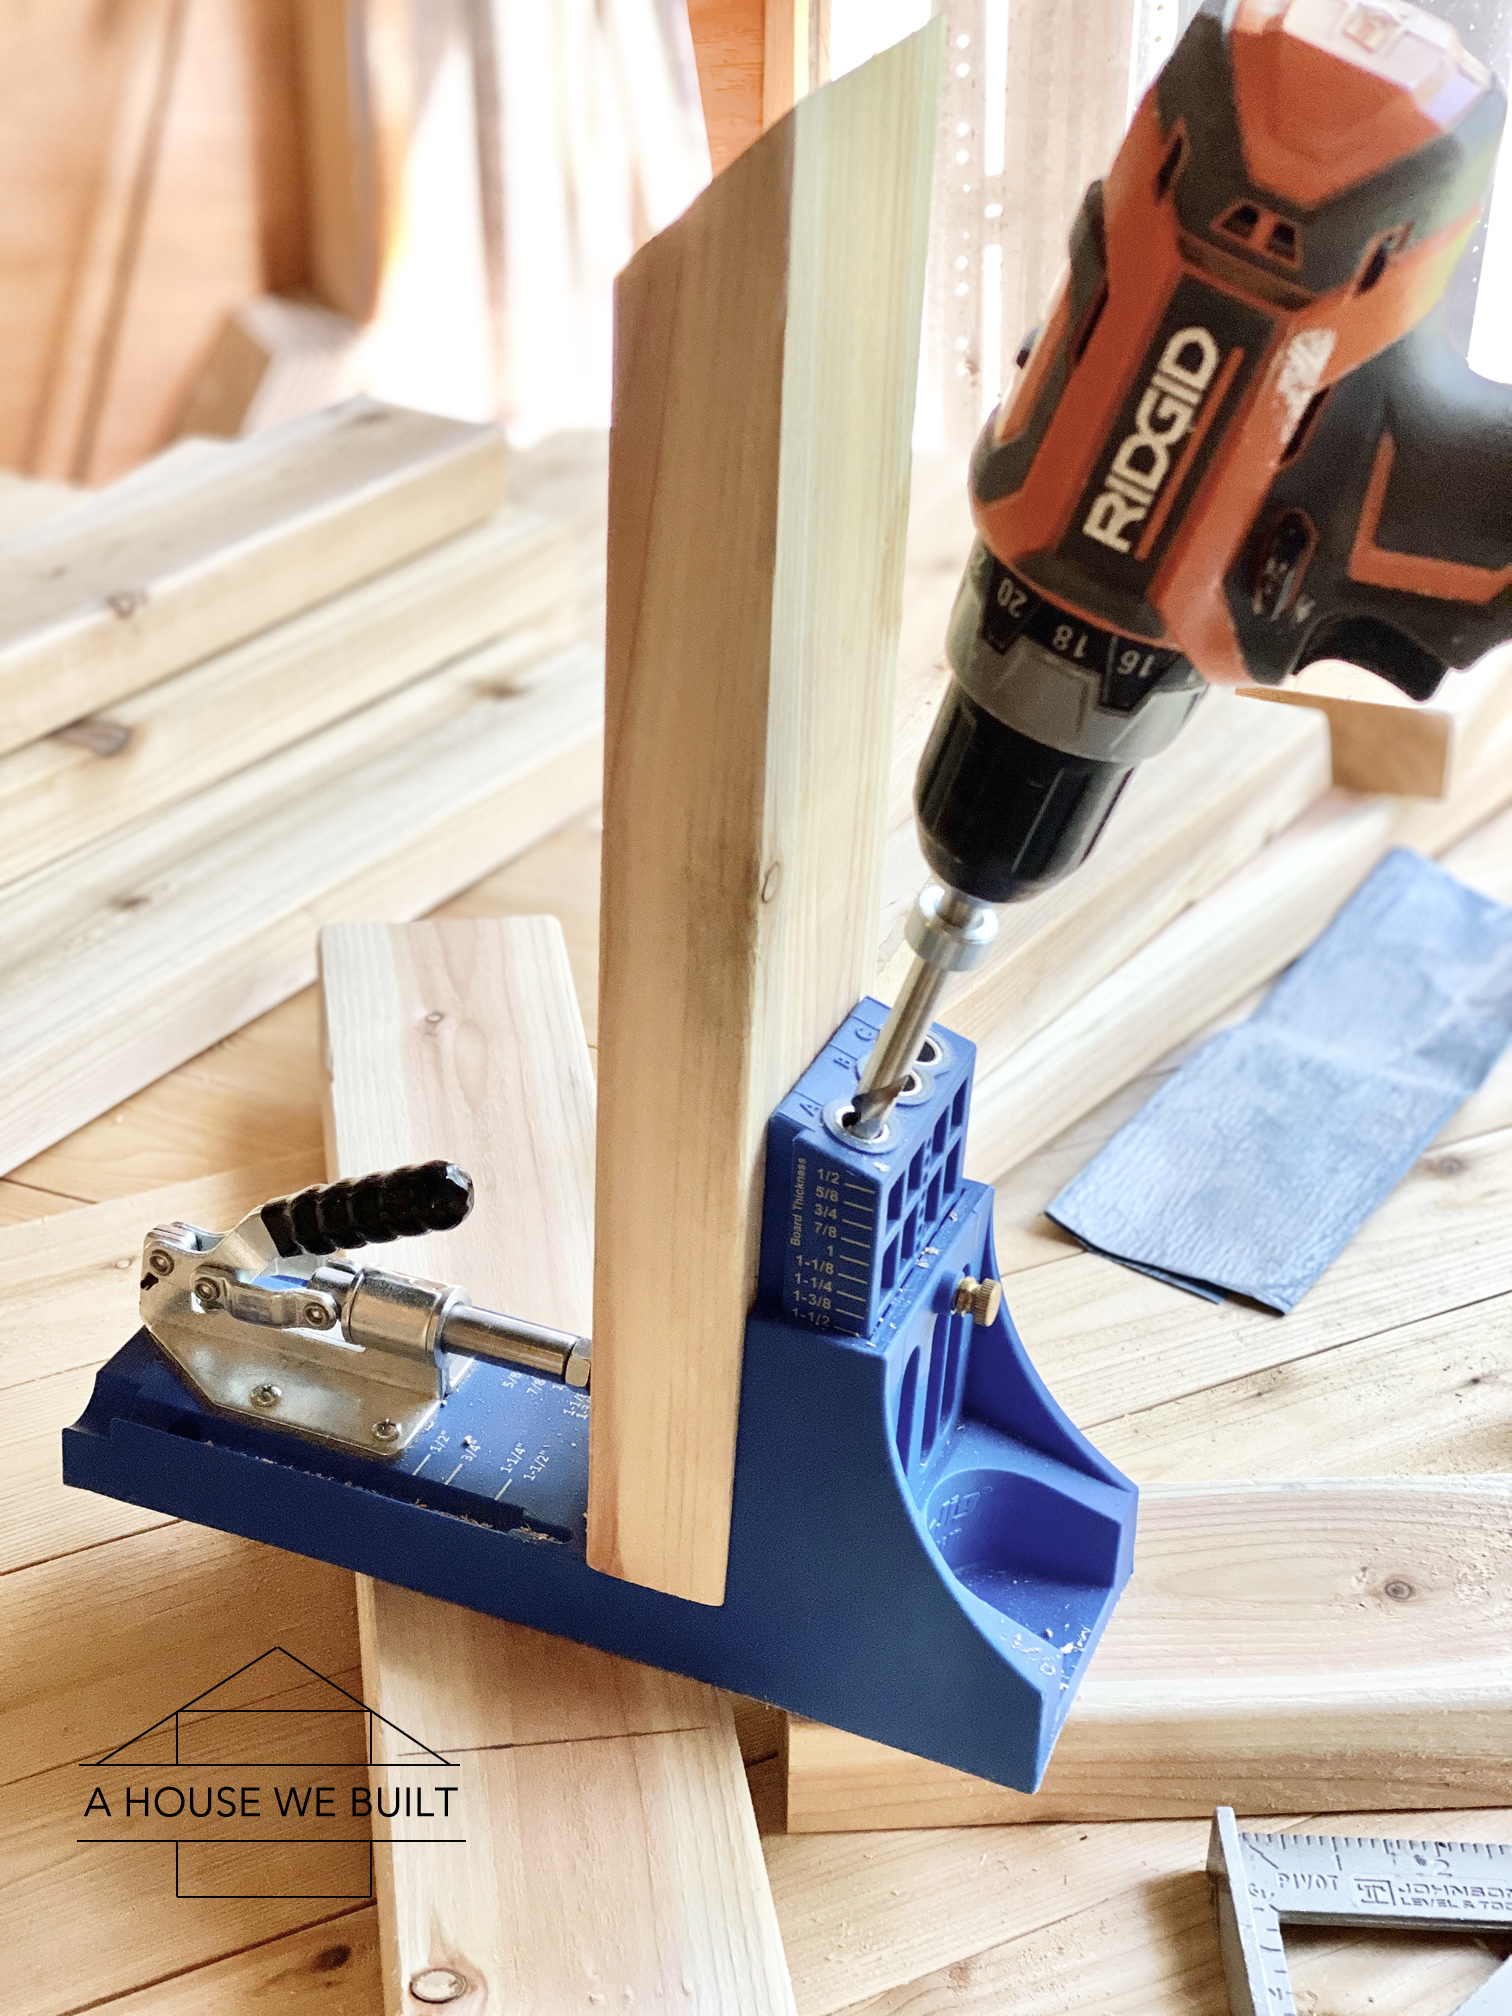
- Kreg Jig: Home Depot | Amazon
- Drill: Home Depot | Amazon
- Tape measure
TABLE DESIGN:

TABLE TOP BUILDING INSTRUCTIONS:
- To remove the rounded edges on your lumber, use a table saw to rip 1/8″ off both narrow sides. This will give you lumber with nice square edges to work with. This step is optional.
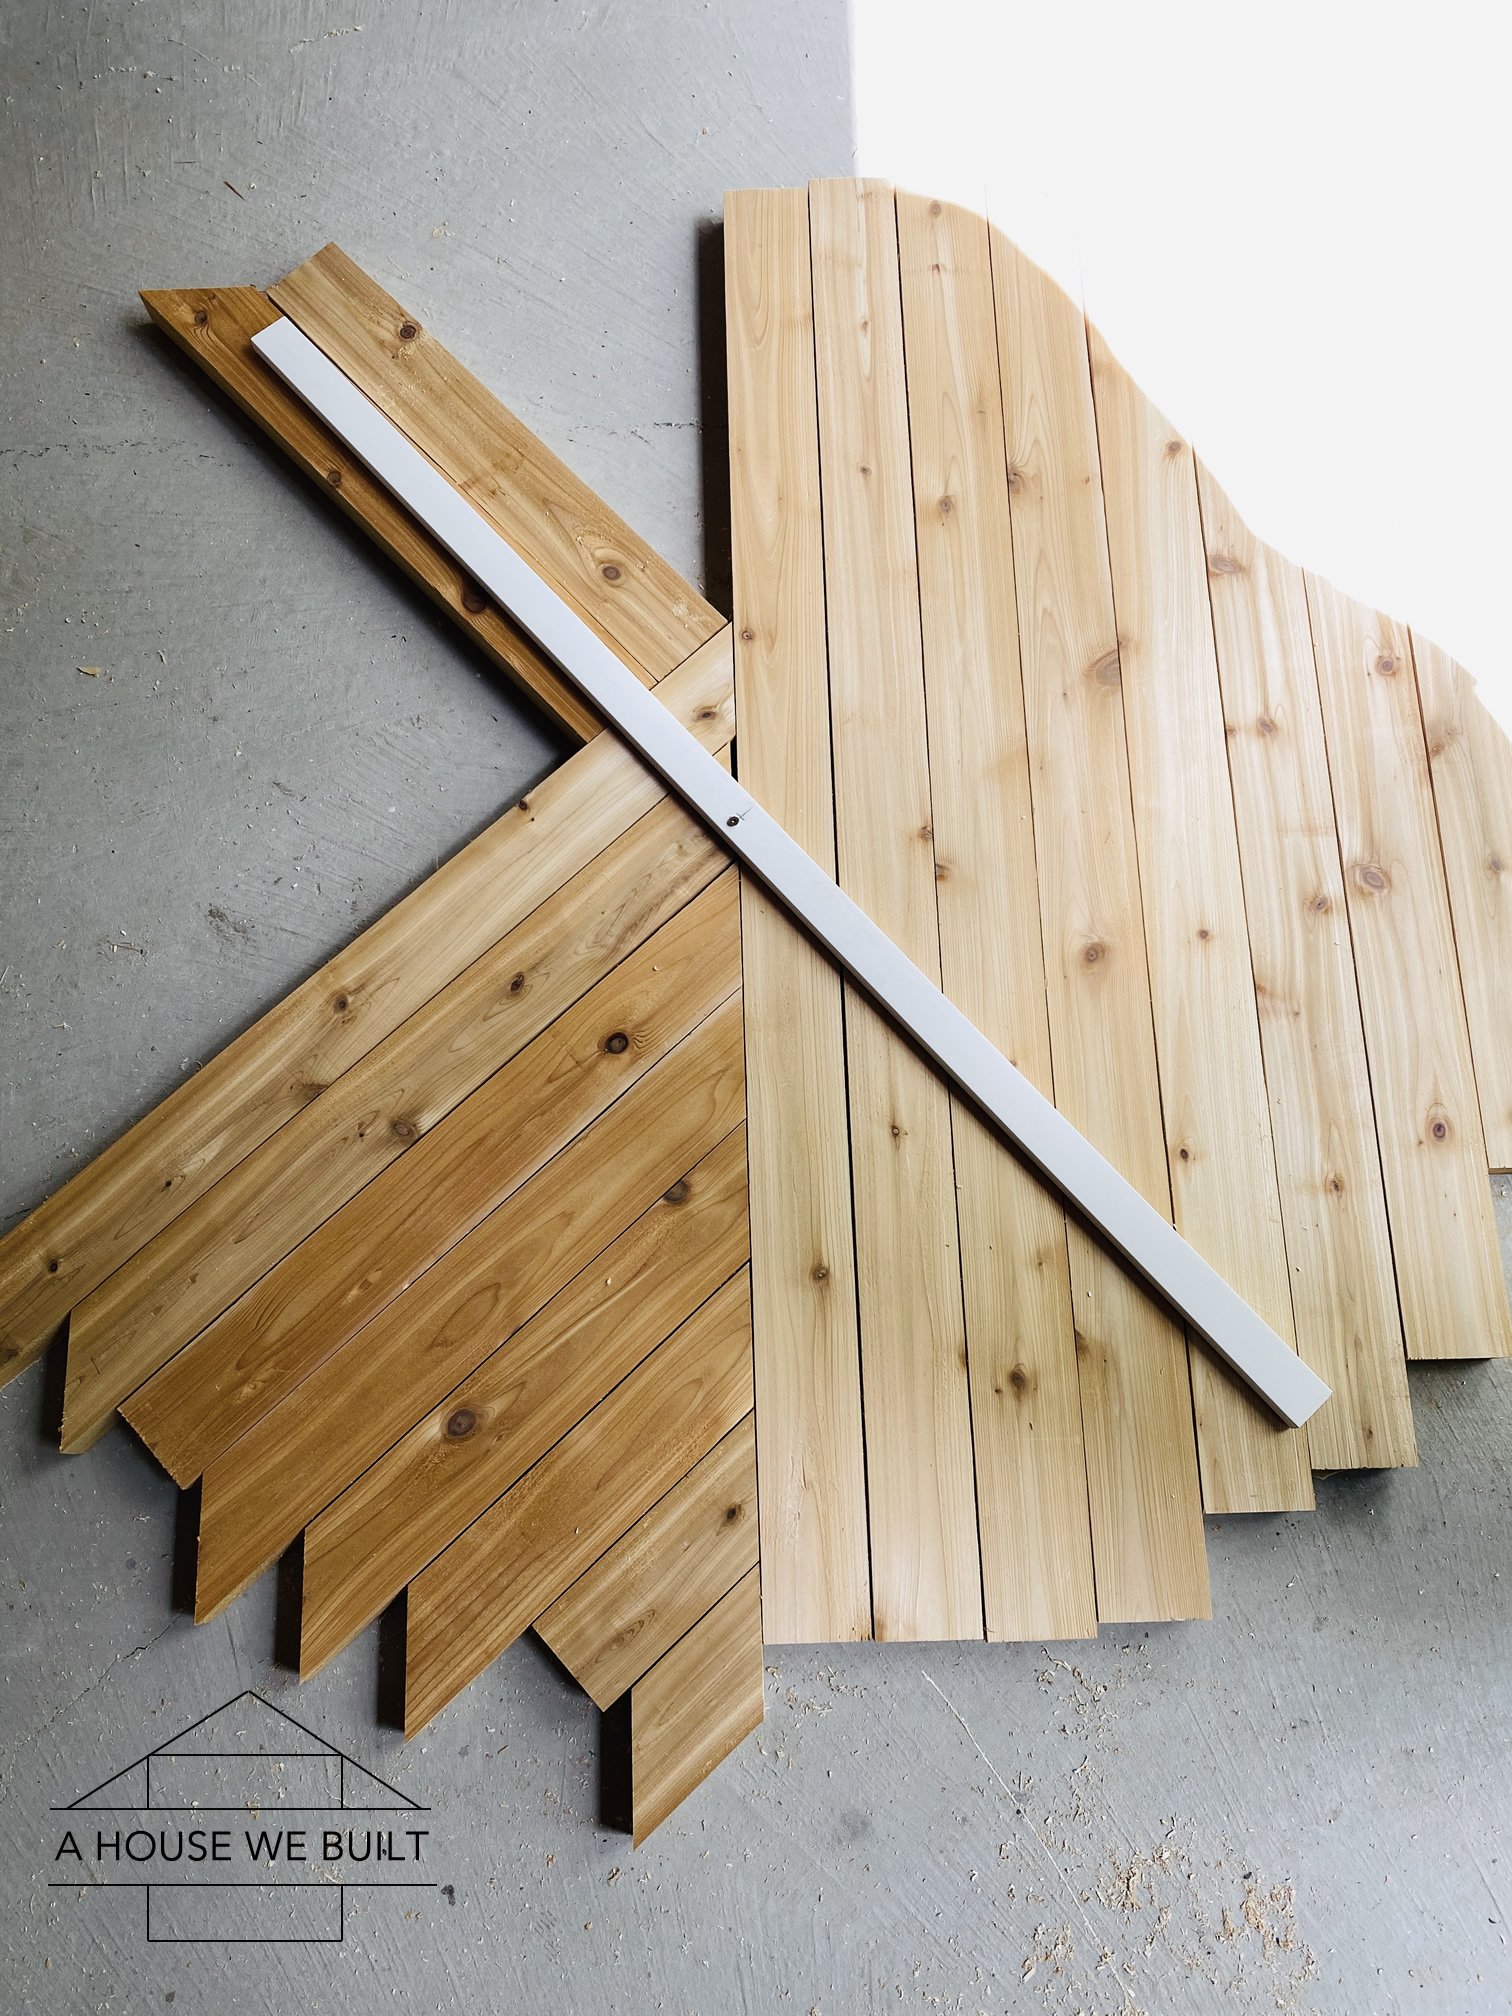
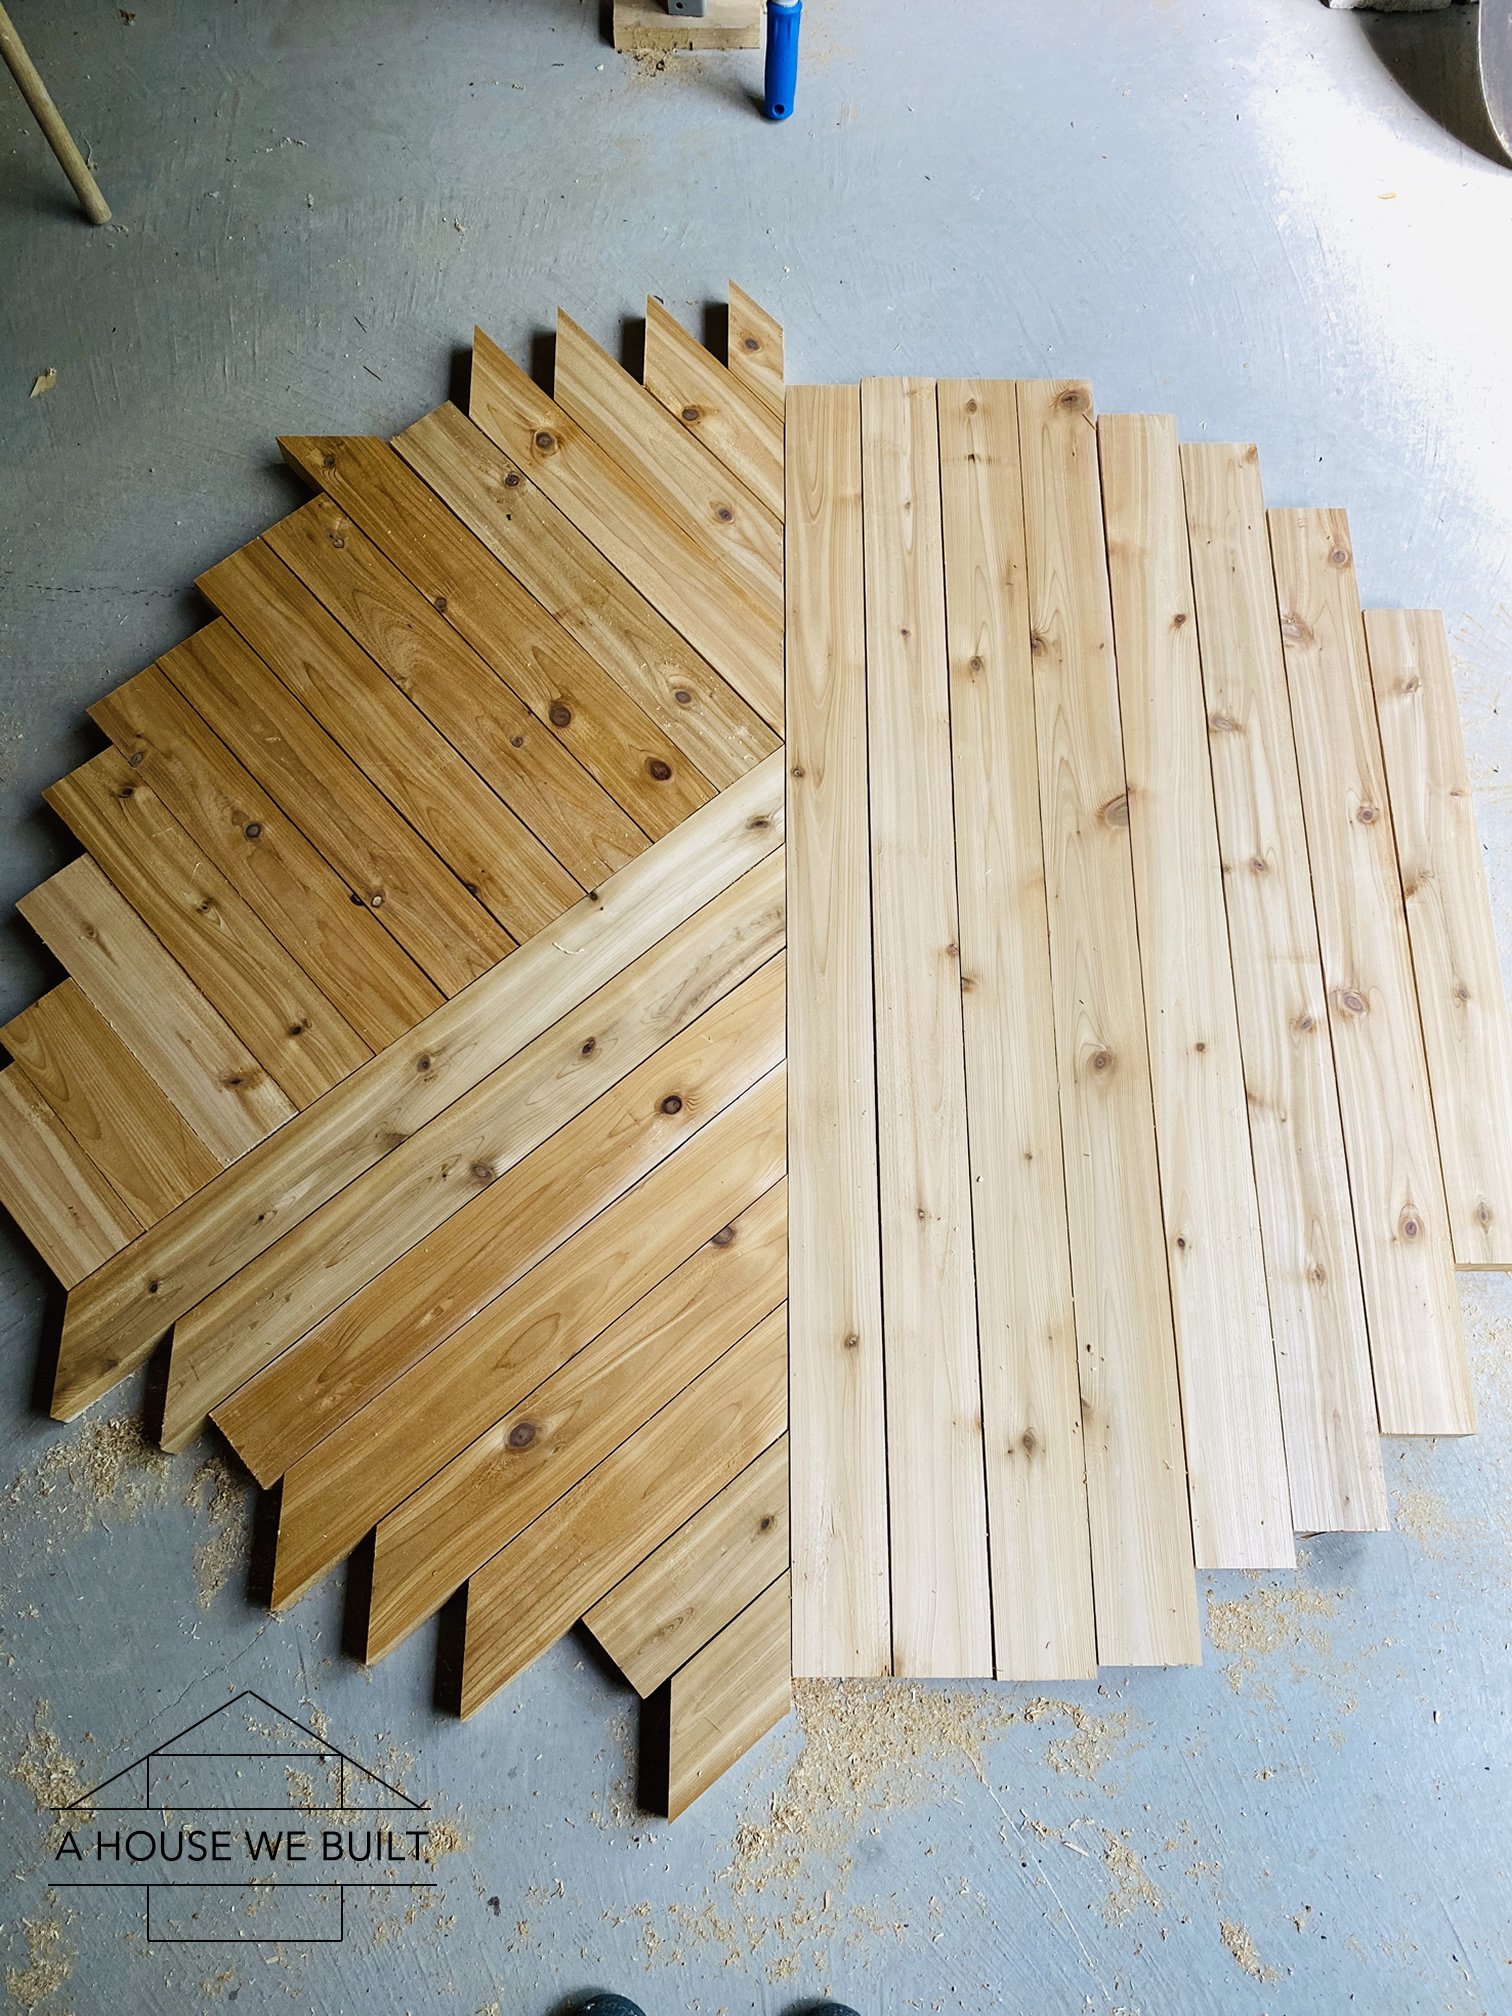
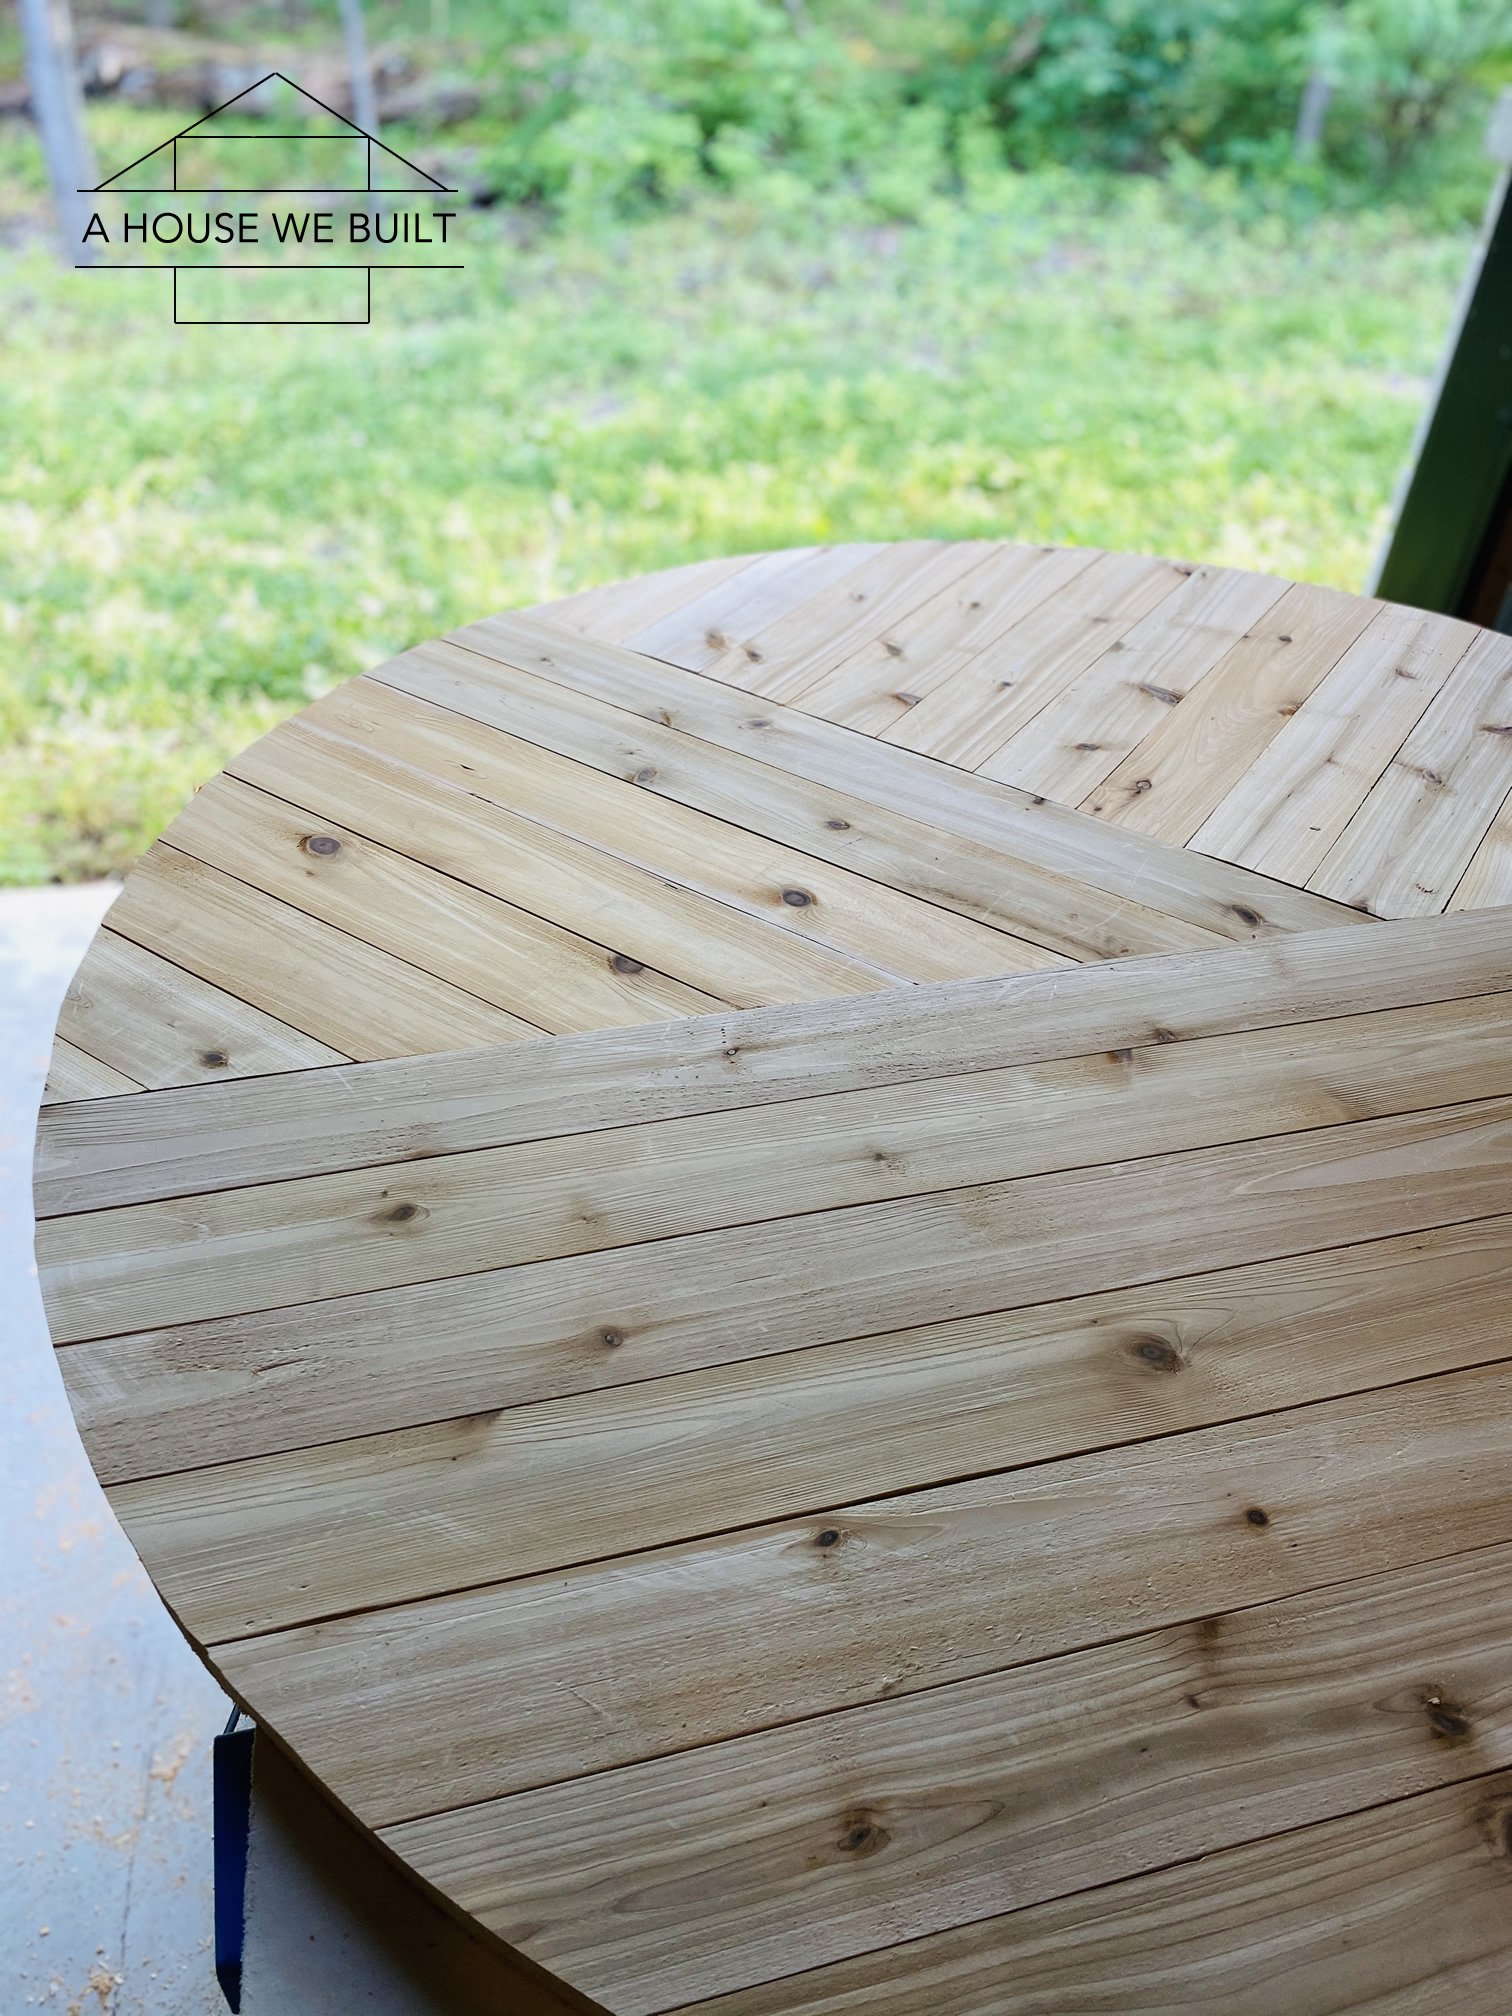
- Cut your tabletop planks to size creating whatever pattern you choose (can be totally different than ours), but generally allowing for at least 1″ of extra space on the outside. So in our case, we did a 48″ round table, so my first piece was cut to 48″ exactly and I laid it down in the middle. Then the pieces around it would be progressively less. It helps to make a guide that you can twirl around your boards to make sure the pieces you cut are bigger than your circle.
- Use wood glue between the planks and screw them together. Be careful placing your screws so they don't interfere with your final rounded cut line. First, we attached the individual planks together into 3 sections using pre-drilled holes and countersunk 3″ screws going halfway through each plank. Then we attached those 3 sections to each other with Kreg Jig pocket hole screws. (Note: the wood glue is very important because if you have any warp, the glue can help correct it in combination with the next step listed below so don't skip the glue and don't skimp on it!)
- Place it under something heavy (we used gym weights) overnight to dry so that it dries straight/flat.
Couple of problems we ran into during this stage and how we fixed them:
- To prevent warping, you're supposed to alternate the direction of the grain in boards when you build tables but we were so caught up in choosing our boards based on the coloring of the individual boards (there's a lot of color variation in the type of wood we used so the undersides of our table boards are often completely different colors than the tops) that we forgot to alternate the direction of the grain in the boards so we as we began screwing the boards together, some of the sections had quite a curve to them. We corrected this with wood glue and weighting the table top down as it dried, but still had to add a steel plate to the underside of one area at the end of the build. Not a big deal, but preventable if you remember to alternate your grain. We should have known better.
- The steel plate we added was specifically to the underside of the tabletop half that's all straight boards – the plate is ~ 1″x8″. I have a feeling that even if we'd done everything perfectly, we would still have needed the steel plate for stability but there's no way for me to know for sure.
- Even though our wood pieces dry-fit perfectly, they didn't always fit together as perfectly once we started screwing them together so be prepared to make adjustments as you go. For this reason, it's helpful to have a table saw as we ended up using it to shave off bits to make the pieces fit better.
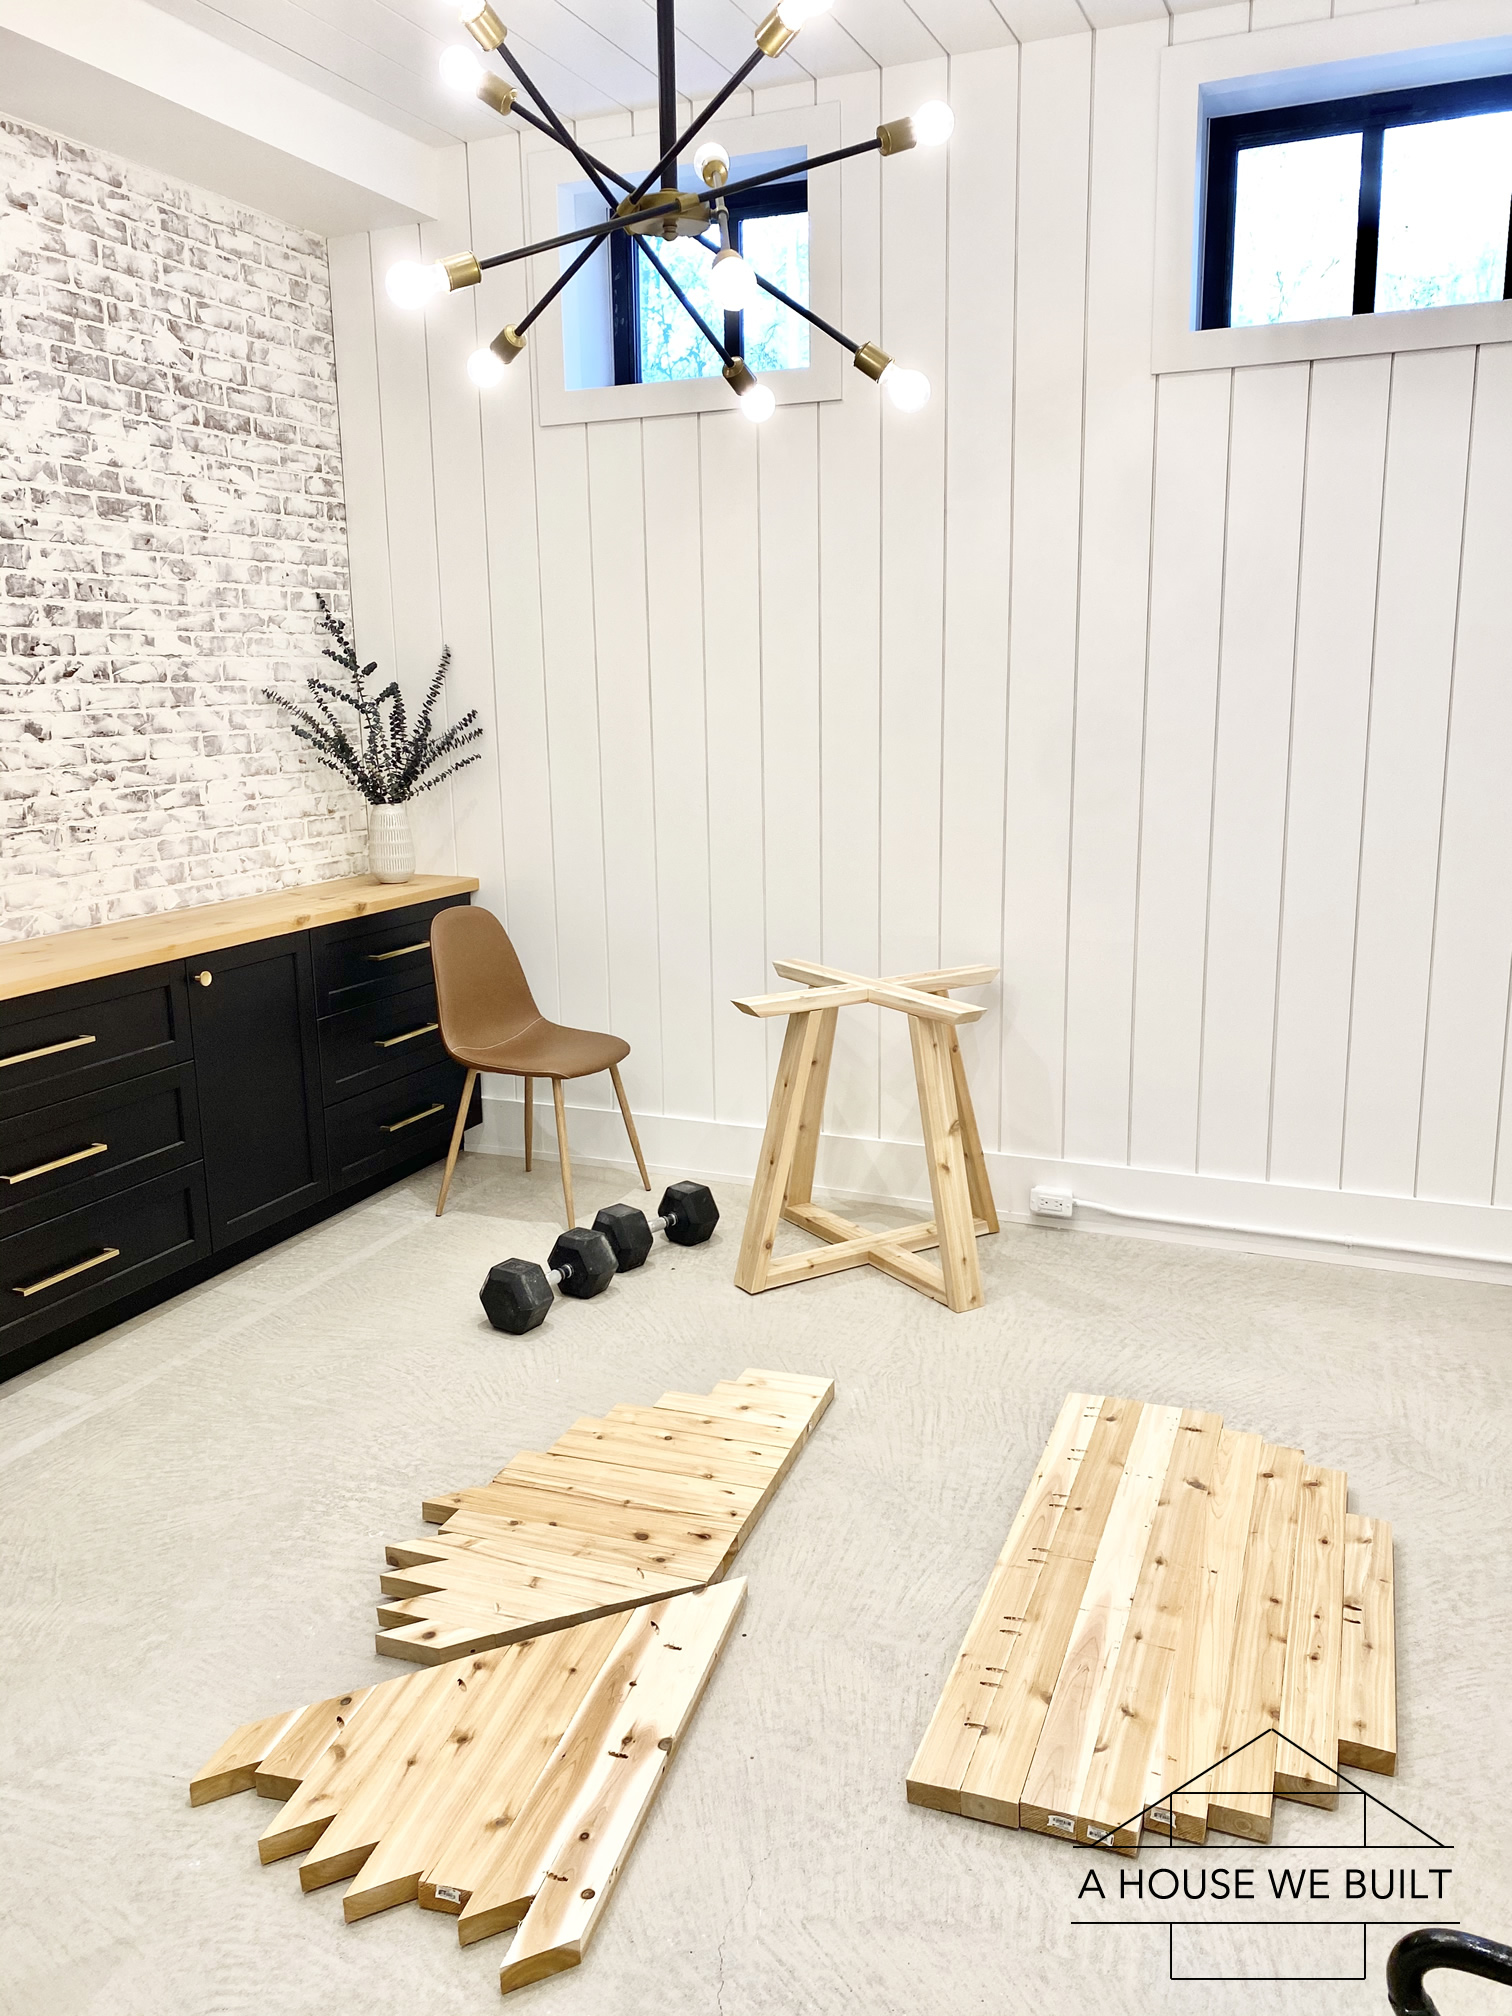
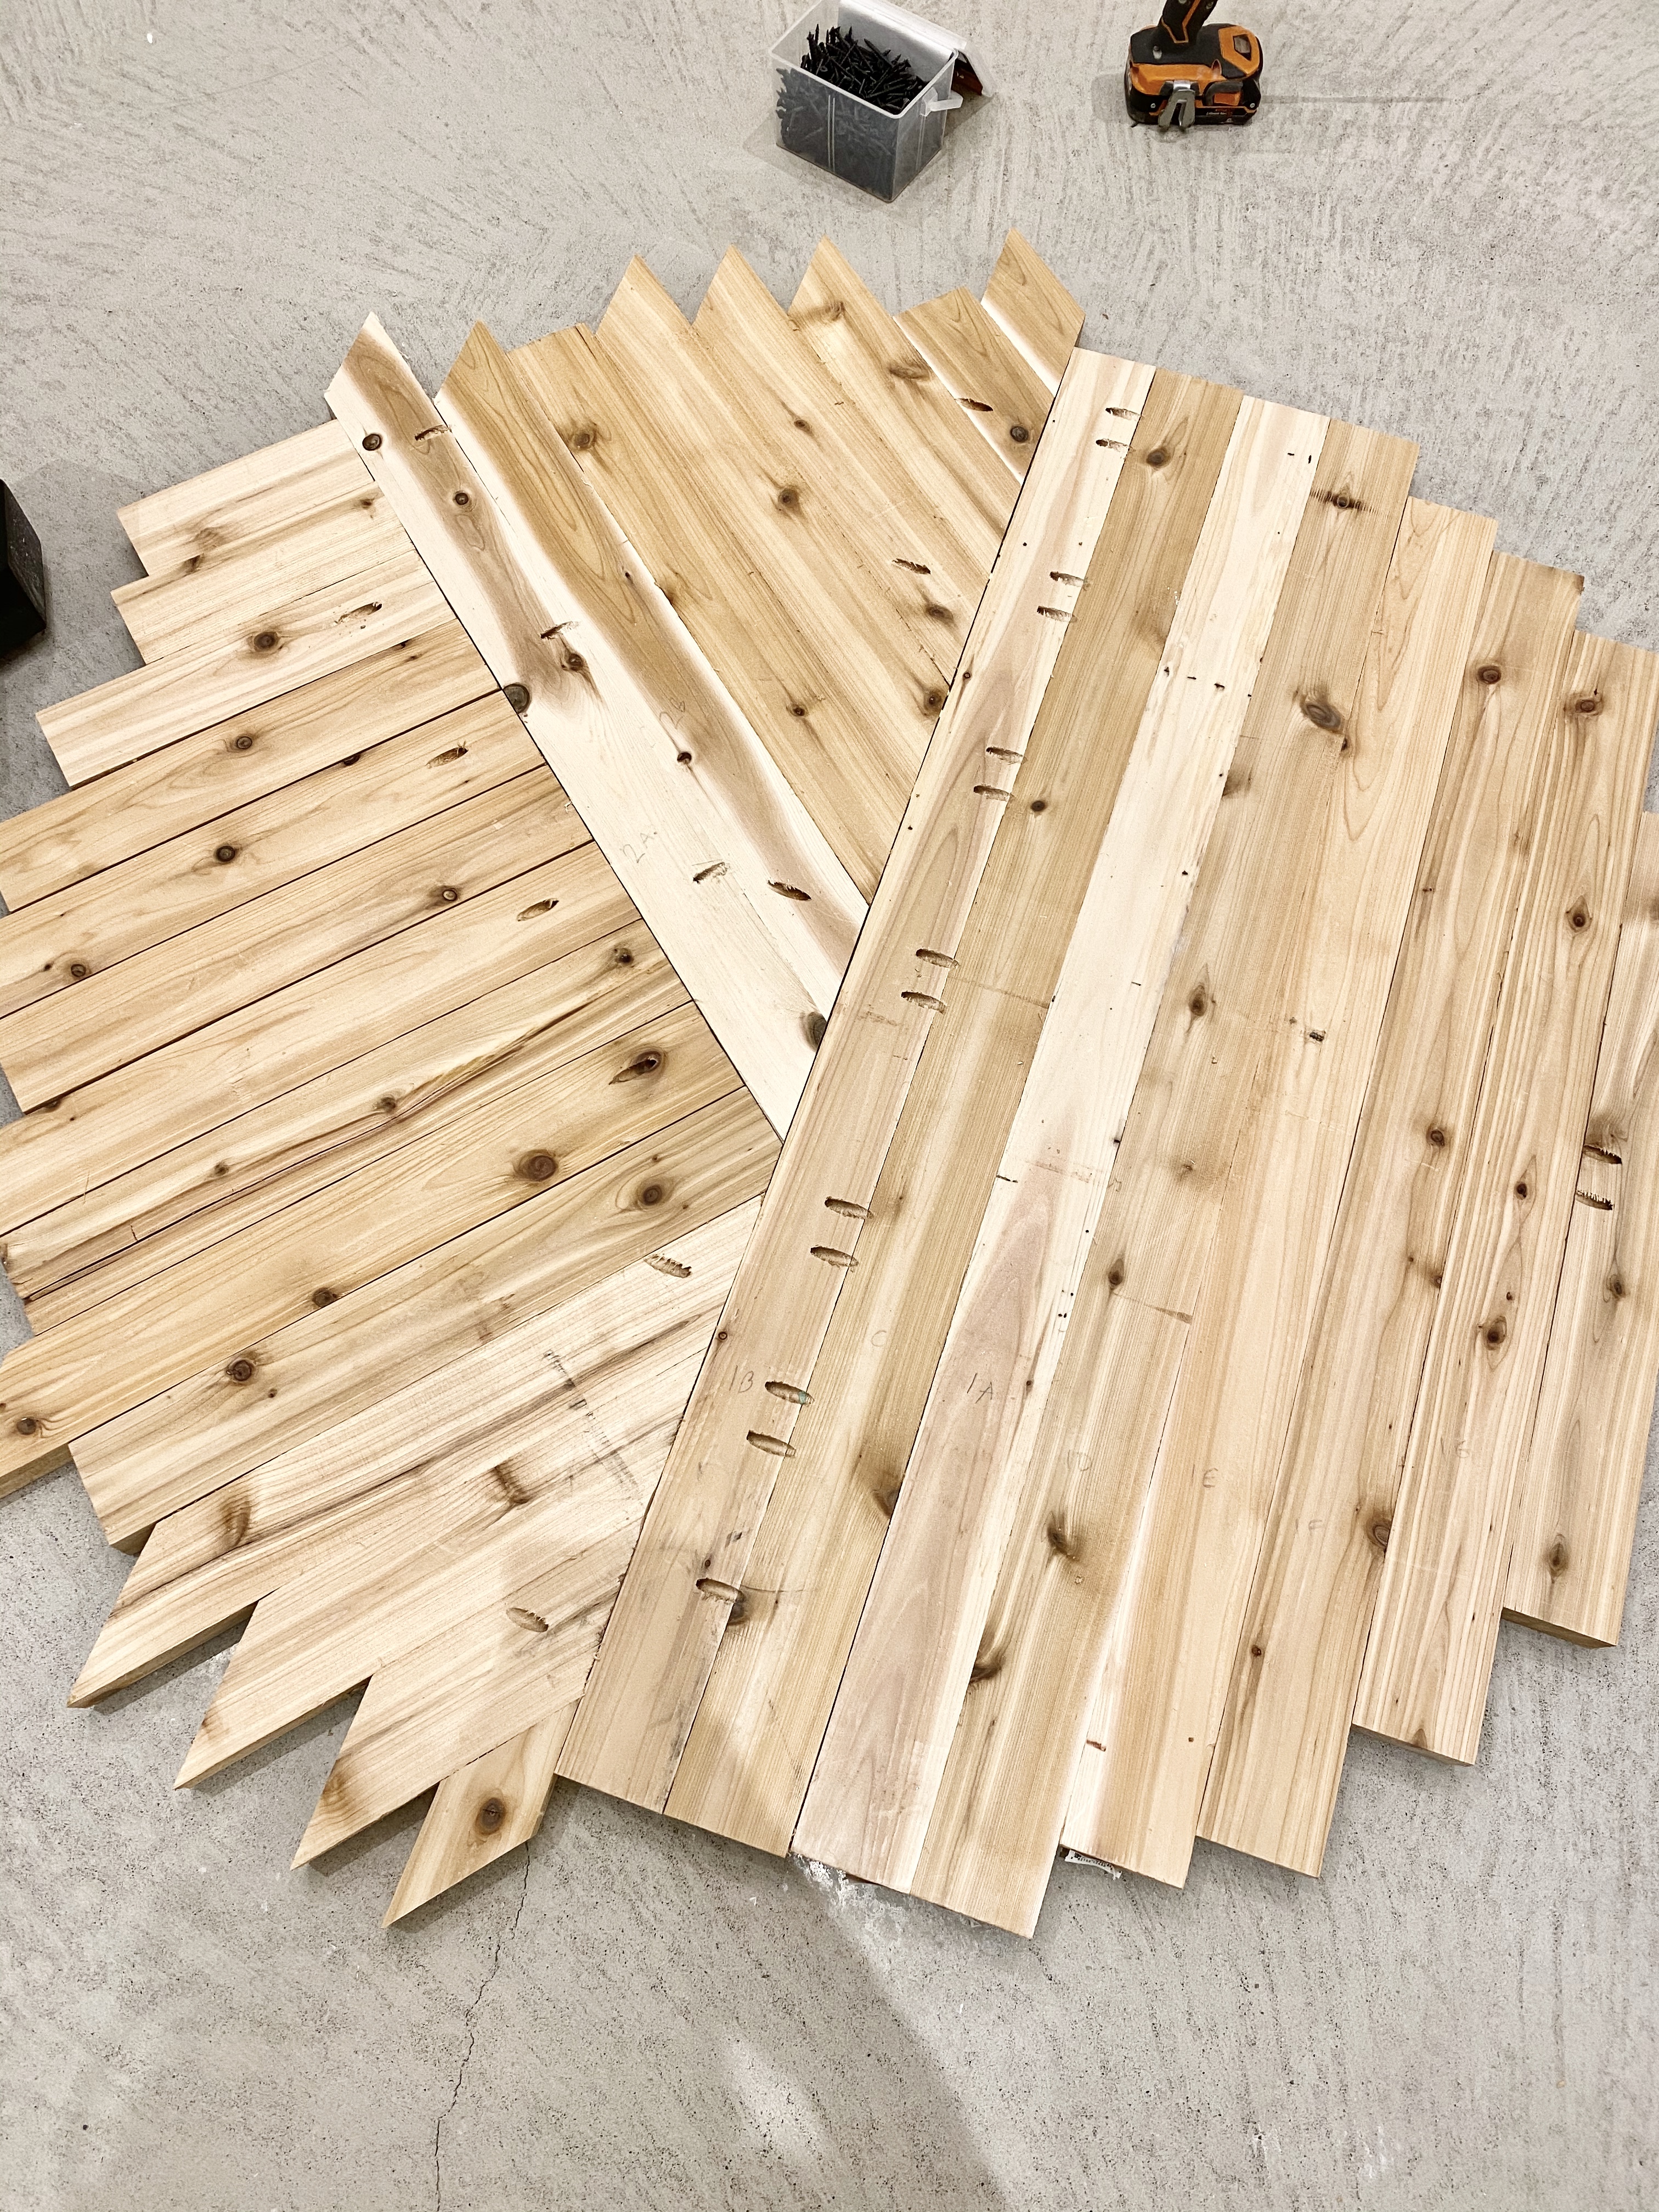
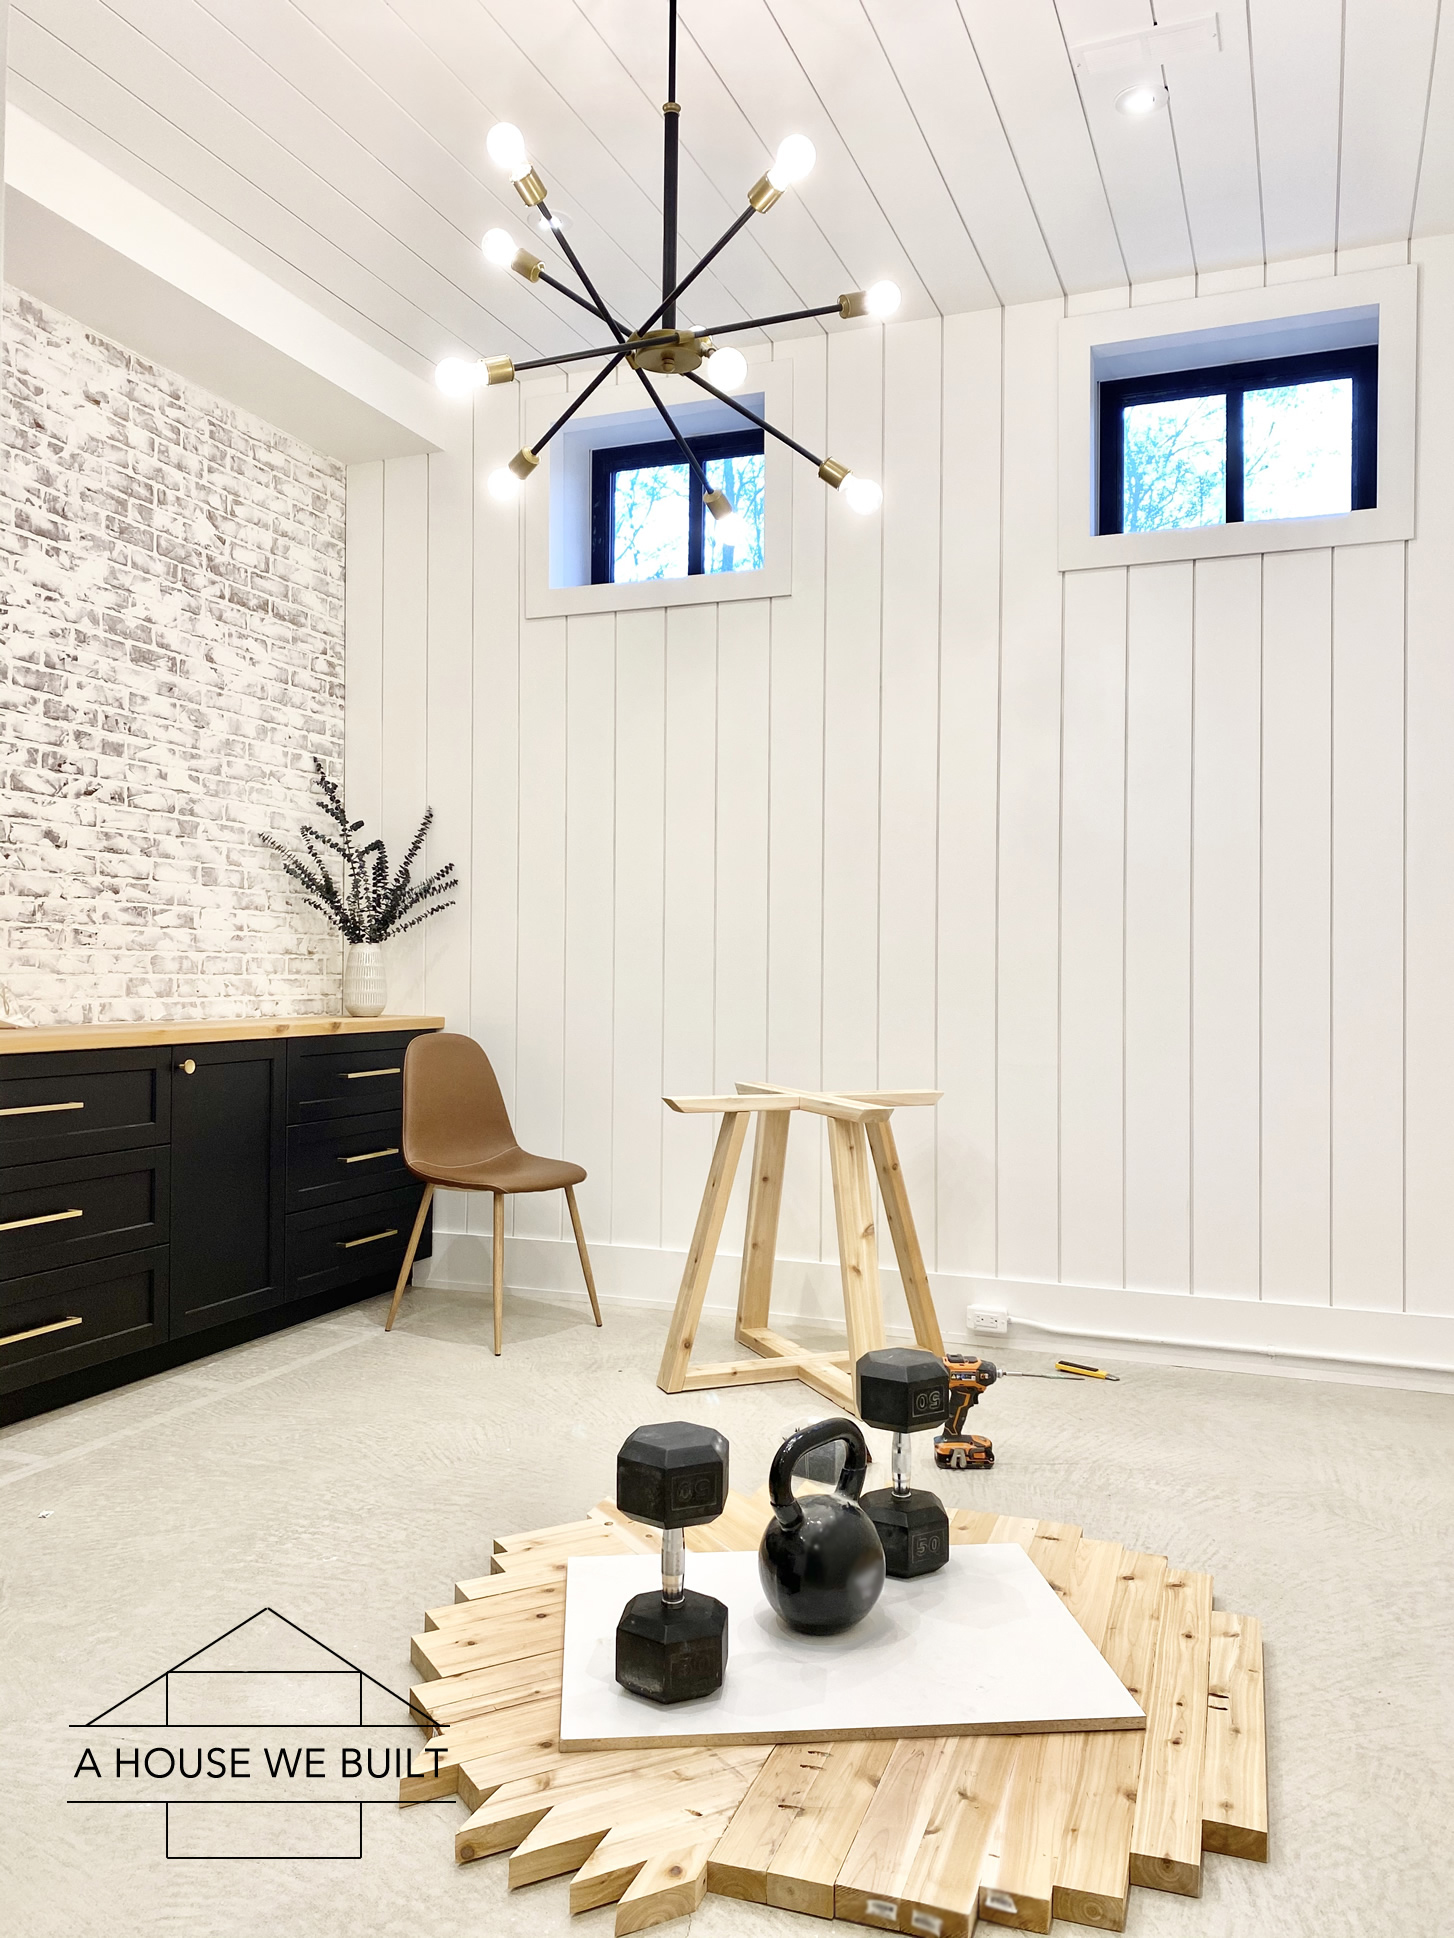
TABLE TOP CUTTING INSTRUCTIONS:
Once your table top is fully assembled and the glue has dried, it's time to cut out the round circle. Ultimately we found that the best way to do this was to draw a perfect circle using a homemade compass and freehanding the cut with a jig saw. I think a router is a better tool to cut the circle but we don't have one and renting one just seemed like a lot of trouble and we had a jig saw so we used it.
First, we tried to build a jig for the jig saw and the jig actually worked really well in theory. It held the jig saw perfectly in place and it moved in a perfect circle. Unfortunately it didn't work for us though because I guess the wood we used was too thick for the jig saw blade to handle in a jig because the blade just kept bending out of the way and creating an angled cut instead of a straight cut. So in the end, we just freehanded the cut and that actually worked really well! We were worried we wouldn't be able to get it perfectly round but we did and it wasn't even all that hard honestly as long as you go slow and steady and don't try to rush the cut. I'll show you the jig we built though down below in the next pics because the concept worked really well and on either softer wood or a sheet of plywood/mdf or just anything less thick than our 1 1/2″ solid wood planks, this jig would've been the perfect solution to cutting a circle.
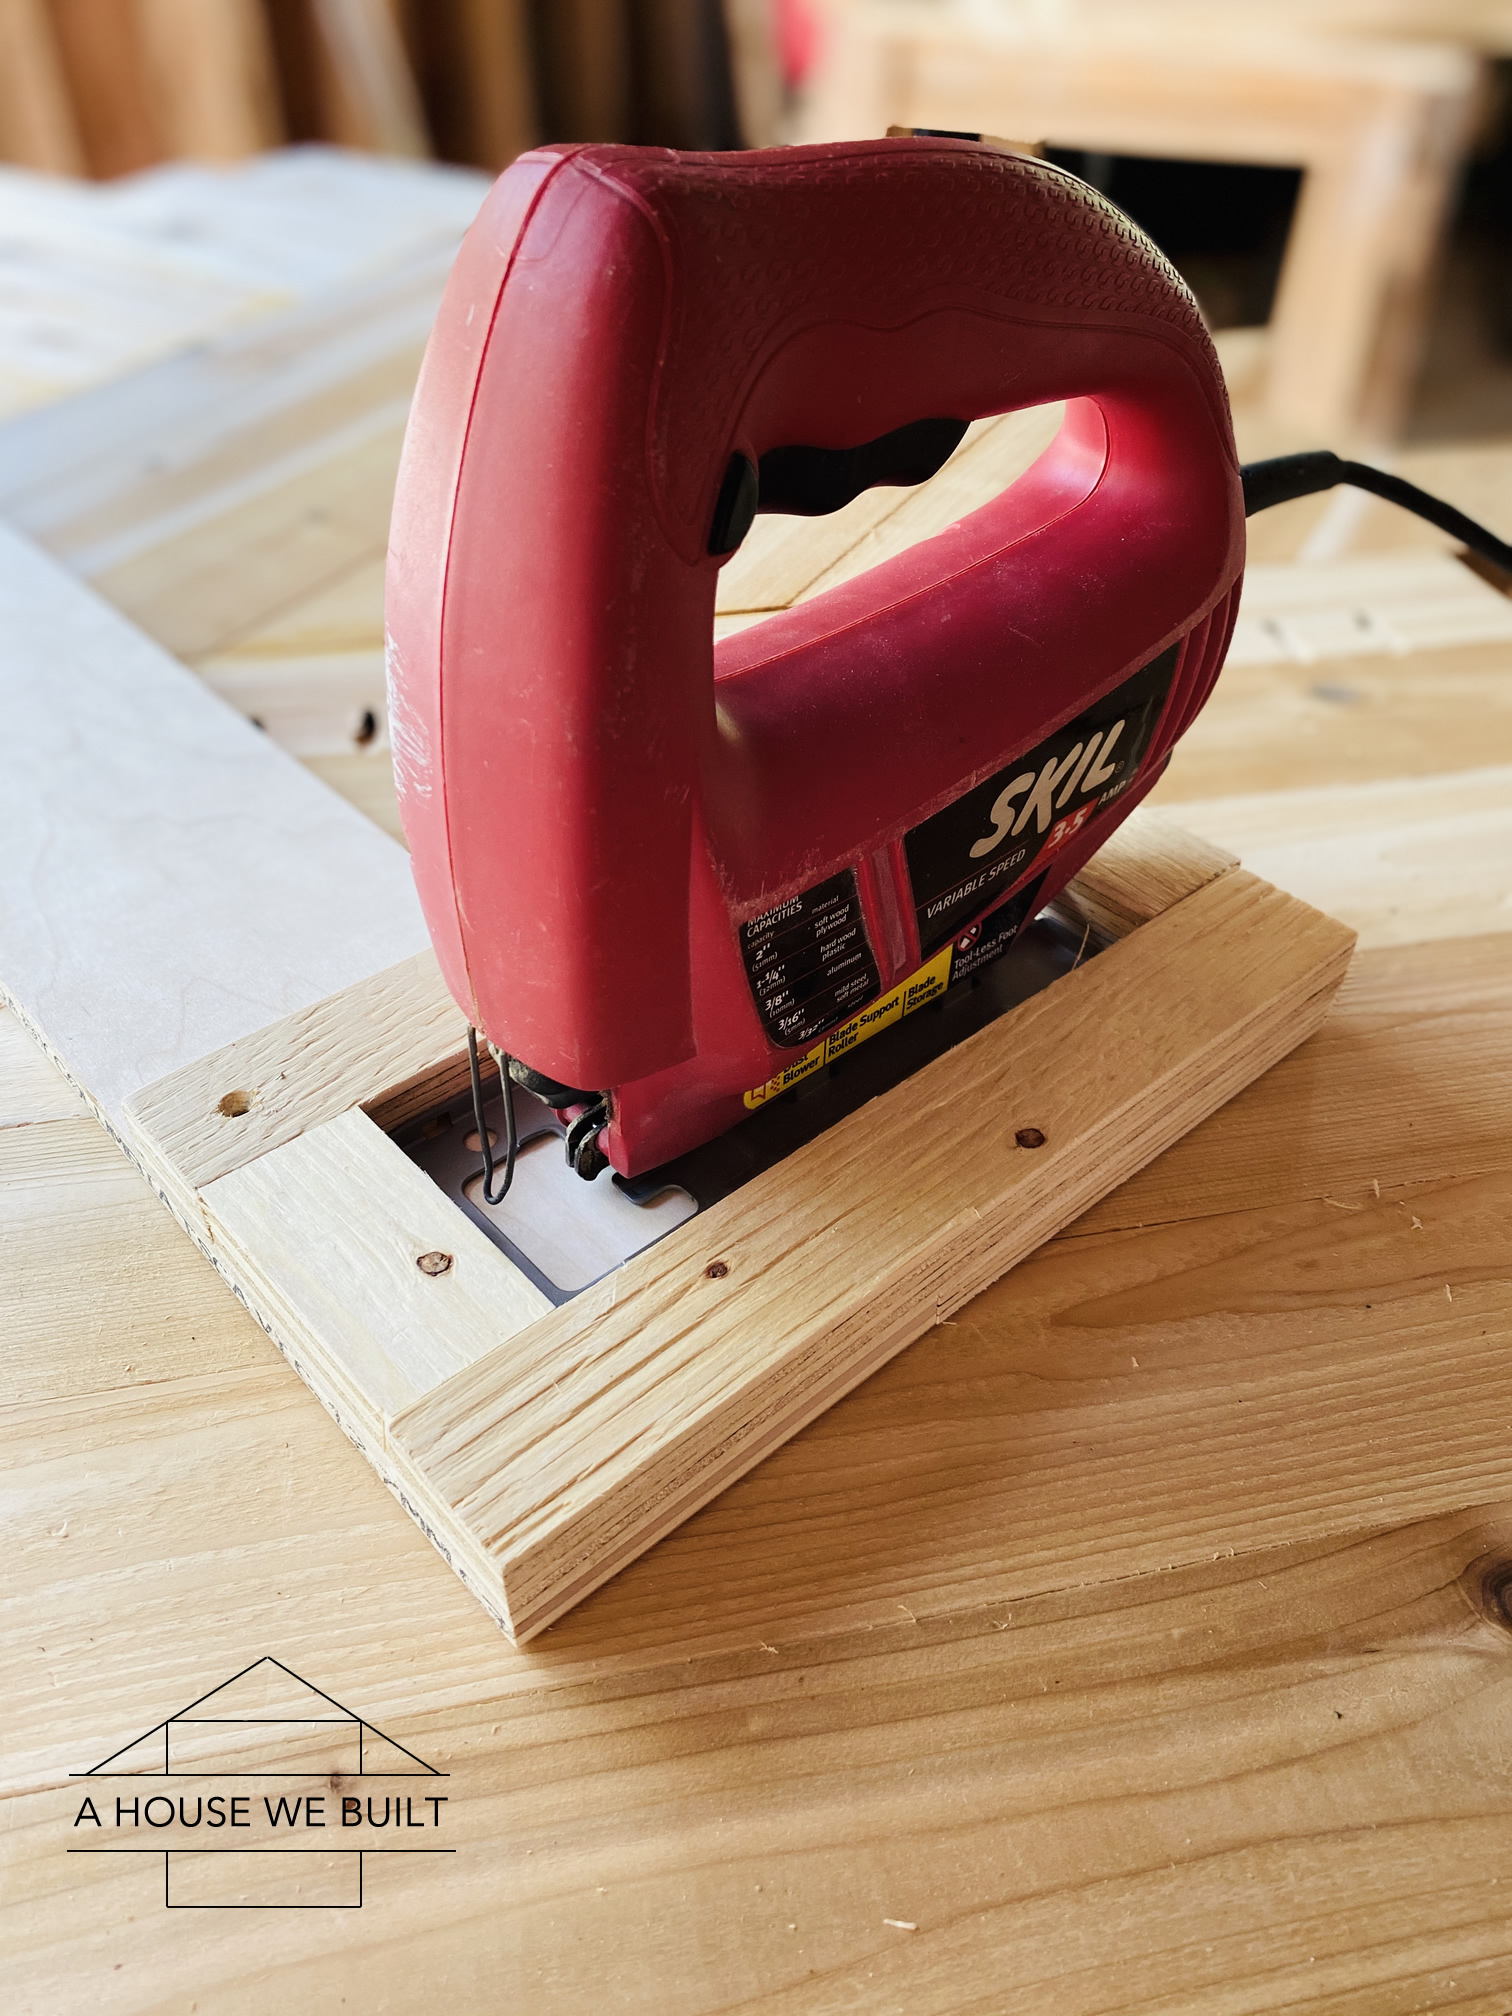
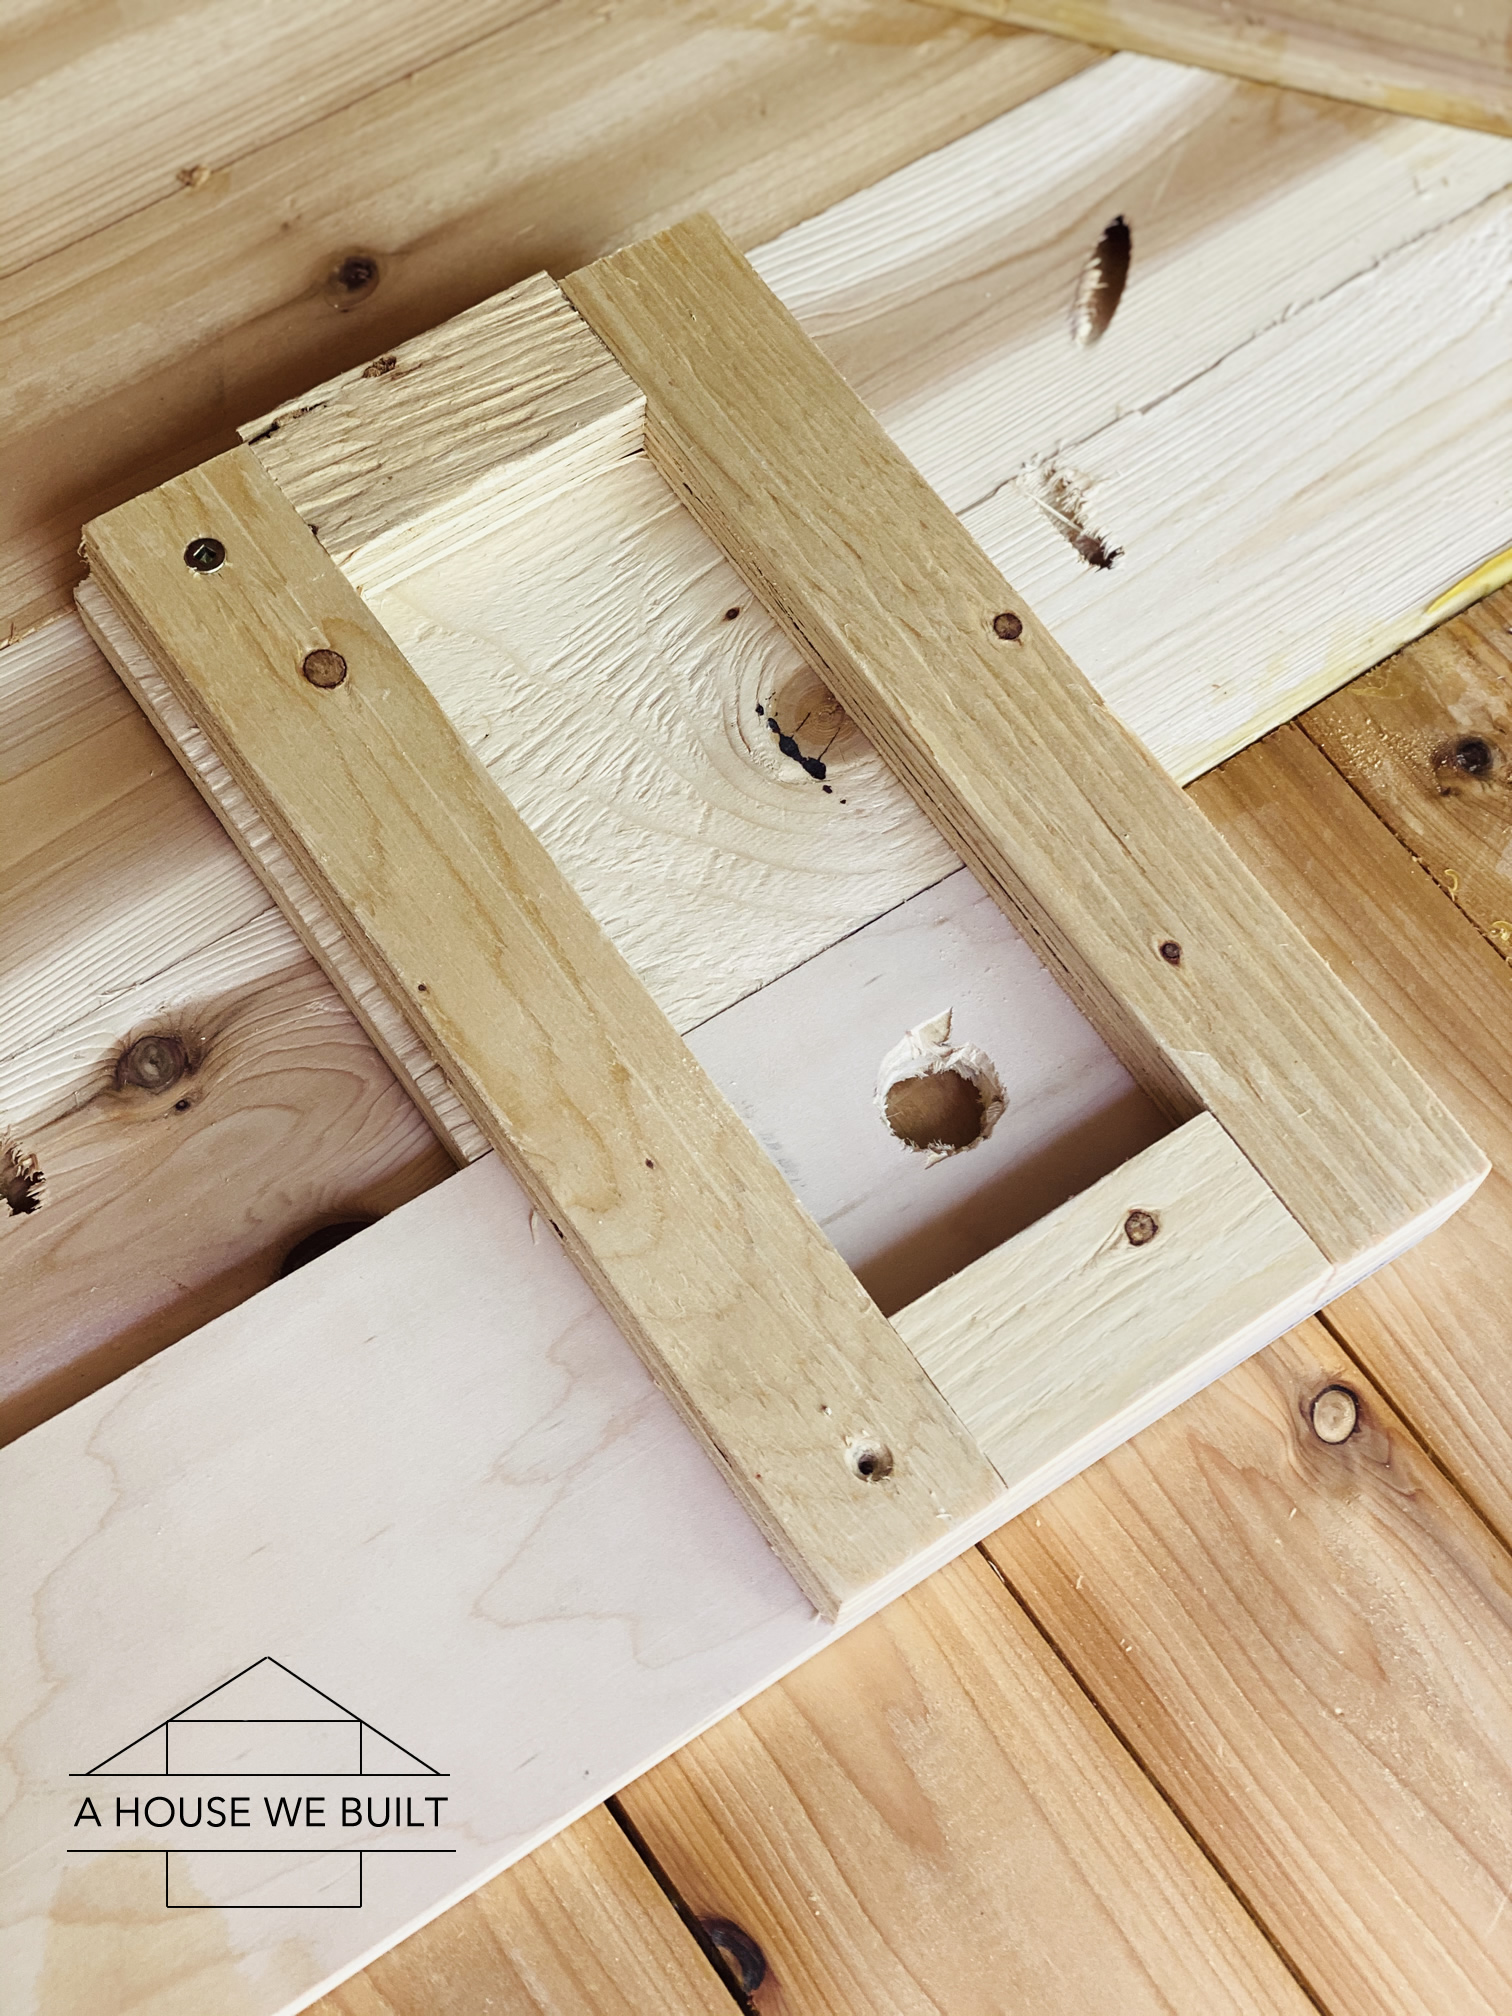
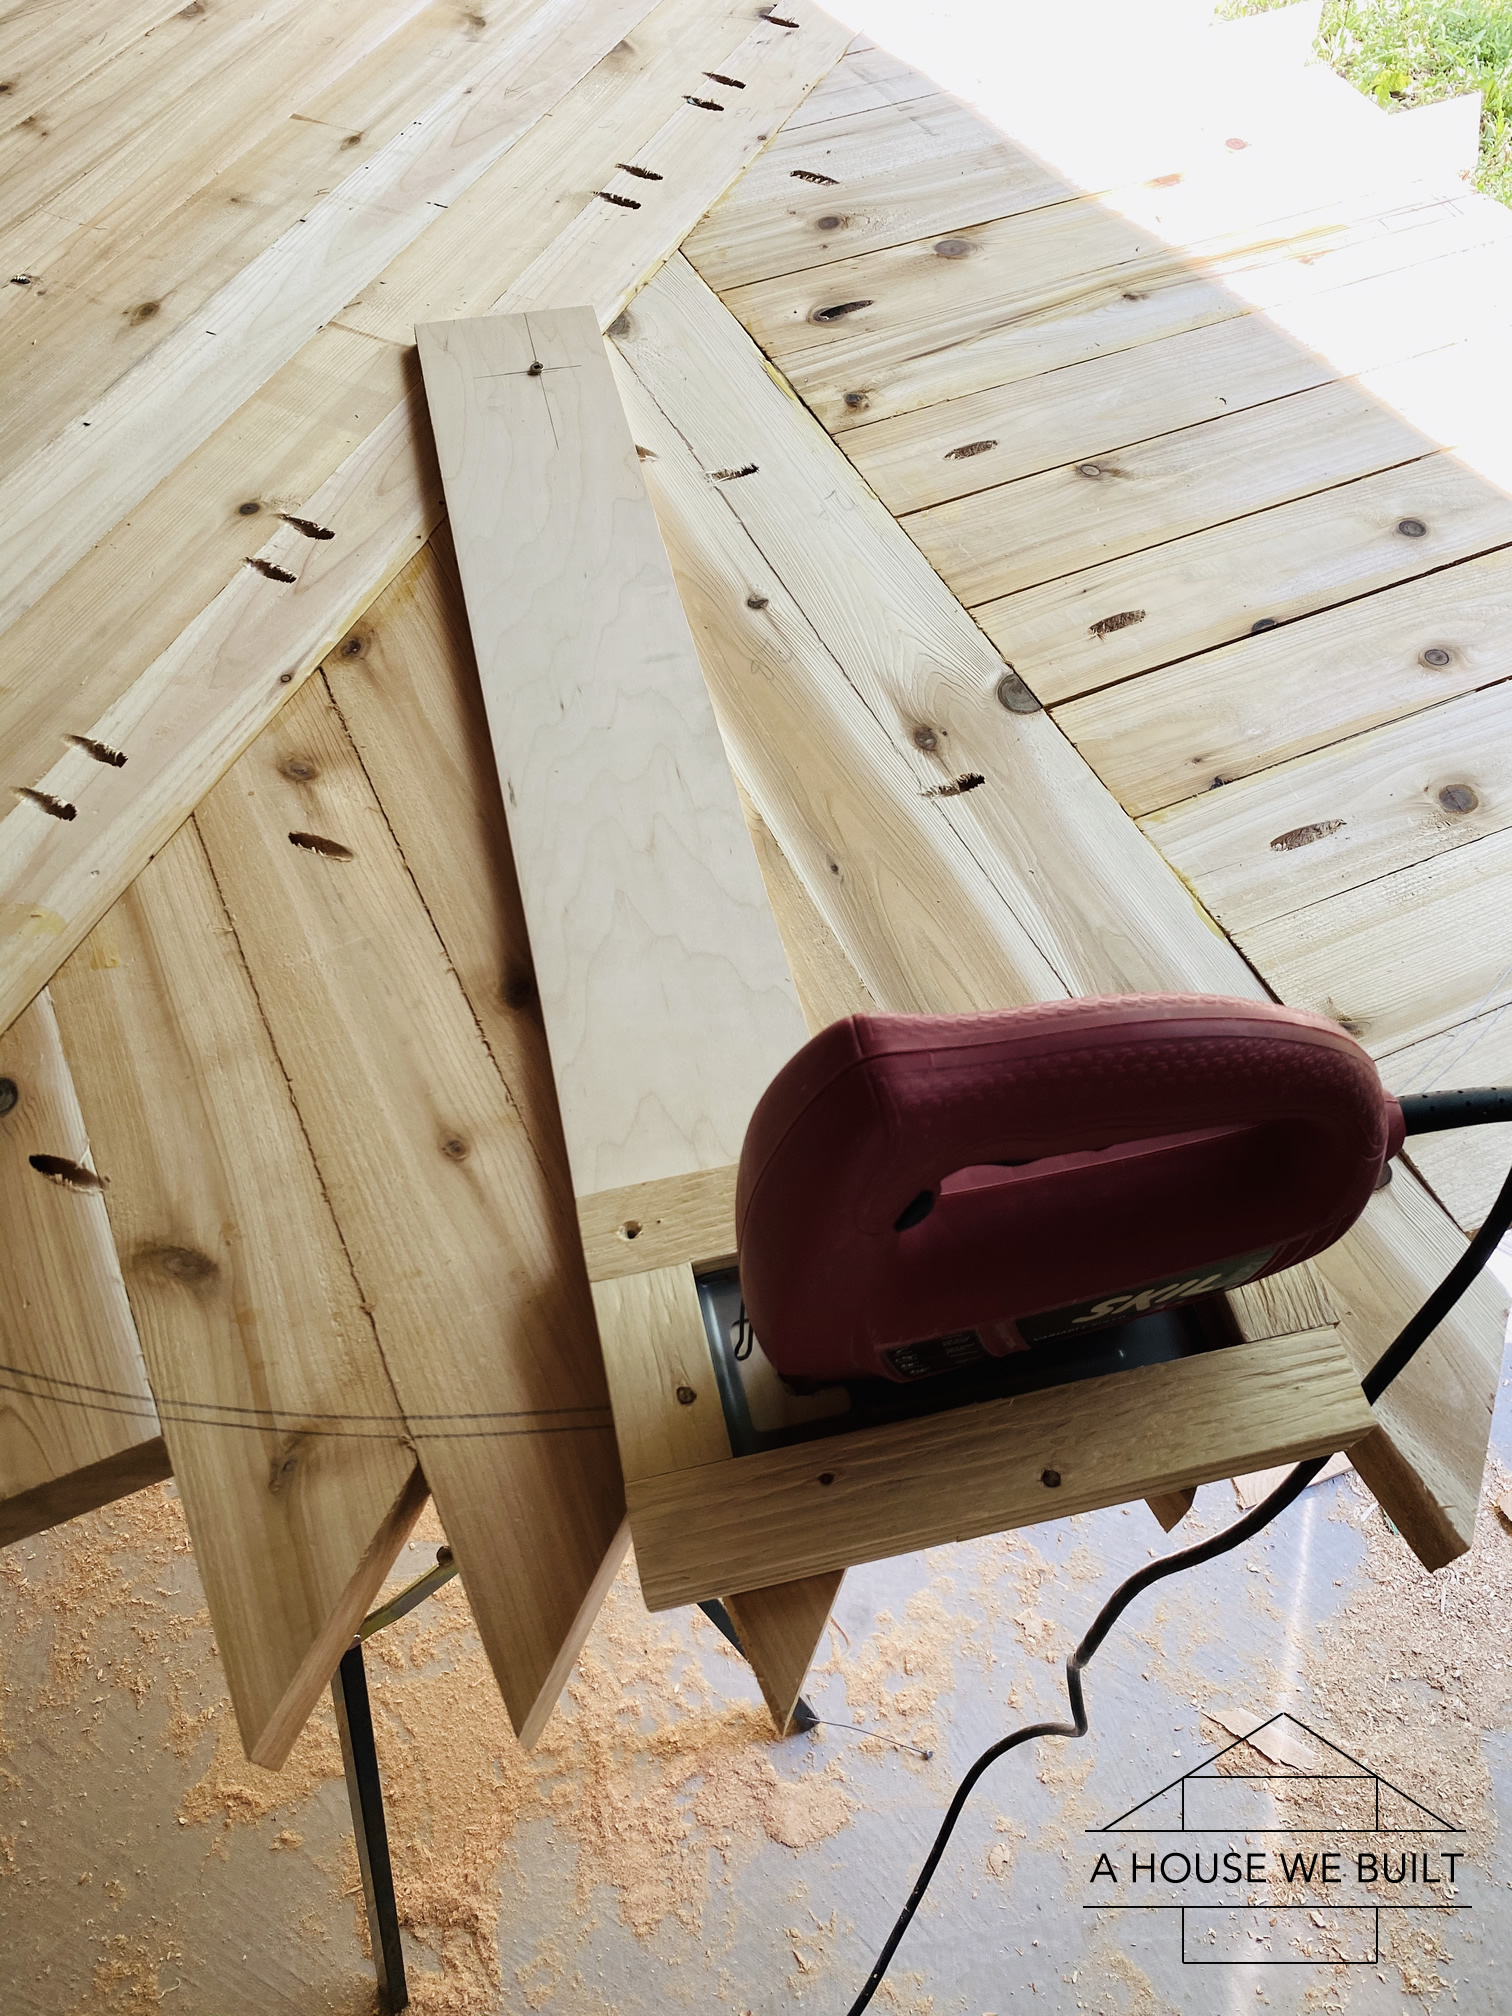
TABLE BASE BUILDING INSTRUCTIONS:
Please refer to our Table Design diagram in the first section above ^^.
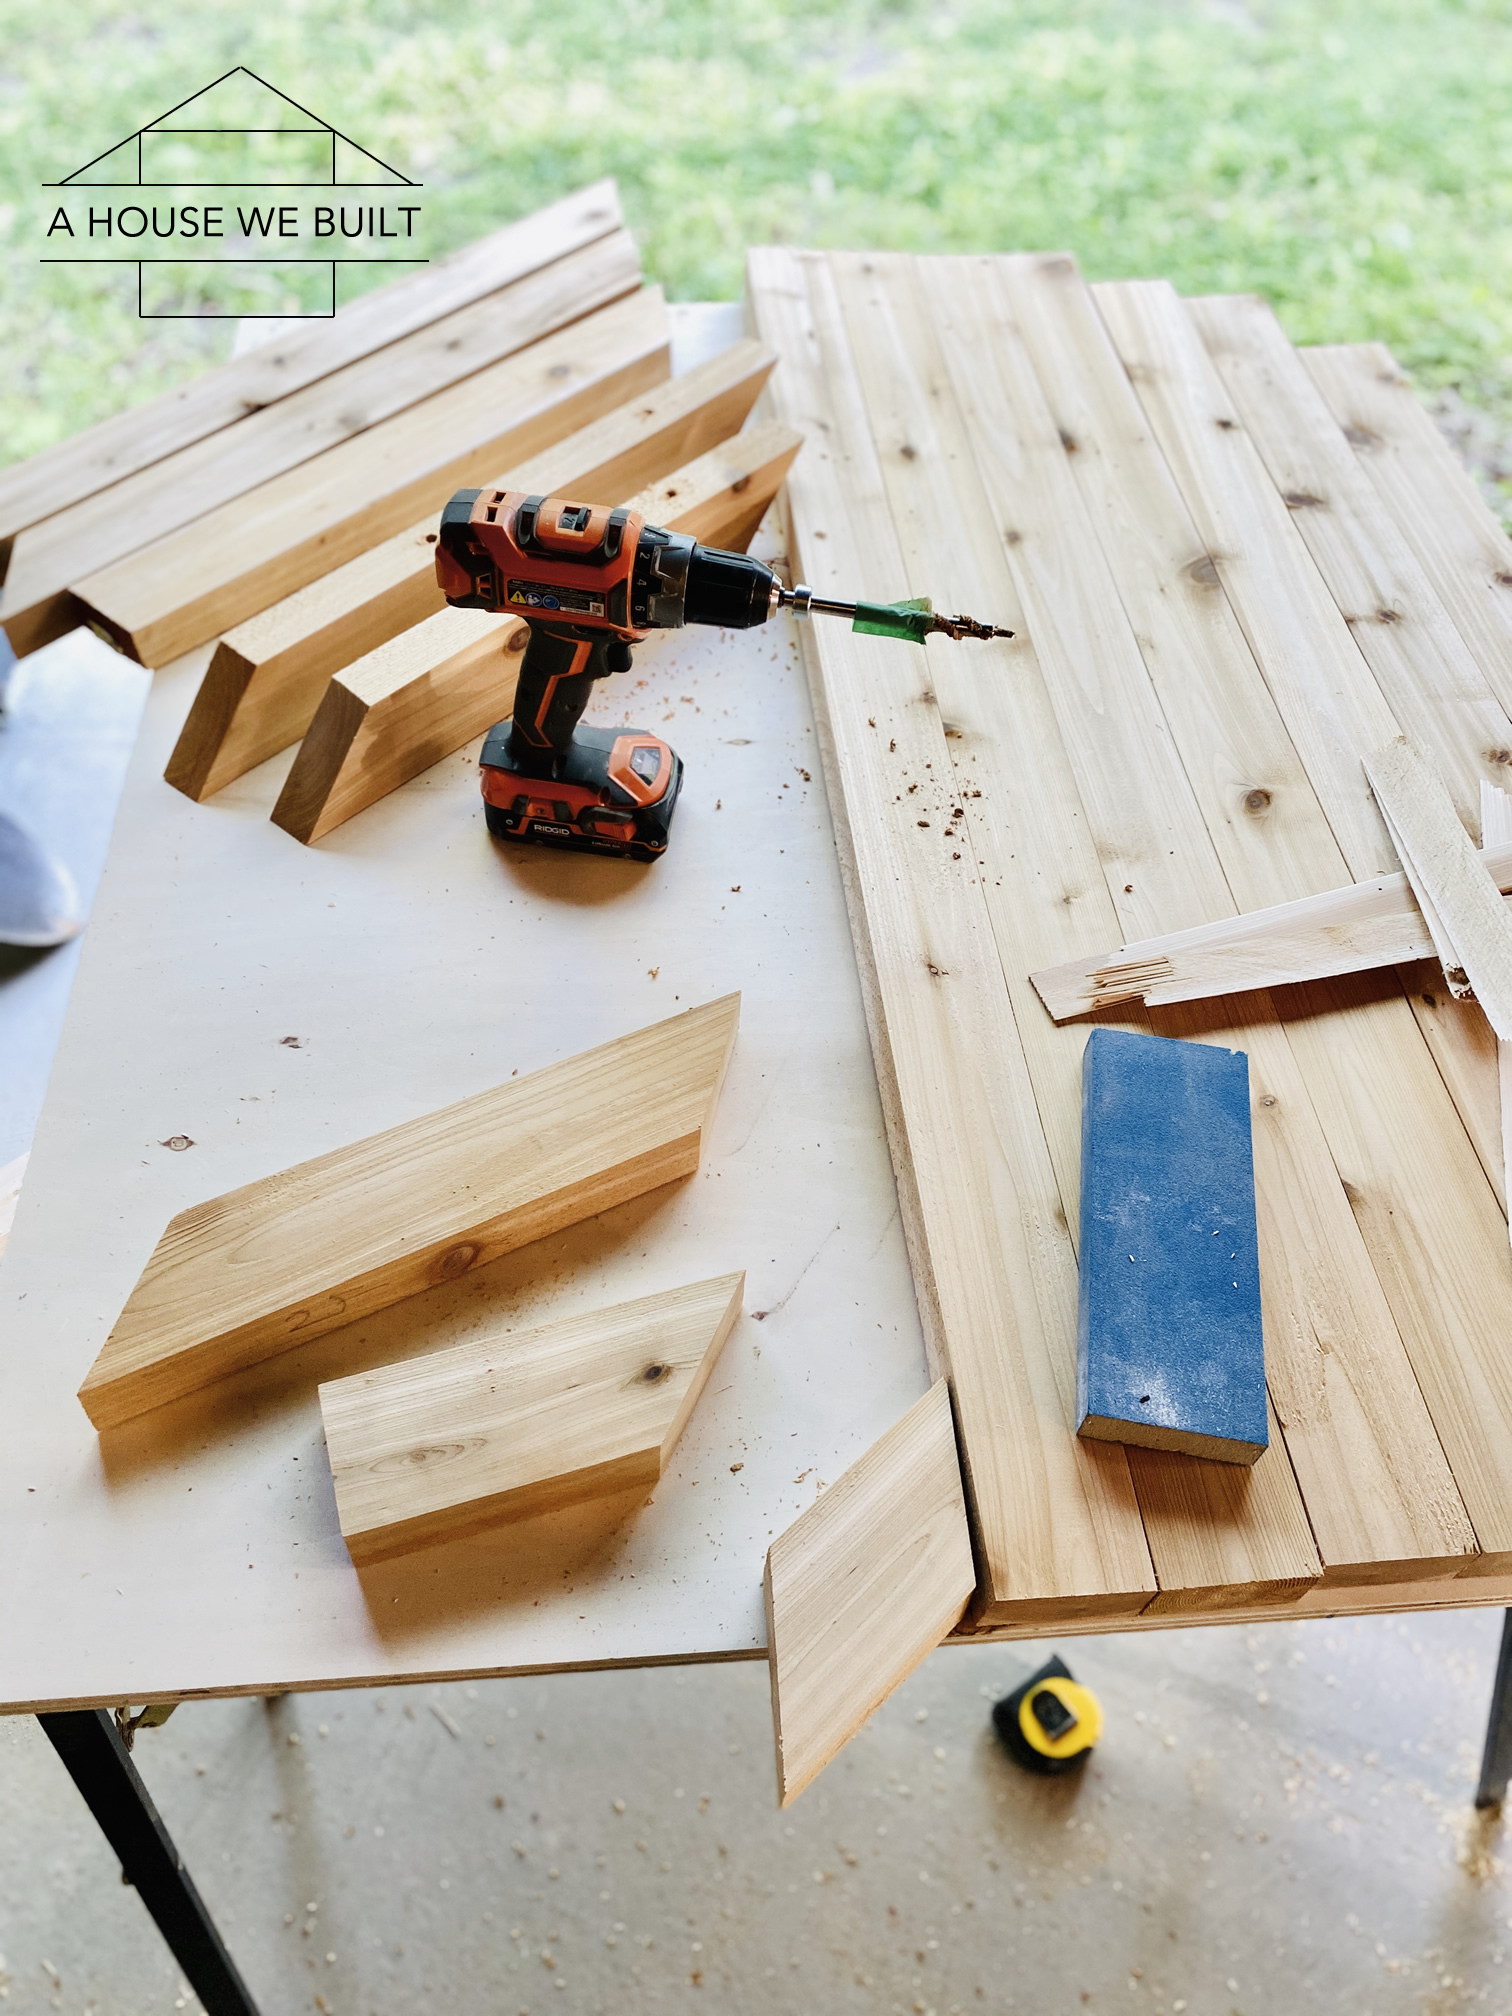
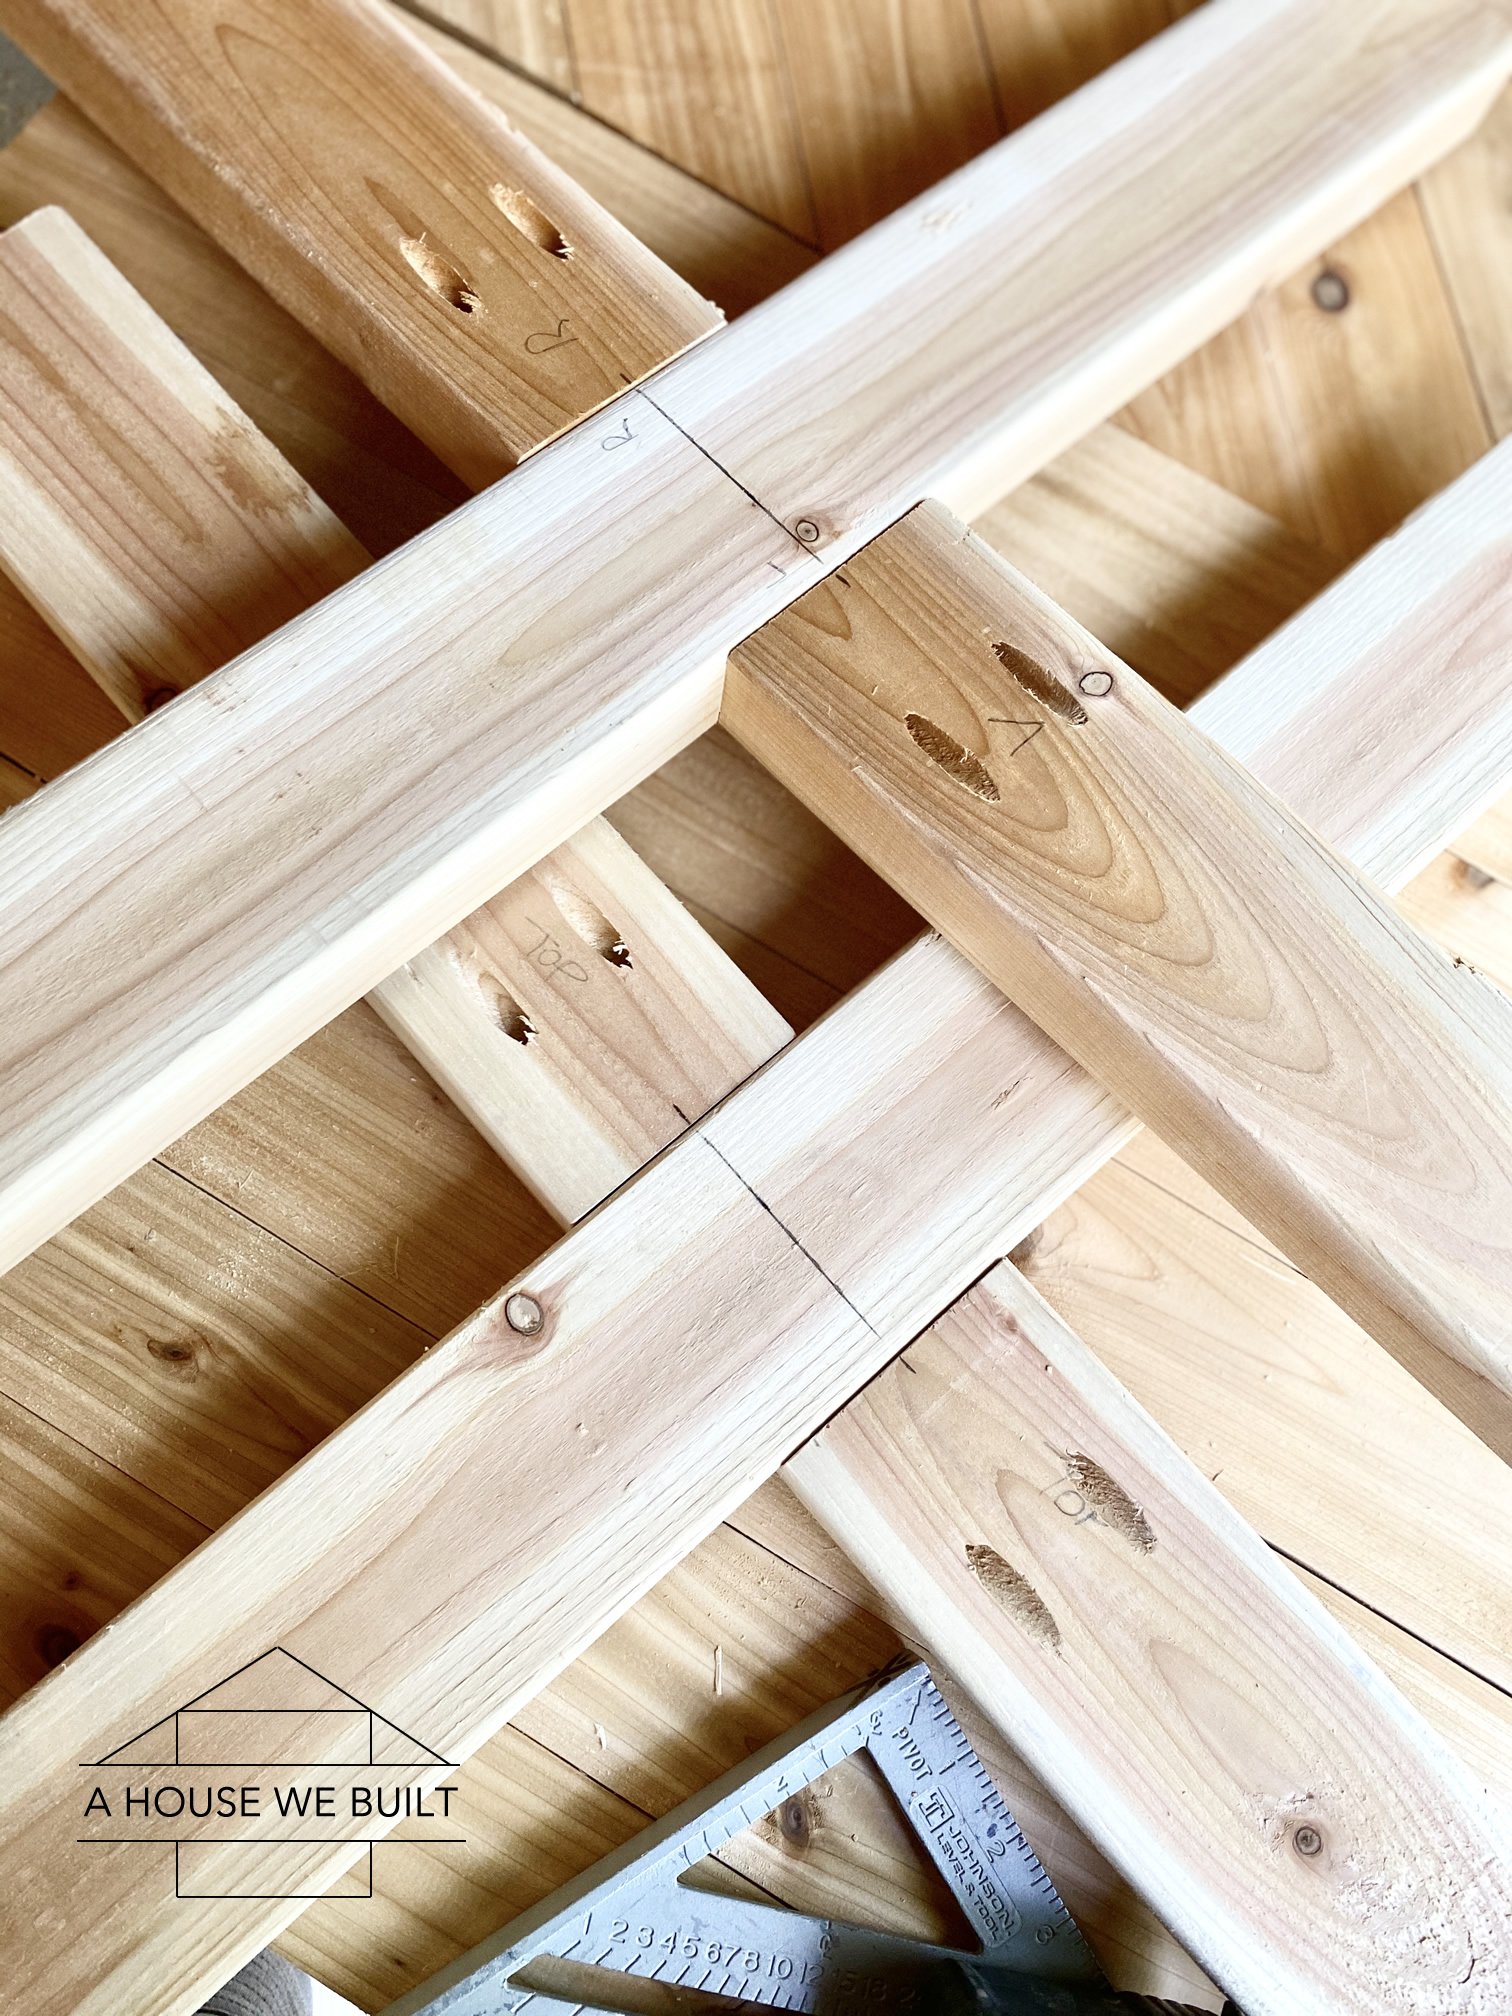
- Cut all your pieces to size.
For the top cross:
1 x 32″ (both ends backcut 45*)
2 x 14 1/4″ (each piece: one end straight, the other backcut 45*)
For the floor cross:
1 x 29″ (both ends backcut 15*)
2 x 12 3/4″ (each piece: one end straight, the other backcut 15*)
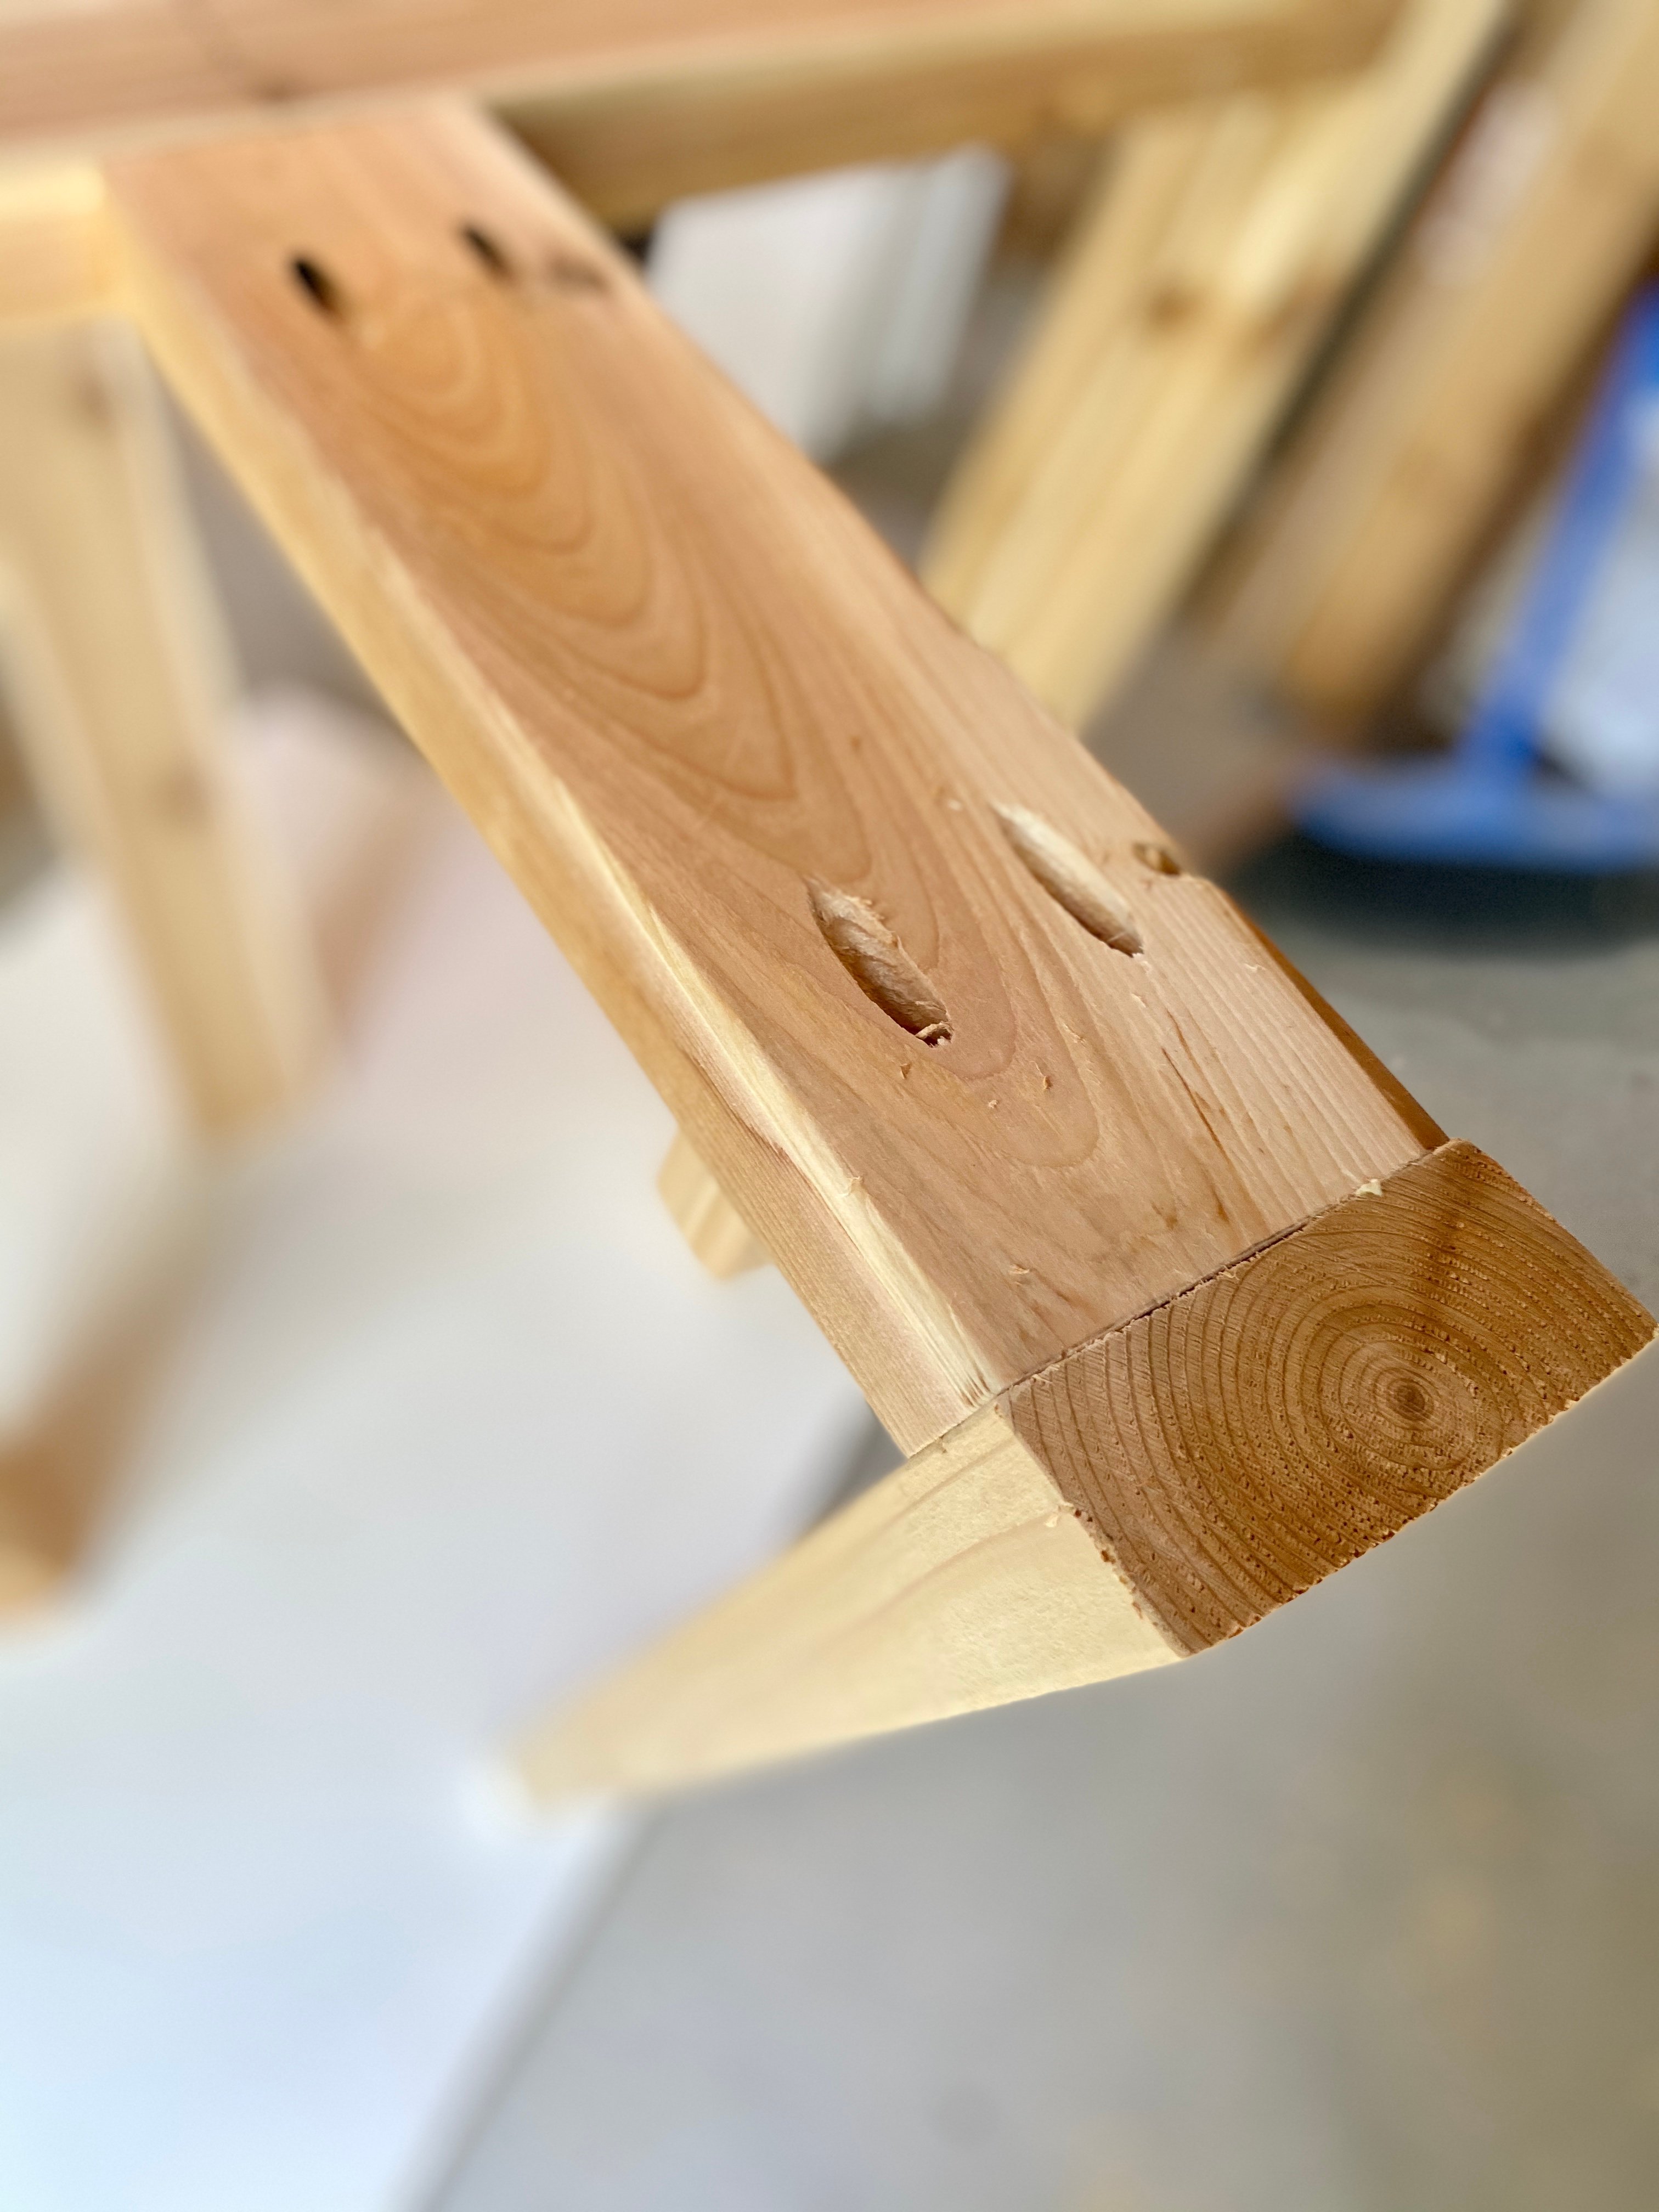
For the legs:
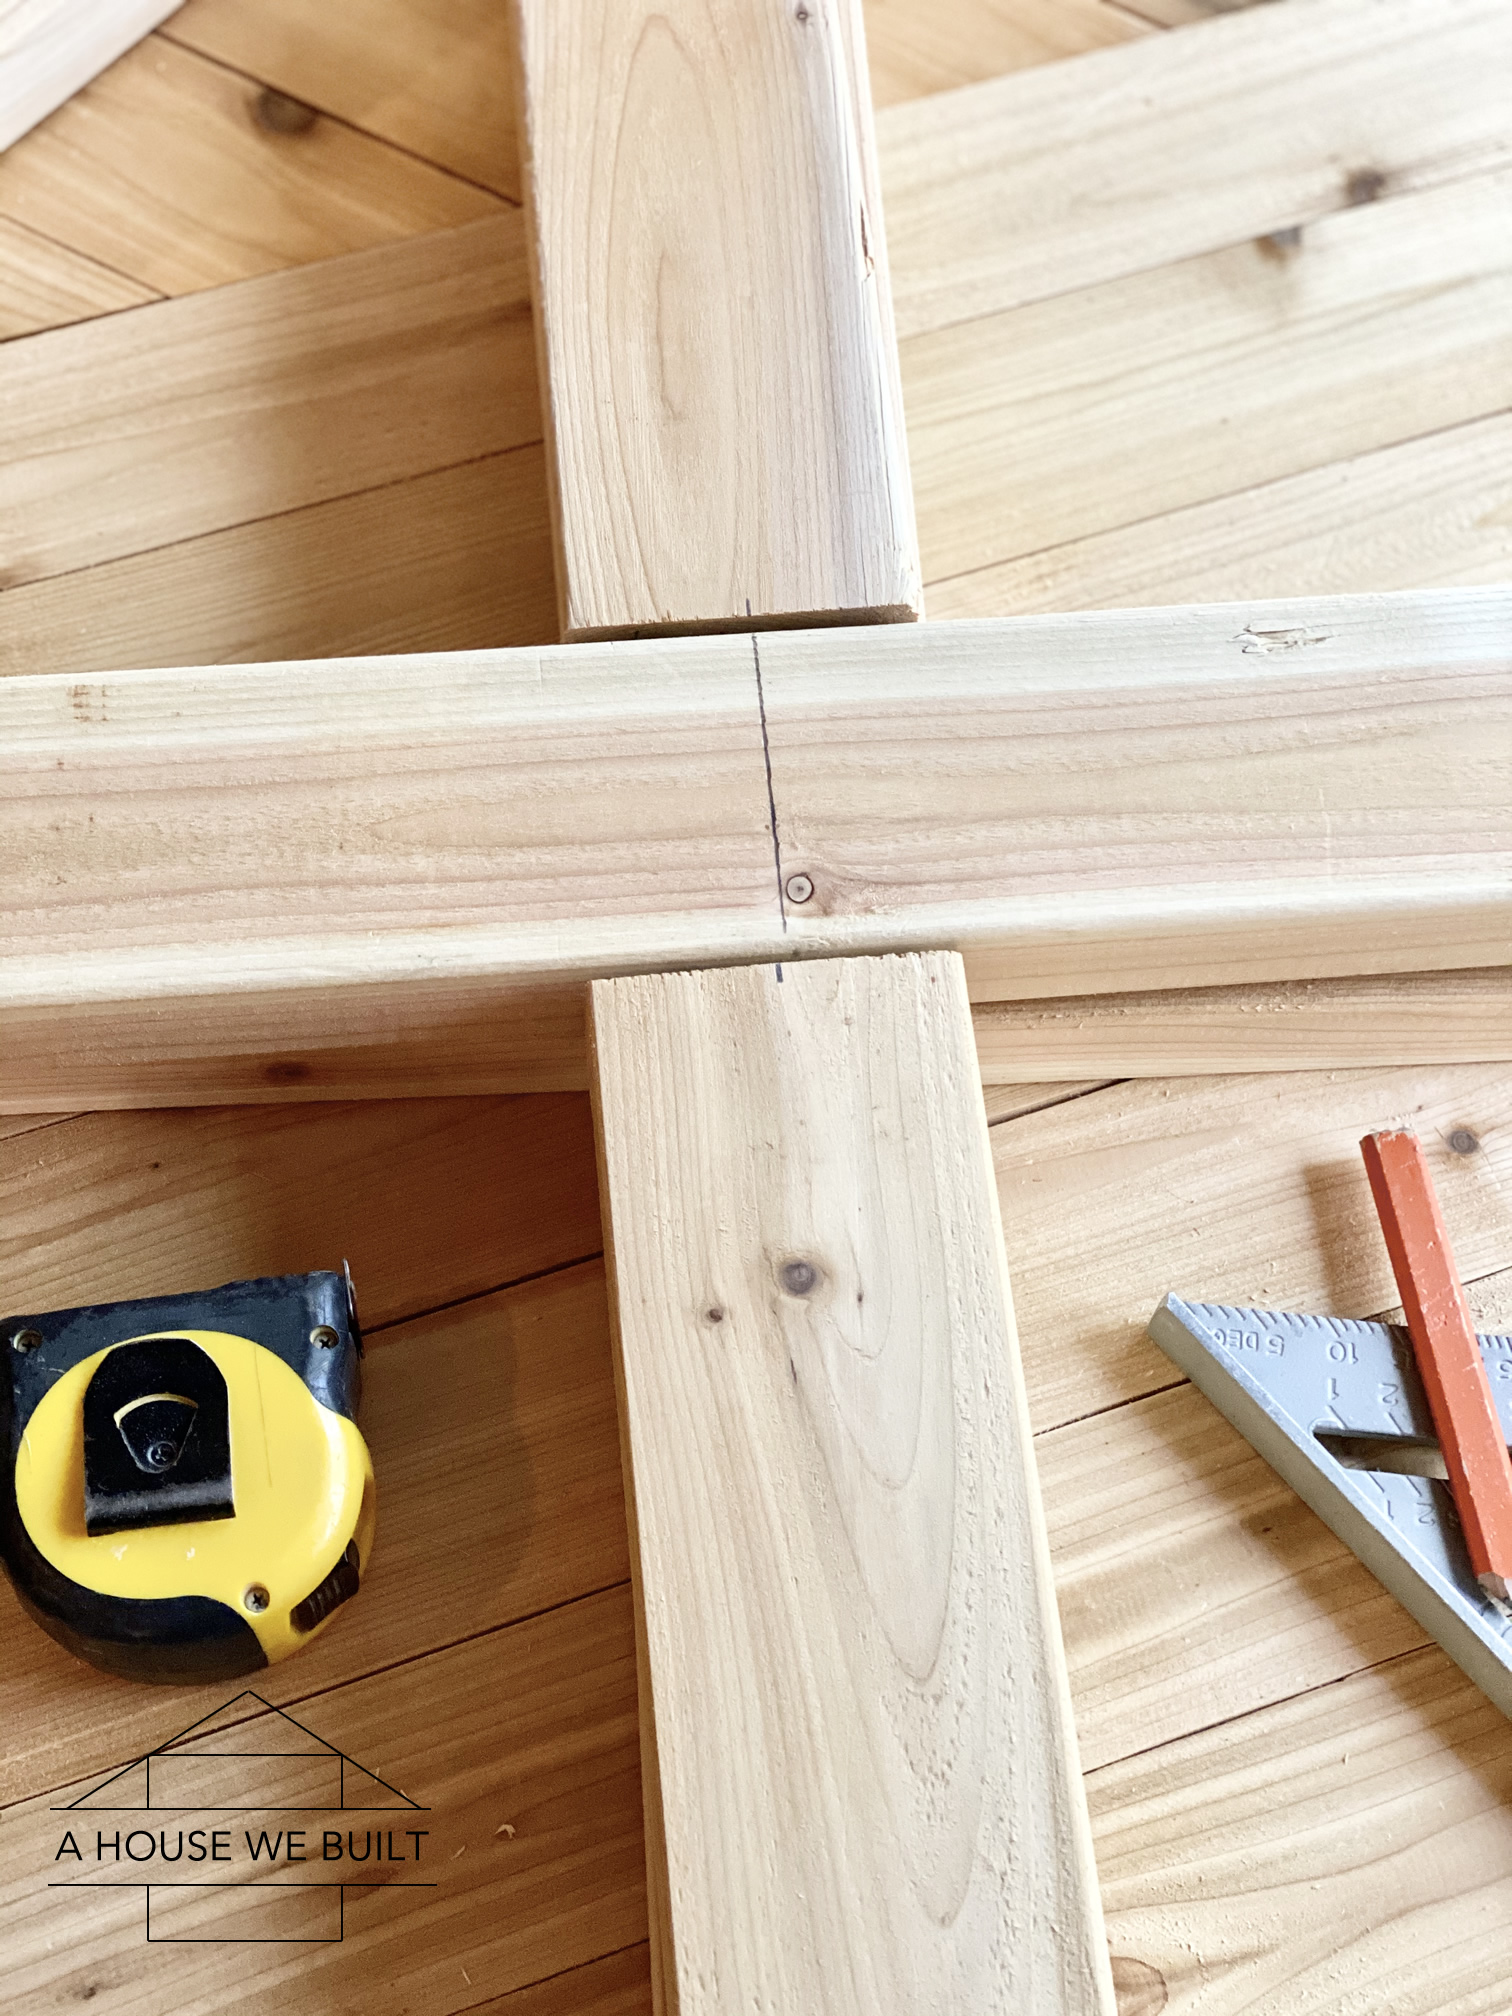
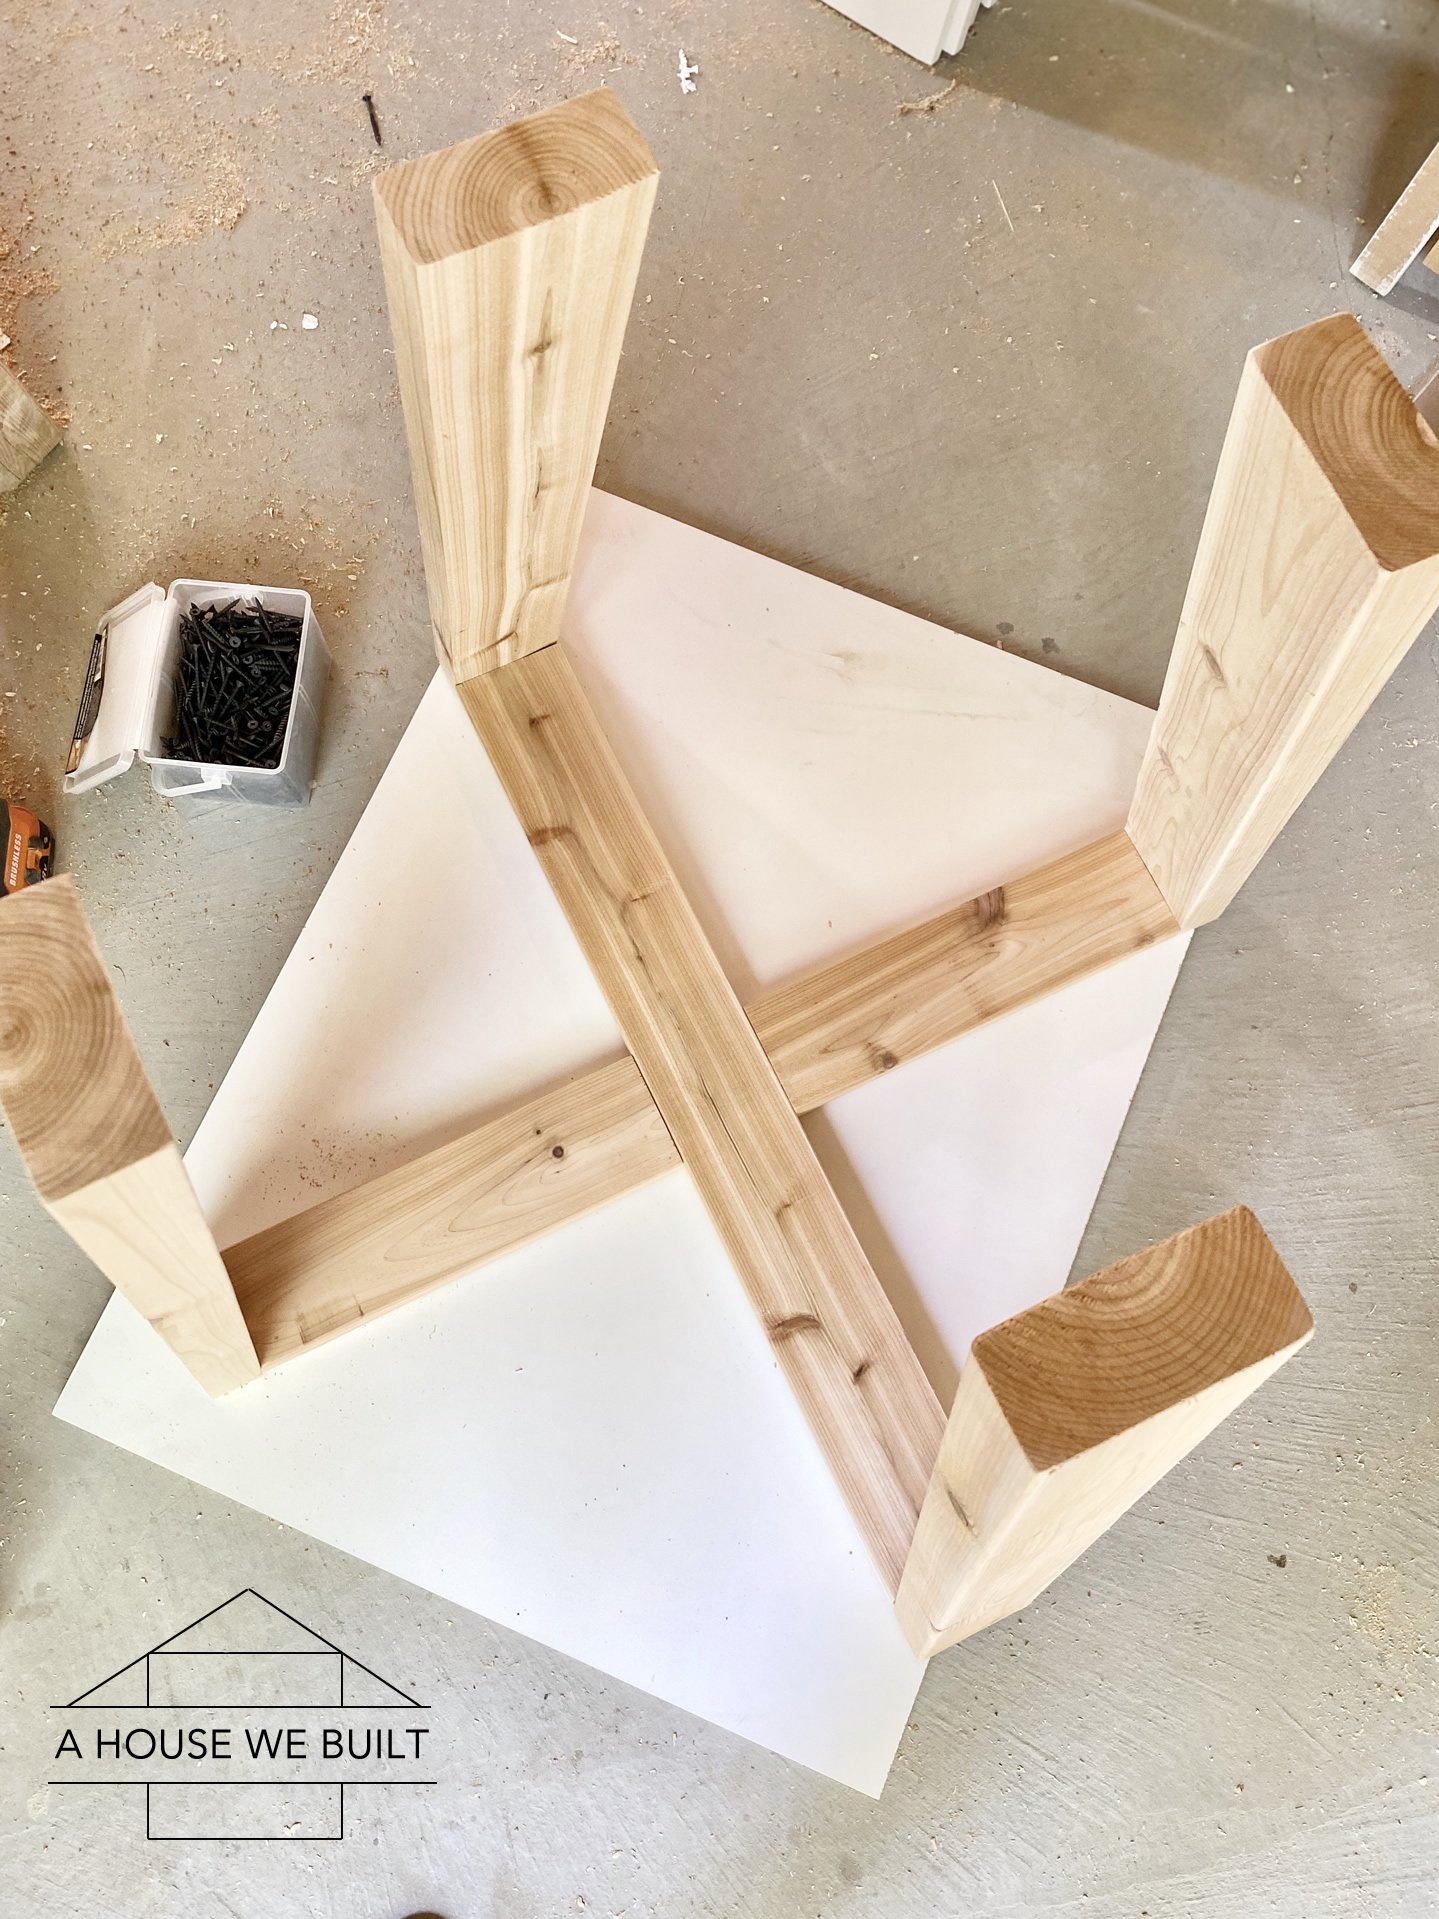
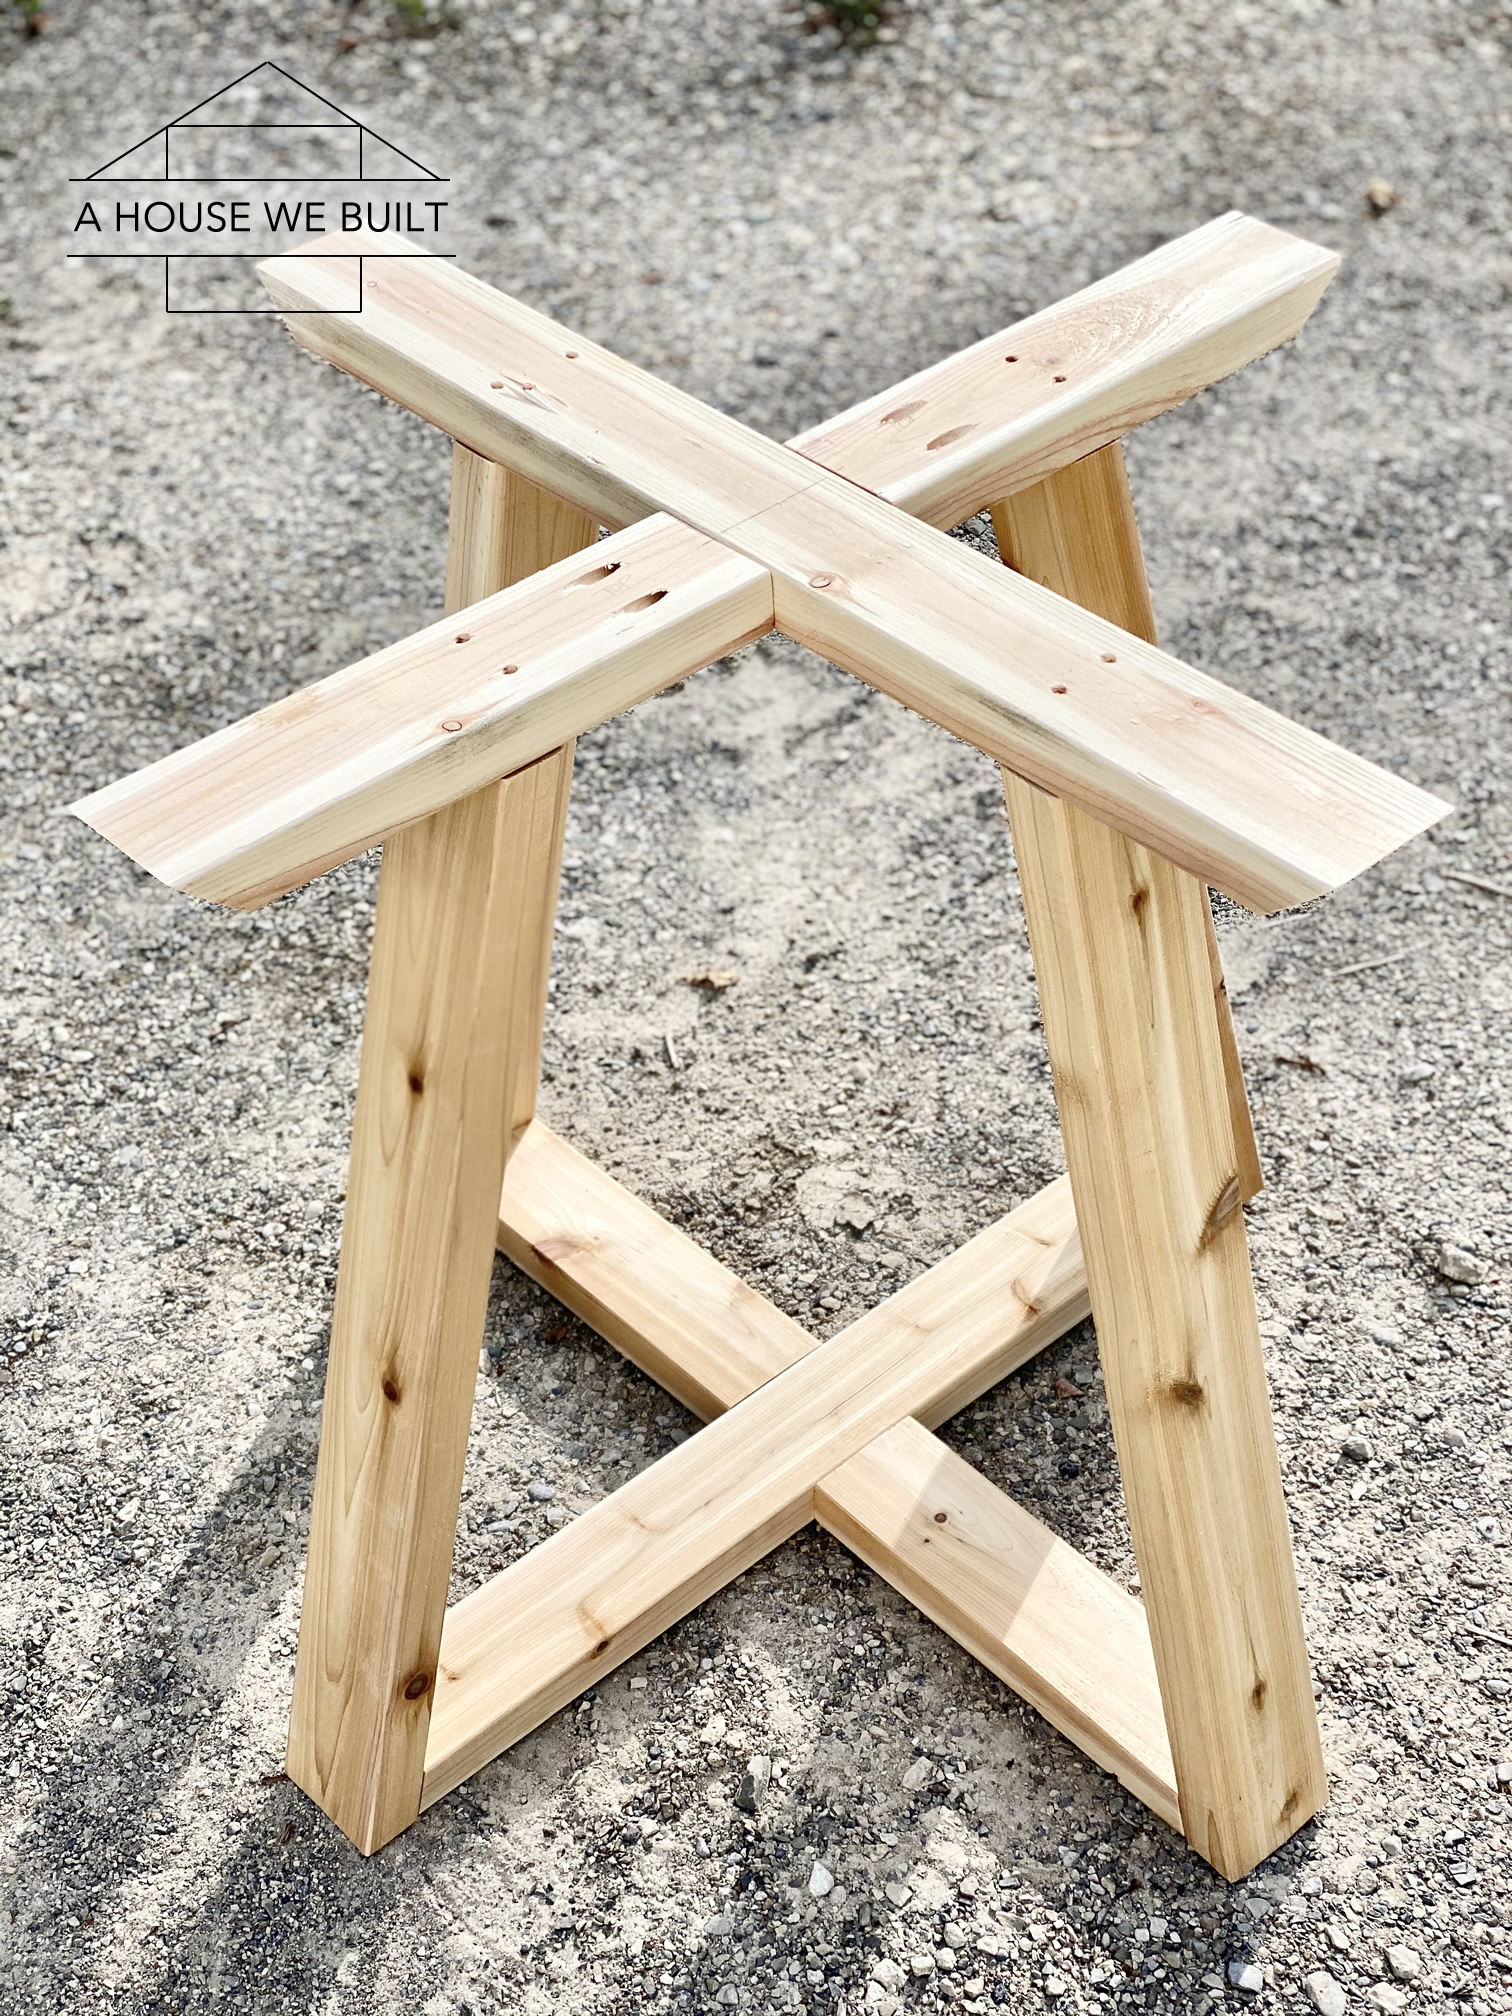
4 x 28.5″ (both ends cut 15* in the same direction) - Assemble the top and bottom/floor cross pieces as shown in the diagram with pocket hole screws.
- Attach the legs to the bottom cross piece as shown in the diagram with pocket hole screws..
- Attach the top cross piece to the base as shown in the diagram with countersunk screws.
FINISHING INSTRUCTIONS:
- Sand your table down to whatever level of smoothness seems good to you. We just did a couple passes of 150 grit everywhere including the edges with an orbital sander.
- If you're planning to stain your table, now's the time. Staining is very simple: Stir your stain well (but don't shake), apply to wood with a rag, wipe off excess with another rag, allow to dry overnight.
- Top coating the table is the final step! I used a matte top coat for our table. I applied one coat to the base, but three coats to the tabletop and edges, and I always sand lightly between coats.
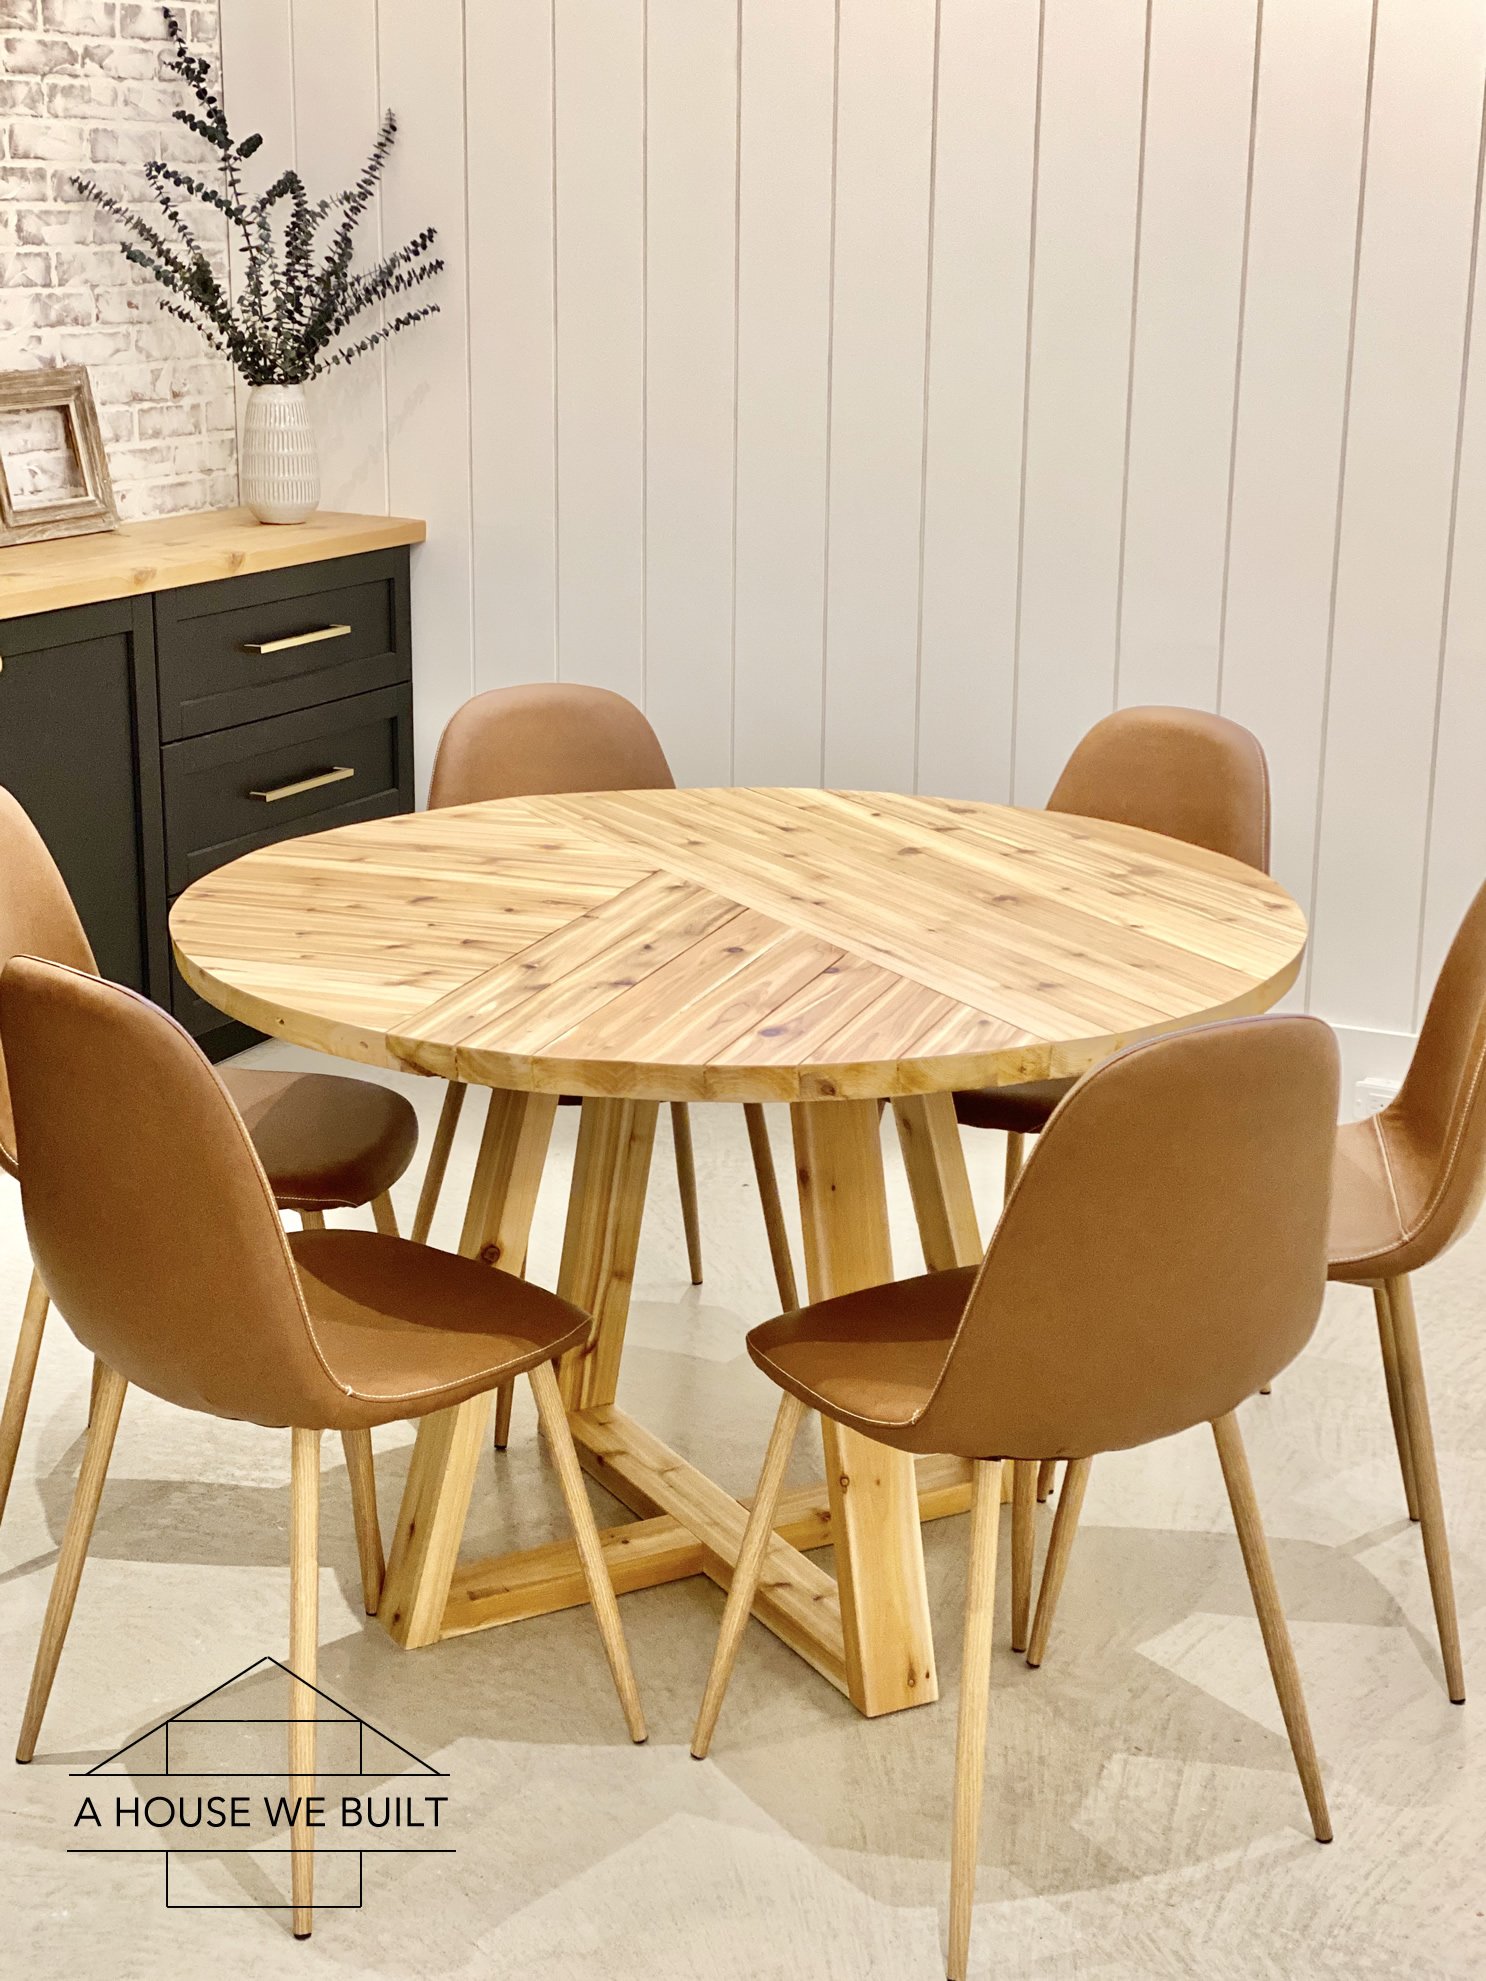
Our 48″ table comfortably fits 6 chairs around it:
- Our chairs: Wayfair (x2 sets) | Amazon | Similar: West Elm | West Elm | World Market | Pottery Barn
And you're done!!
If this sounds like too much work, here are some similar ready-to-order tables for reference:
- Similar base: McGee & Co | Pottery Barn | Wayfair | West Elm | Lulu & Georgia
- Alternative base: Crate & Barrel | Crate & Barrel | Crate & Barrel | West Elm
Other sources:
- Our lighting (black/gold): Build.com | Wayfair | Gold version: Overstock | Black version: Wayfair | Nickel version: Build.com | Similar: Wayfair | West Elm | McGee & Co | Overstock | Overstock
- Our chairs: Wayfair (x2 sets) | Amazon | Similar: West Elm | West Elm | World Market | Pottery Barn
For more sources from our Game Room, click here.
For more sources from our Basement, click here.
For our tutorial on how to DIY a faux brick wall, click here.
For our tutorial on how to install shiplap, click here.
For more of our DIY tutorials, click here.
To explore the other rooms in our house, click here.
Reader Interactions
Source: https://www.ahousewebuilt.com/round-table/

0 komentar:
Posting Komentar